Table of Contents
Scenery Creation Part 1: Aerial Images
Welcome
Welcome to the GeoConvert tool tutorial. In this tutorial you will learn the steps to add your very own photo-real scenery to Aerofly FS2 so that you can fly over your own special areas of your choice. Please understand that this tutorial may change pending any changes to the tool and its processes. More will also be added to the tutorial (a part 2) as further features are added. We hope that you enjoy your newly realized freedom. Happy Flying!
Disclaimer
The references made by this tutorial and any other reference to the application FS Earth Tiles (FSET) is in no direct affiliation to IPACS. IPACS and its affiliates are not responsible for which application is used to obtain aerial imagery. FSET is an independent application which may contain copyrighted imagery and/or data, therefore it is the users responsibility to adhere to the copyright of such data. IPACS does not condone nor disapprove the use of FSET for personal use. FSET shall not be used for scenery packages of personal gain or profit, and shall only be used for non transferable use for the purpose of creating scenery for Aerofly FS2 Flight Simulator.
This tool is not a simple plug and play application and may need some practice to be successful. Please post any issues that you may be having onto the forum where the community can assist you.
Prerequisites
- Aerofly FS2 simulator - Must be installed
- Aerofly FS2 SDK Tools package - Download it from: here
- FS Earth Tiles (FSET) - Download it from: here
- FSEarthTiles.ini - Download it from: here
- inf2tfwConverter.exe (Optional) - Download it from here
- Gimp; Free Image Manipulation Application (Optional) - Download it from: here
Find an Area
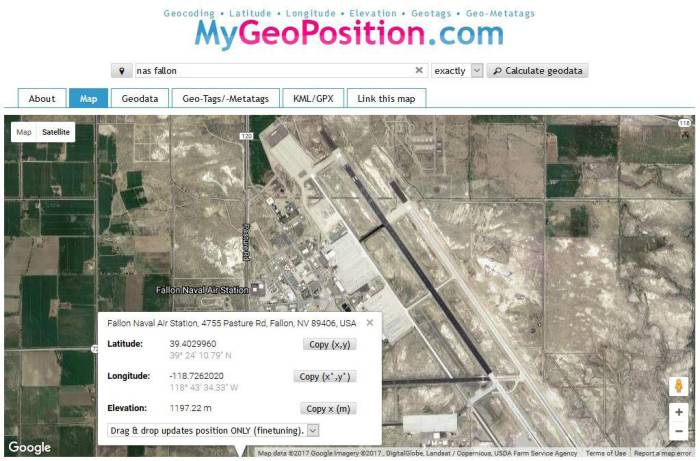
Once you know which scenery area that you wish to add to Aerofly FS2, visit the site: http://en.mygeoposition.com/
- Search for the name or move the map to your position.
- Press right mouse button to display the Latitude and Longitude coordinate of the area. Note- To begin we just need an approximate position to locate our area in FS Earth Tiles (FSET).
In our example we want to add the Naval Air Station Fallon, Nevada, USA.
FS Earth Tiles (FSET)
FSET is a fantastic tool to extract aerial images. It is also possible to configure this tools with many different custom parameters. It is widely used in the flight sim community and tons of manuals, tutorials, YouTube videos are available on the internet. Therefore we will not go deeper into detail, please gather more information from the existing sources. We will just concentrate to our setup for Aerofly FS2.
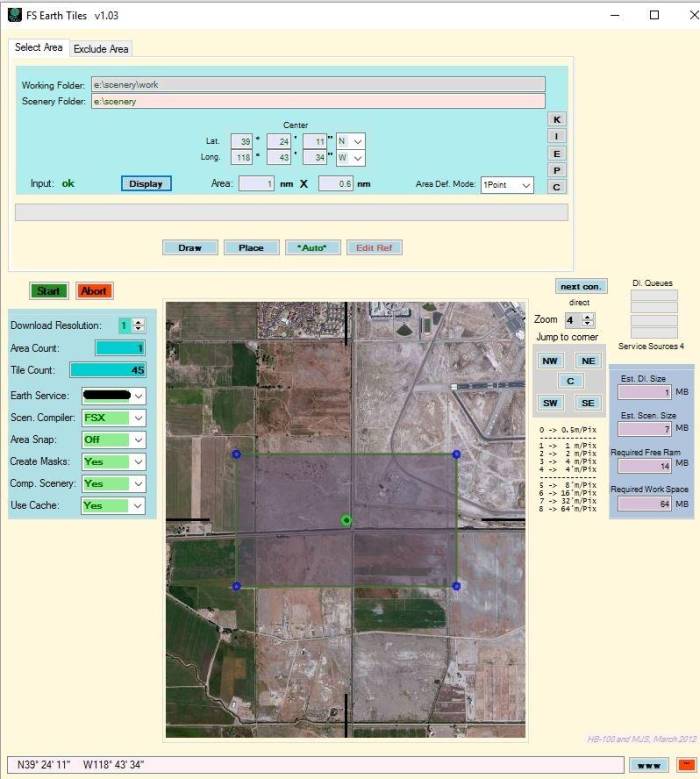
- Enter the coordinates of NAS Fallon into the boxes below Center and press Display.
Note-The aerial image shows up in FSET.
Before we go on, please modify some input fields:
- Enter valid working and a scenery folder, where FSET will save the images. Note-If this is not done FSET will appear to run properly and when finished you will not have any imagery saved.
- Set Download Resolution to 0. Note- “0” will give you a resolution of 0.50m per pixel which is a very high resolution for your scenery. You may adjust this variable to your preference; -1 will provide you with 0.25m however for larger areas (regions) you may want to go with a higher variable (less resolution), maybe 2 or even 4.
- Set the following variables prior to running your scenery:
- Scen.Compiler: FSX
- Area Snap: OFF
- Create Masks: NO
- Comp.Scenery: NO
- Use Cache: NO
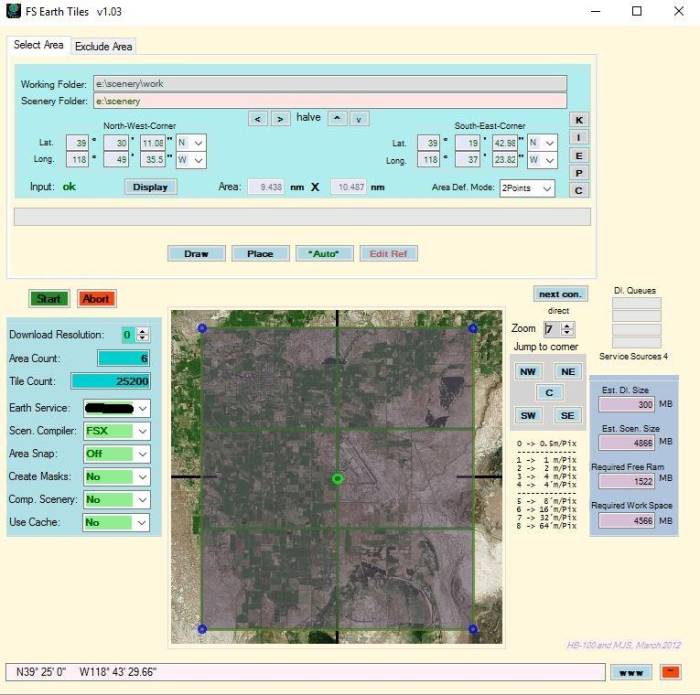
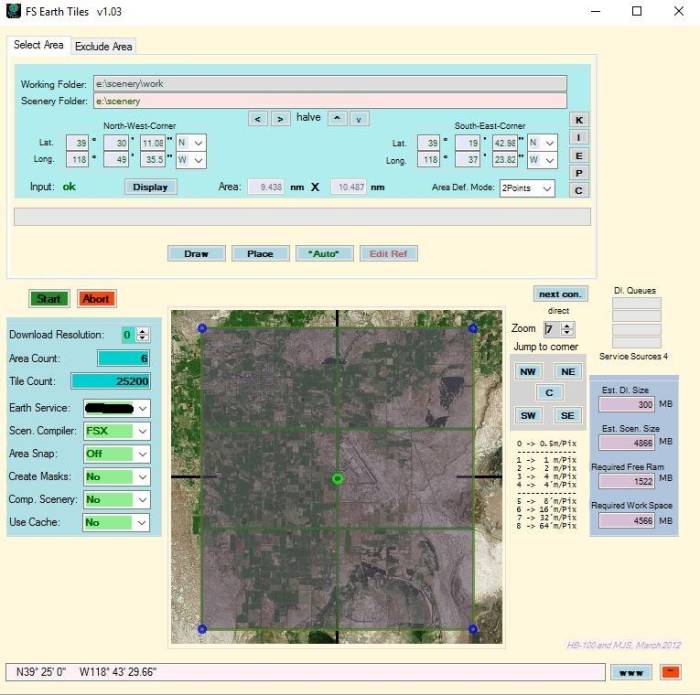
- Zoom out to level 7 and draw a frame similar to the below picture.Note-In this tutorial FSET will create 6 images for us.
- Read the coordinates of the NW corner and SE corner. This defines our full area extension. Note-if it displays just the center value, click with mouse to one of the corner points.
- It’s a good idea to make a snapshot of the window for future uses.
- See the size of your rectangle in nautical miles.
- It’s not a bad idea to keep the runway on a single tile (although not really necessary). This will make it easier if you are going to make an airport.
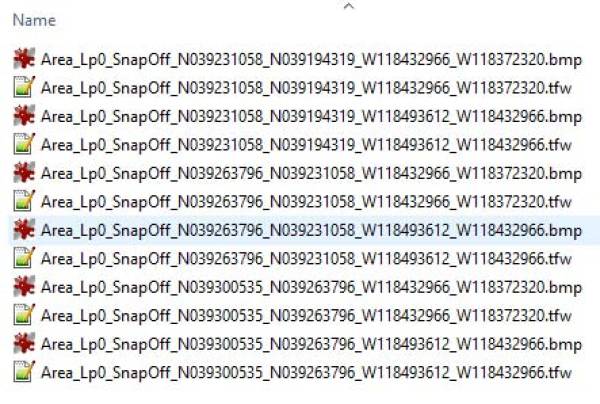
As soon as we press the green Start button, the amazing process begins. FSET creates 6 different bmp files together with some information files, which we can read with our text editor later.
Depending on the size and resolution of the scenery that you are building, once you press the green start button, the process may take some time to finish. Once the project completes you will see done
Create the TFW file
Once the image and inf files are obtained from FSET the tfw files must be created from the inf files. This can be done either by using the inf2tfw application automatically or done manually.
If you wish to use the automatic TFW file option, go on with these steps:
- Start the inf2tfwConverter.exe application. (See prerequisites for download location)
- Select the directory of your FSET images/inf files. Note- placing these files (from FSET) directly into the 'input_aerial_images' saves time. Do not rename any of these files.
The INF2TFW tool will read all .INF files in the specified directory and creates the necessary .TFW file for each image. It does the correct file naming too. Our new result looks now like this:
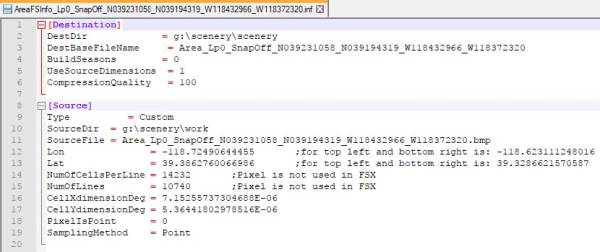
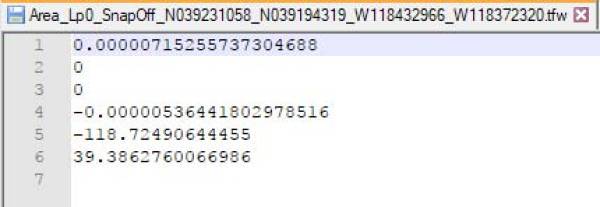
Note- See below some detail of the .INF file generated by FSET and the converted .TFW file result:
.INF
.TFW
Conversion Translation
| INF | TFW | Meaning |
|---|---|---|
| Line 16 | Line 1 | Pixel resolution in X direction |
| Line 17 | Line 4 | Pixel resolution in Y direction, in TFW always negative |
| Line 12 | Line 5 | Longitude of top left corner |
| Line 13 | Line 6 | Latitude of top left corner |
If you choose to manually create each tfw file and not use the automatic option (for advanced users only), you will need to reference the above charts to be successful.
Creating/Editing Your .TMC File
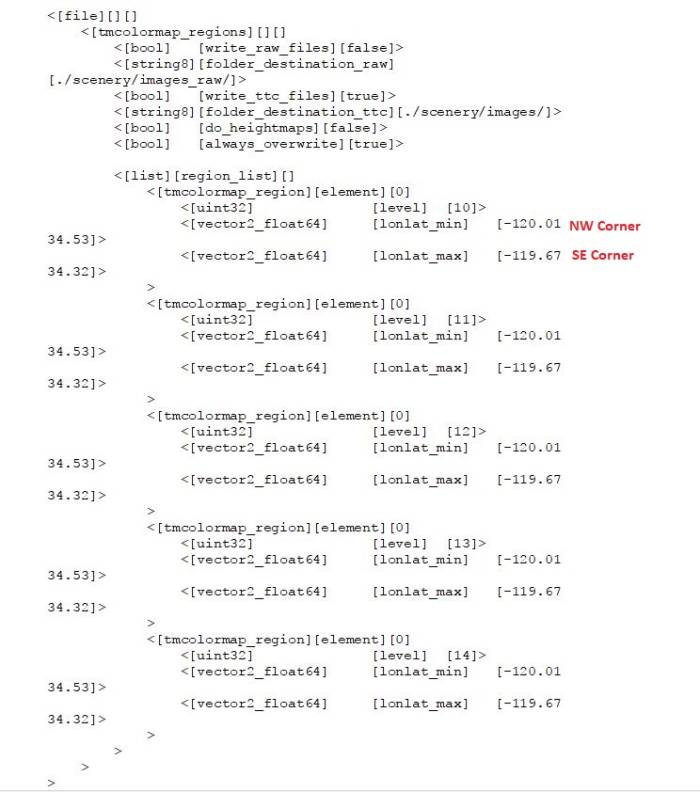
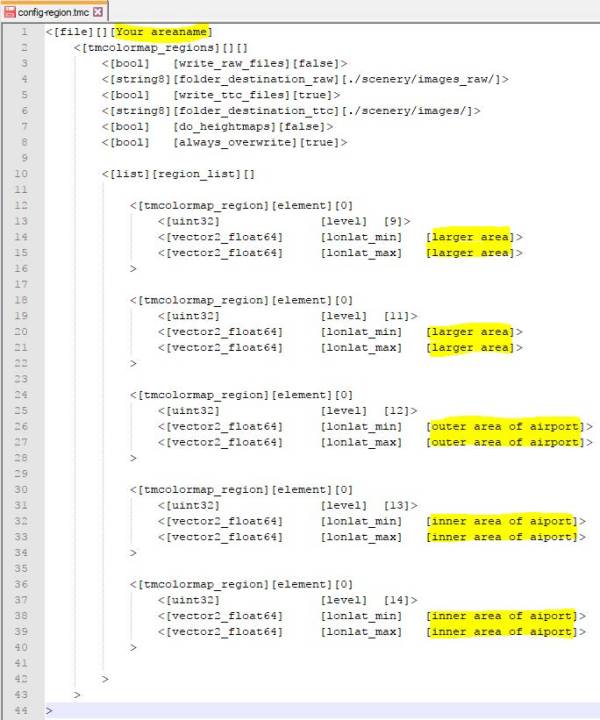
The SDK package contains a sample .TMC file for you to reference. We have to define the full area of our image set by entering the topmost left corner NW, and the bottommost right corner SE.
- Once we have identified the needed coordinates we need to convert the coordinates from degrees, minutes, seconds into decimal values. Visit this site and enter the coordinates for conversion: https://rechneronline.de/geo-coordinates/
Note- the process shown above is the fastest and easiest way of converting the coordinates however, Another possibility is to find the values in the corresponding .INF file.
- Enter the NW corner in the first box (Degrees, Minutes, Seconds) as shown above. You will see the decimal value that you need in the next box (Decimal Degrees); these are what you need.
Note-You will do the same process for the SE corner as well.
In the below image, the parameter lonlat_min specifies the NW corner, the parameter lonlat_max specifies the SE corner.
- The same coordinates should be repeated for each level as seen in the above .TMC file. You can manually add levels up to level 14, normally beginning at level 9. This is your resolution at different flight levels seen in the sim. Note- The coordinates entered into the TMC file should be two digits after the decimal to avoid conversion issues.
Section Alpha Blending (Optional)
At times, mostly around oceans, you will have aerial images that are missing tiles, alpha blending will make the selected areas transparent showing the default FS2 scenery underneath. The result is a smoothly transitioned scenery.
- If the images that you are using are complete and to your liking and you want to include the full content of your images, you can skip this section.
- If you wish to delete parts of your images, this is the section for you.
Aerofly FS2 Geoconvert supports alpha blending.
In general terms, alpha blending is the process of combining a translucent foreground color with a background color, thereby producing a new blended color. The degree of the foreground color's translucency may range from completely transparent to completely opaque. (wikipedia). The information is stored in the alpha channel.
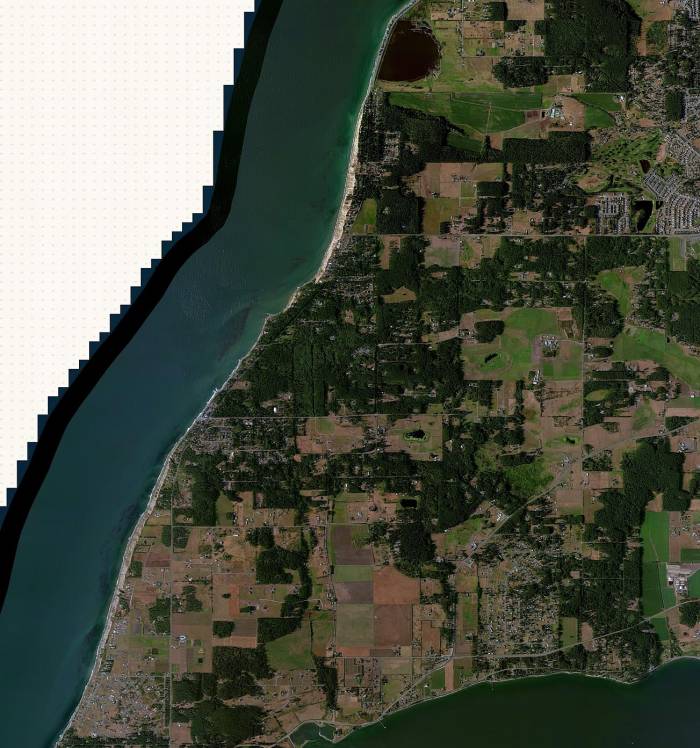
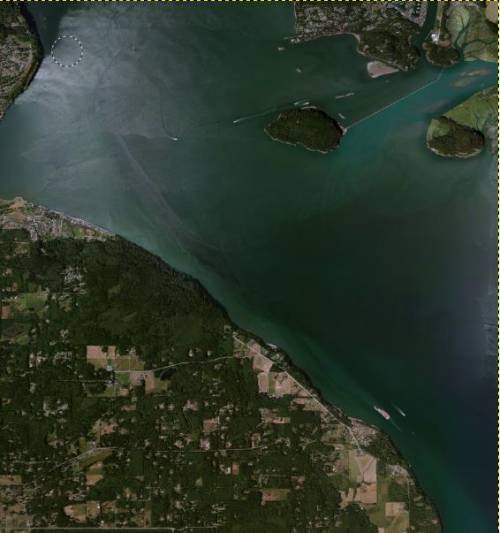
This is an example of an aerial image, derived from FSET:
As you can see, the top left corner does not contain any useful data. To import this without changes into aerofly FS 2 would look totally ugly.
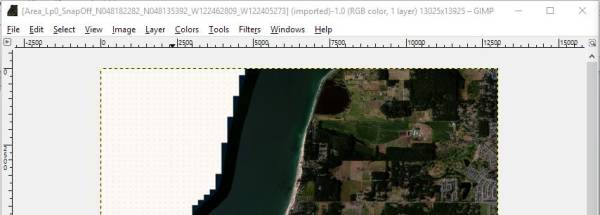
- let’s open the .BMP with GIMP (or similar graphics program).
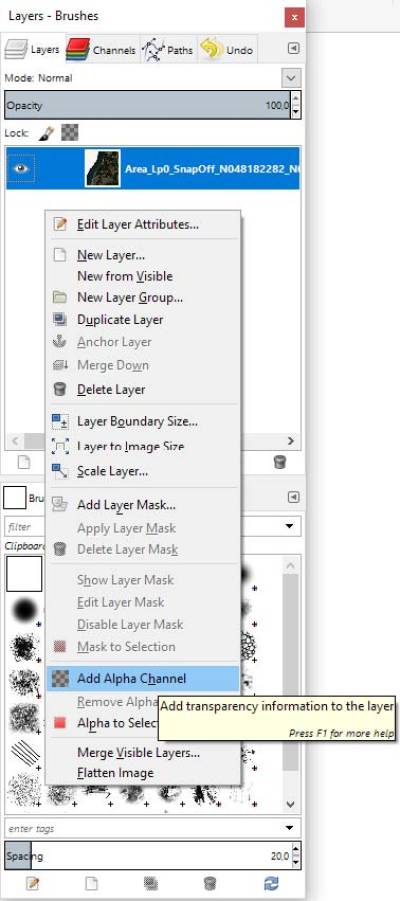
- In the Layer menu, right click with mouse and select : Add Alpha Channel.
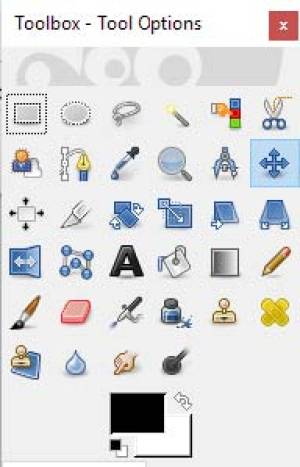
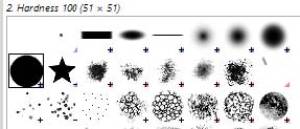
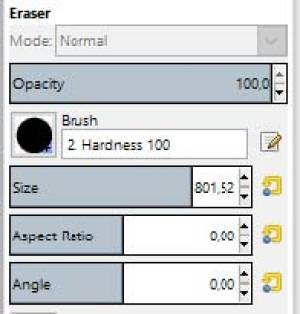
- Select the eraser, adjust hardness to 100%, and adjust the size very large
Note-There are other tools in Gimp that will also work for this process; framing areas, hand draw tool, etc. in combination with pressing with delete key.
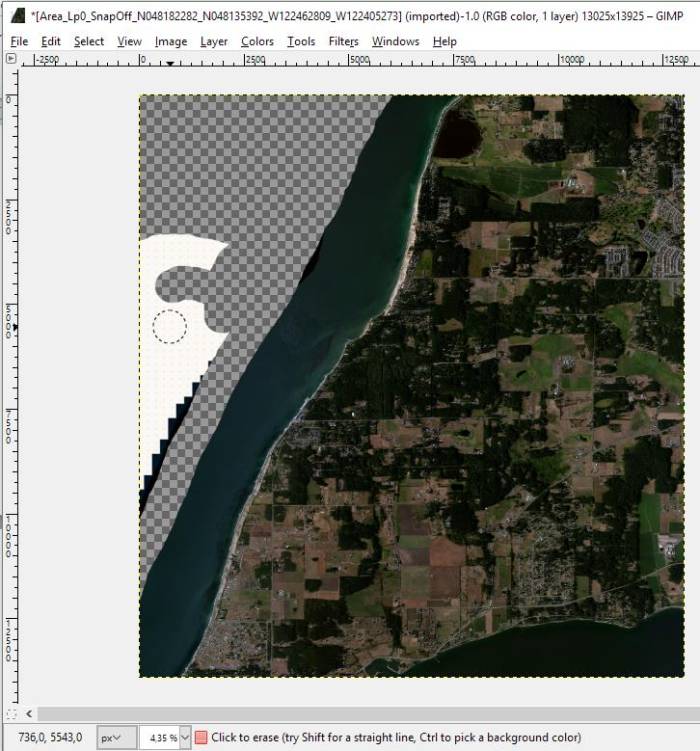
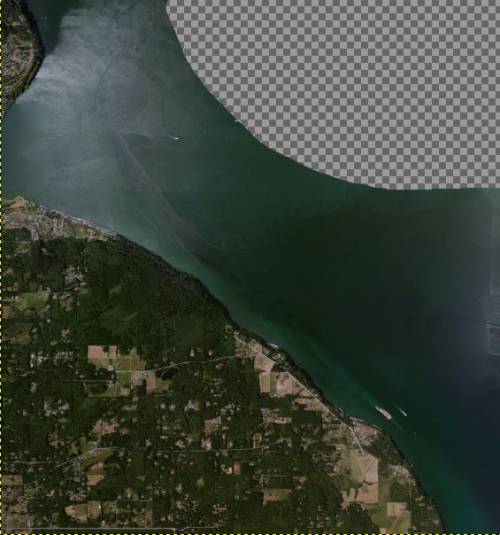
- Now use the eraser to create a transparency for the selected area. In the example you can see this work in progress, not yet finished.
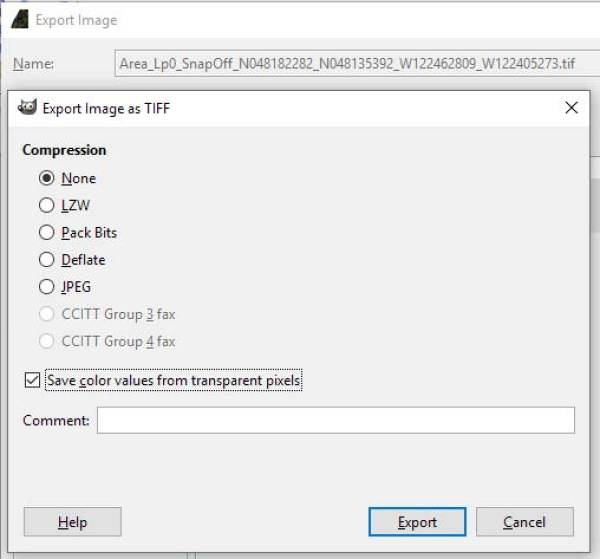
- The last step is to save the image as a .TIF without compression, but with transparent alpha (Select File – Export as – TIF).
Note-Geoconvert will process this .TIF file with the alpha layer to produce the alpha blending.
Below are some examples of where alpha blending can be useful
- Remove the islands, which are only partly covered by our new scenery. So that Aerofly FS2 does not show the sharp border between the default texture and the new one within the island. The transition is being shifted into the sea.
- You can also use alpha blending to append a new aerial image to an existing scenery.
Run the Aerofly FS2 Geoconvert process
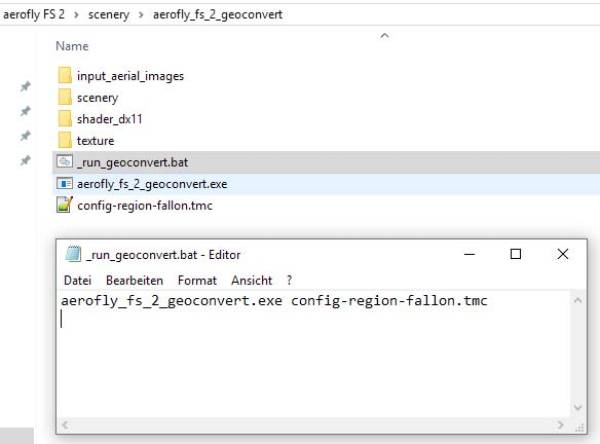
This is the last step and will take some time. Move all images and coordinate files into the directory input_aerial_images. The Geoconvert tool compresses the images and creates the correct file format for Aerofly FS2. You can run the program in a cmd window:
Note-The easier way is to create a batch file; a simple text file with just one line.
Verify the locations of all of the files that you need for the conversion:
- You need all of the image files and associated TFW files placed in the “input_aerial_images” folder
- Your TMC file located in the aerofly_fs_2_geoconvert folder as shown in the above image.
- The name that you called your TMC file should be the same name noted in the batch or CMD command, as seen in the above image.
- Double click the batch file (or run the CMD string) to start the process.
- Once the process is completed (this can take a while depending on the size of your project and how many levels that you used) the completed files will be located in the \image folder
- Copy the content of the \image folder to your Aerofly FS2 user directory located in your Documents folder: …\Documents\Aerofly FS 2\scenery\images
- Finally run Aerofly FS2 and find your new scenery on the map and enjoy. Note-Aerofly FS2 reads the image files during the flight session and warps them over the elevation model. There is no need to worry about the elevation data.
Addendum
Recommendation for GeoConvert levels
| Download Resolution | Size/Pixel | GeoConvert Level | Coverage |
|---|---|---|---|
| 0 | 0.5m | 14 | Inner area of airport |
| 1 | 1m | 13/14 | Inner area of airport |
| 2 | 2m | 12 | Outer area of airport |
| 3 | 3m | 11 | Larger area |
Recommendation for Ultra-High Detail/Long conversion Process
| Download Resolution | Size/Pixel | GeoConvert Level | Coverage |
|---|---|---|---|
| -1 | 0.25m | 14 | Small area |
| 0 | 0.50m | 13/14 | 15nm x 30nm scenery area |
Best Practices
If you convert a larger area remove the entry blocks higher than level 11 from the TMC file and run only level 9 and 11. This will result in a relatively fast process of conversion.
Variable levels within a single conversion process
Within a single conversion process you can input aerial images of different resolutions. Place them all into the input_aerial_images directory and edit the TMC for different coordinates per level.
Performance optimization and mosaicing for GeoConvert.
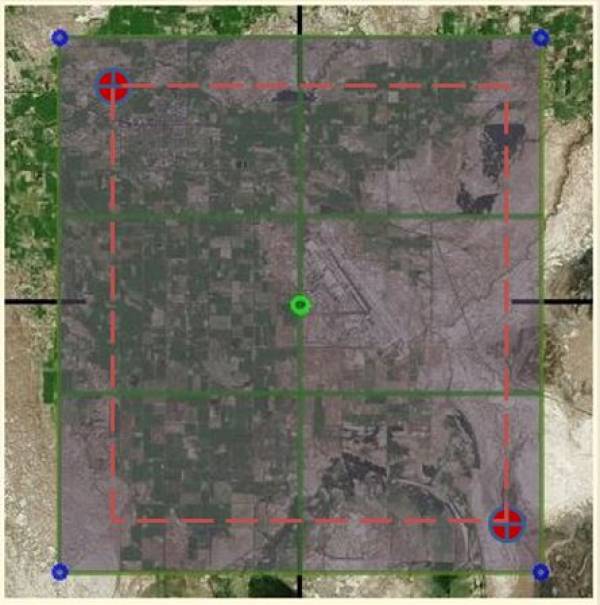
The frame shows the area coverage of FSET. If we reduce the size in the GeoConvert TMC definition, we can avoid masking and reduce calculation power. You can try to set straight coordinates of degrees and minutes.
Resulting frame in TMC file (red color):
39° 30’ and 39°20’ 118° 50’ and 118° 37’
- Convert these coordinates into decimal values and enter them into the TMC file.
With this method you can also precisely add adjacent areas, even from overlapping aerial images.
