Table of Contents
**REDIRECTION NOTICE**
Boeing 777-300ER
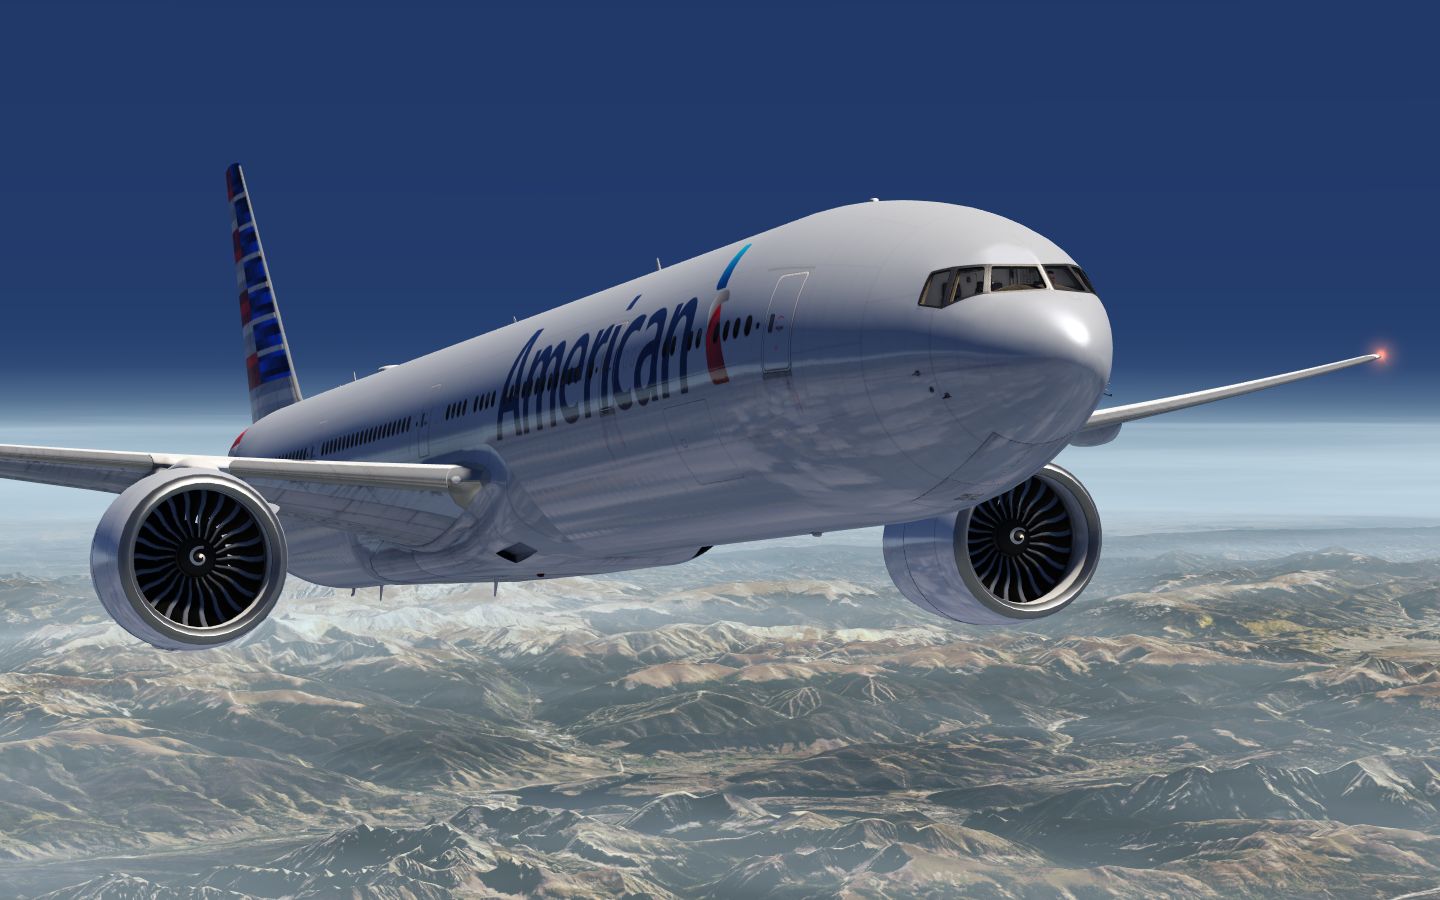
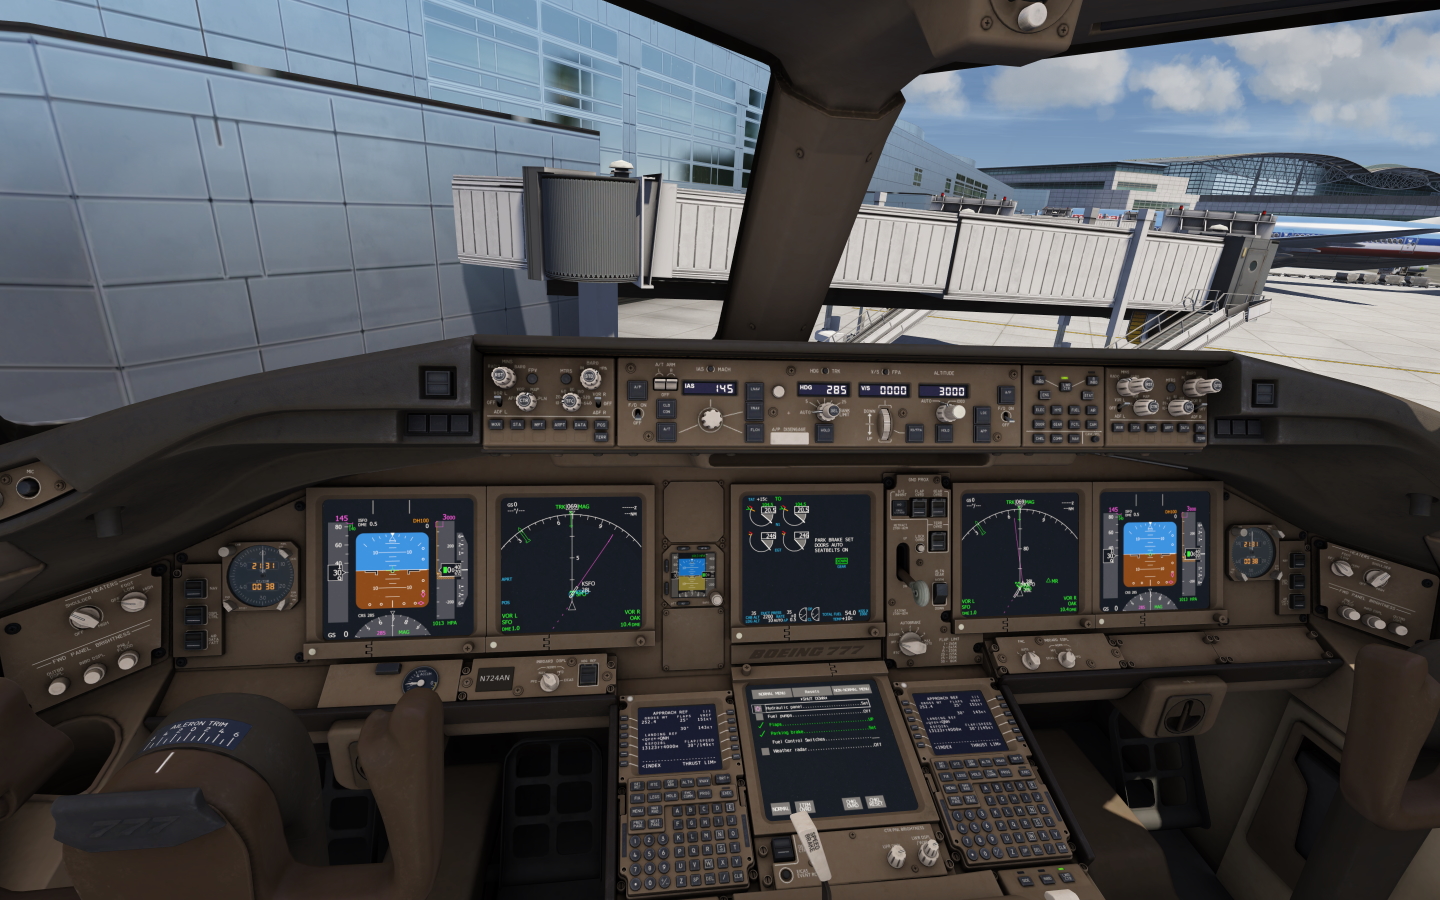
The Boeing 777-300ER (Triple Seven) is one of the largest and heaviest twin-engine commercial aircraft. Impressively large and powerful are also the two GE90-115B engines, each delivering up to 512 kN thrust. In the 'ER' version, the Triple Seven can carry nearly 400 passengers up to 13,600 km. It is the first Boeing aircraft to be equipped with a Fly By Wire system.
Boeing 777-300ER Flight Tutorial
Quick and Dirty Flight
In a Boeing 777 following the route and climbing and descending is very easy. On the ground you set the flight directors to on and arm LNAV and VNAV and the auto throttle (A/T). On the runway you press the TakeOff GoAround (TOGA) button, which can be assigned in the control settings of the Aerofly FS 2, and take off manually. Right after lift off you can engage the autopilot and let if climb in VNAV SPD. Upon reaching the acceleration height the autopilot pitches the aircraft forward and you can retract the flaps. Reaching cruise altitude VNAV PATH engages. Prior to the top of descent you reduce the selected altitude and the aircraft will automatically descent on profile. Near the airport APP is pressed to arm the ILS. Configure the aircraft for landing and adjust the MCP speed window for the final approach to VREF and the aircraft can land on its own and come to a complete stop.
Our Tutorial Flight
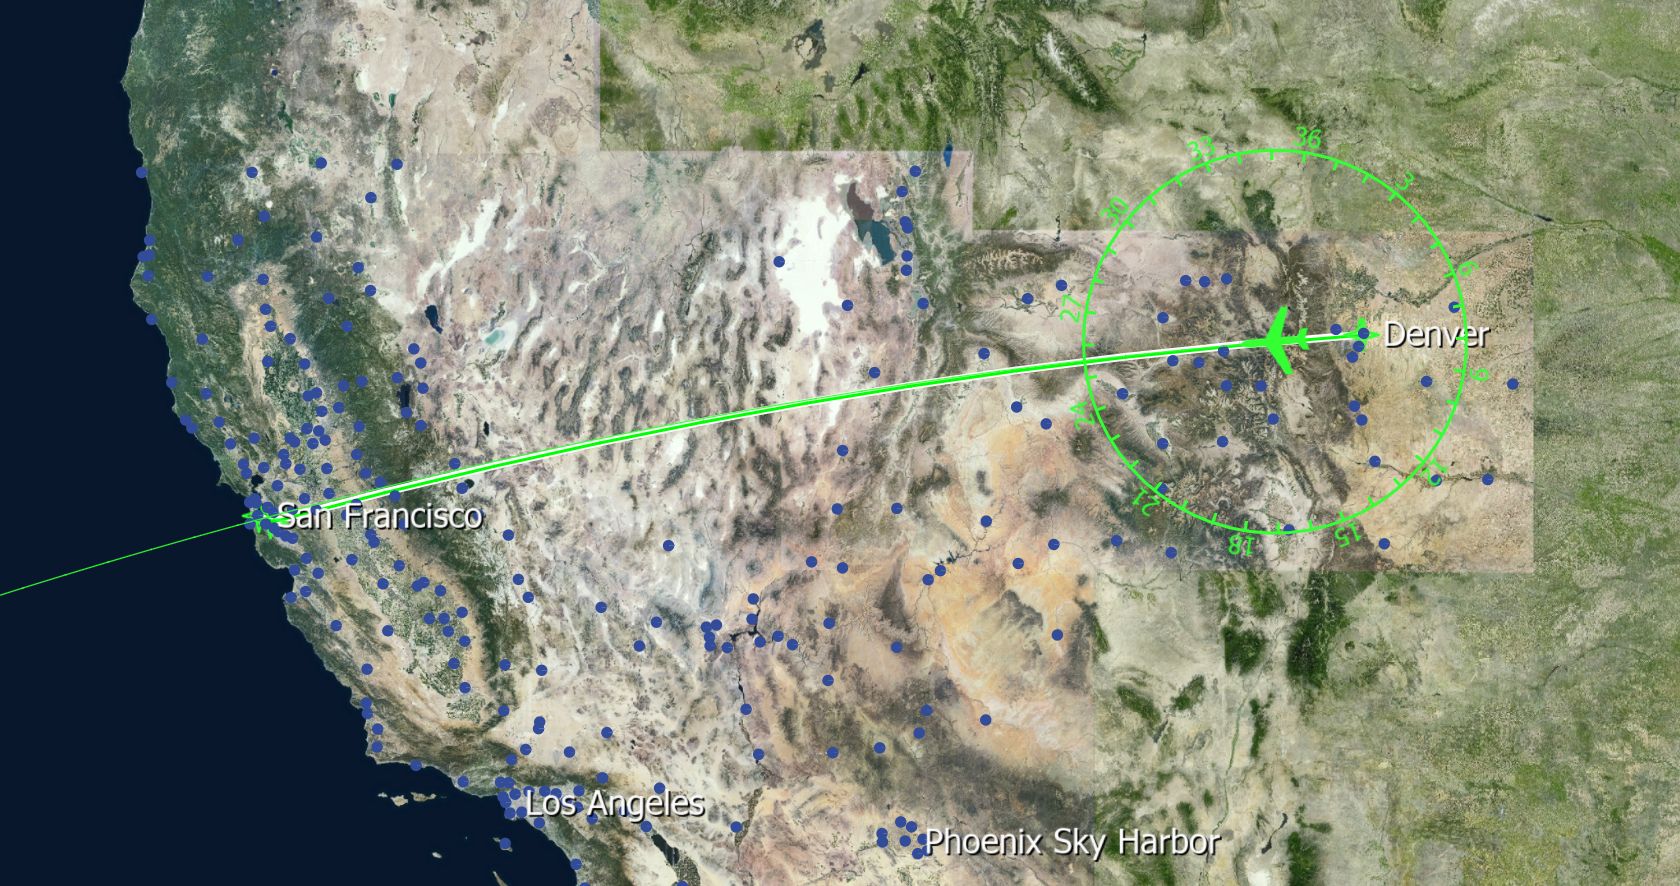
We're going to fly from Denver (KDEN) to San Francisco (KSFO) today to demonstrate the B777 features. You can of course choose any origin and destination that you like and make the flight as long as you want or as short as you want.
This flight takes at least two hours when flown in real time but we'll skip a big portion of it since the cruise is quite monotonous. A typical flight in the B777-300ER would take probably ten hours and more so this is already considered a very short flight.
Required time for this tutorial flight:
Between 30min and 2.5h depending on how much of the flight you want to skip ahead.
We will depart from runway 25 at KDEN and fly direct to the destination. For KSFO we'll use the ILS 28L for landing. The cruise altitude is set to FL410.
If you don't want to mess with the flight management system and the CDU you can set up this route with a few steps in the navigation dialog.
- From the main menu open the navigation dialog
- Click on Denver on the map. Select RWY 25 for departure.
- Click on San Francisco on the map, select ILS 28L for the arrival.
Start Location
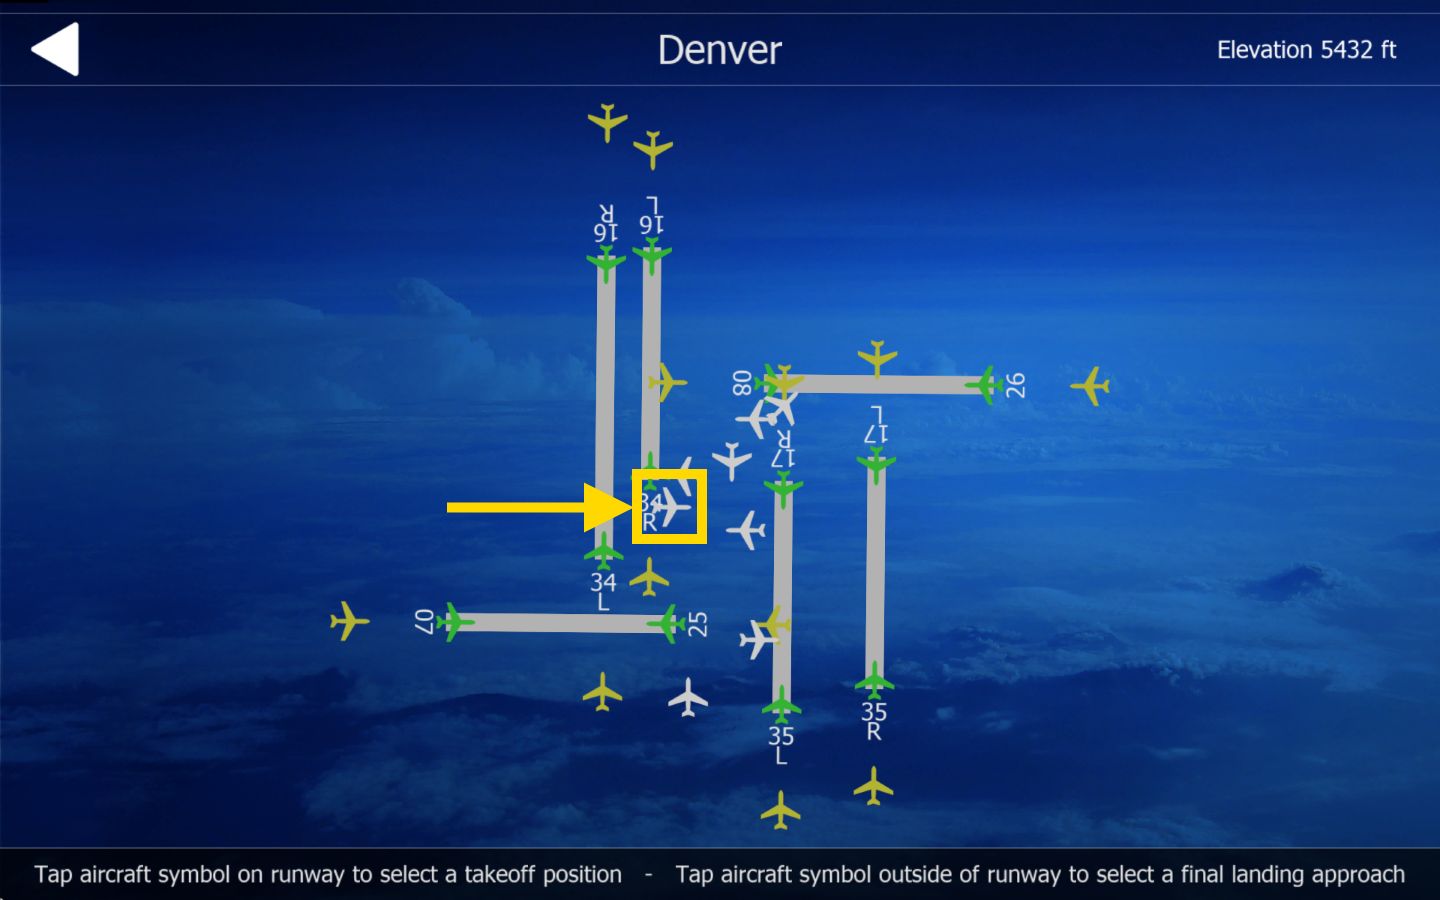
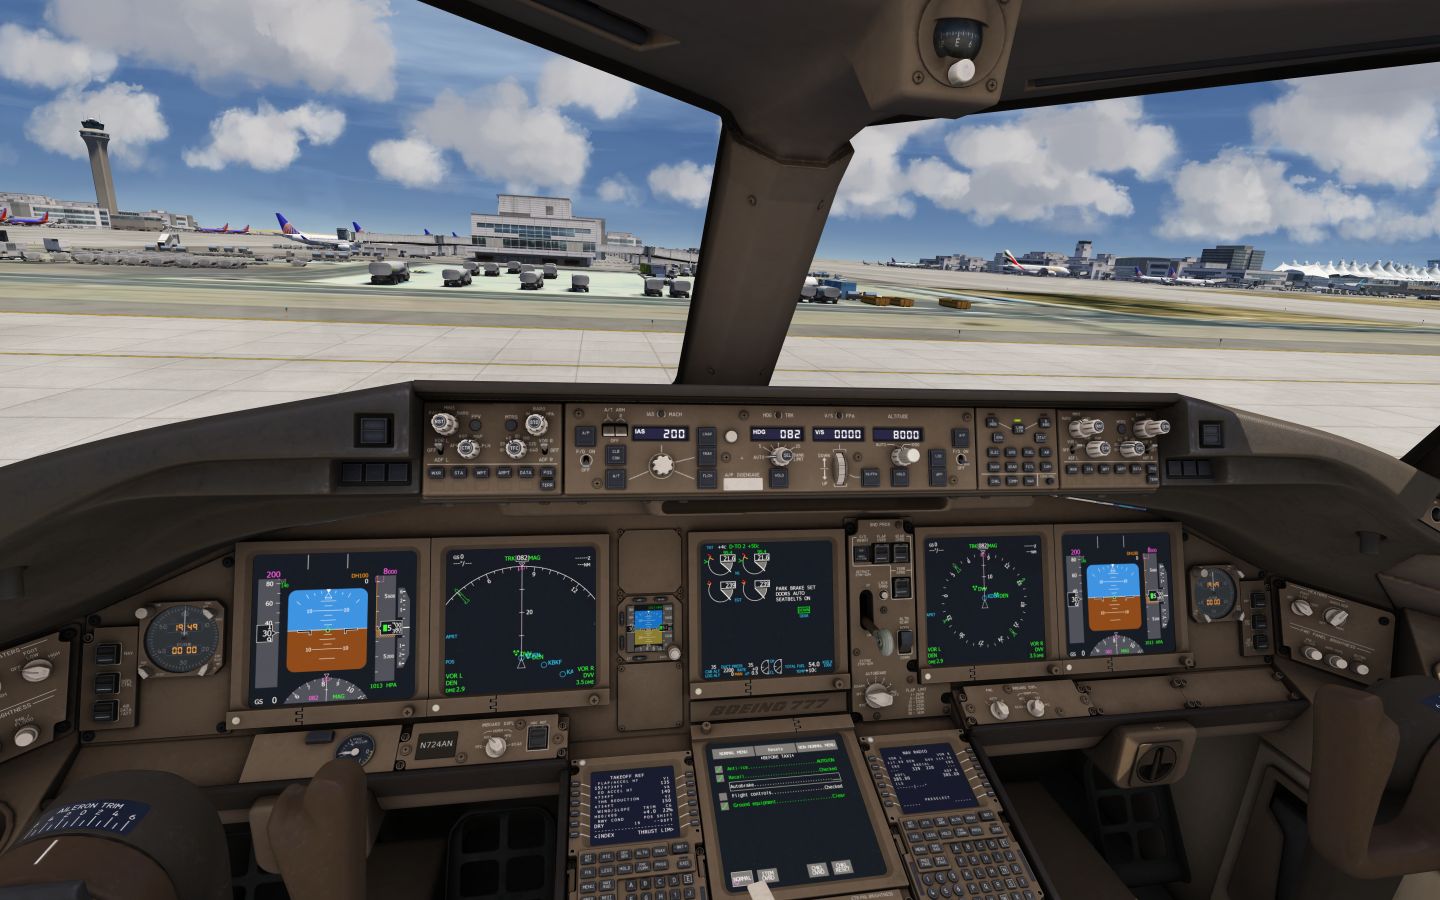
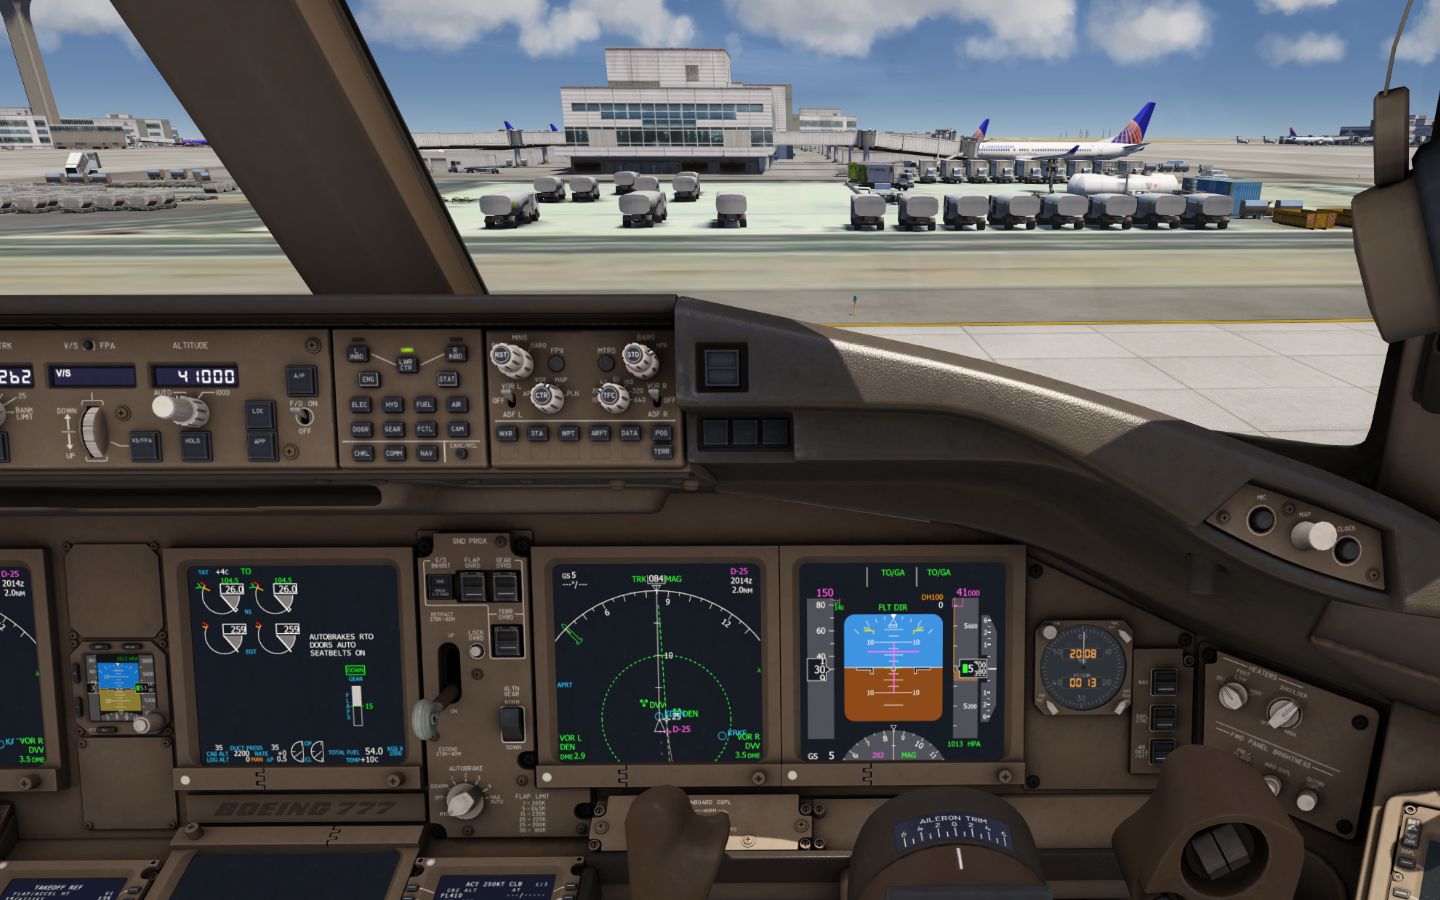
From the main menu open the location dialog and click on Denver on the map. On the airport diagram that opens select the parking position on the west side of the airport. From there we only have to turn right and follow the taxiway to runway 25.
Start the flight.
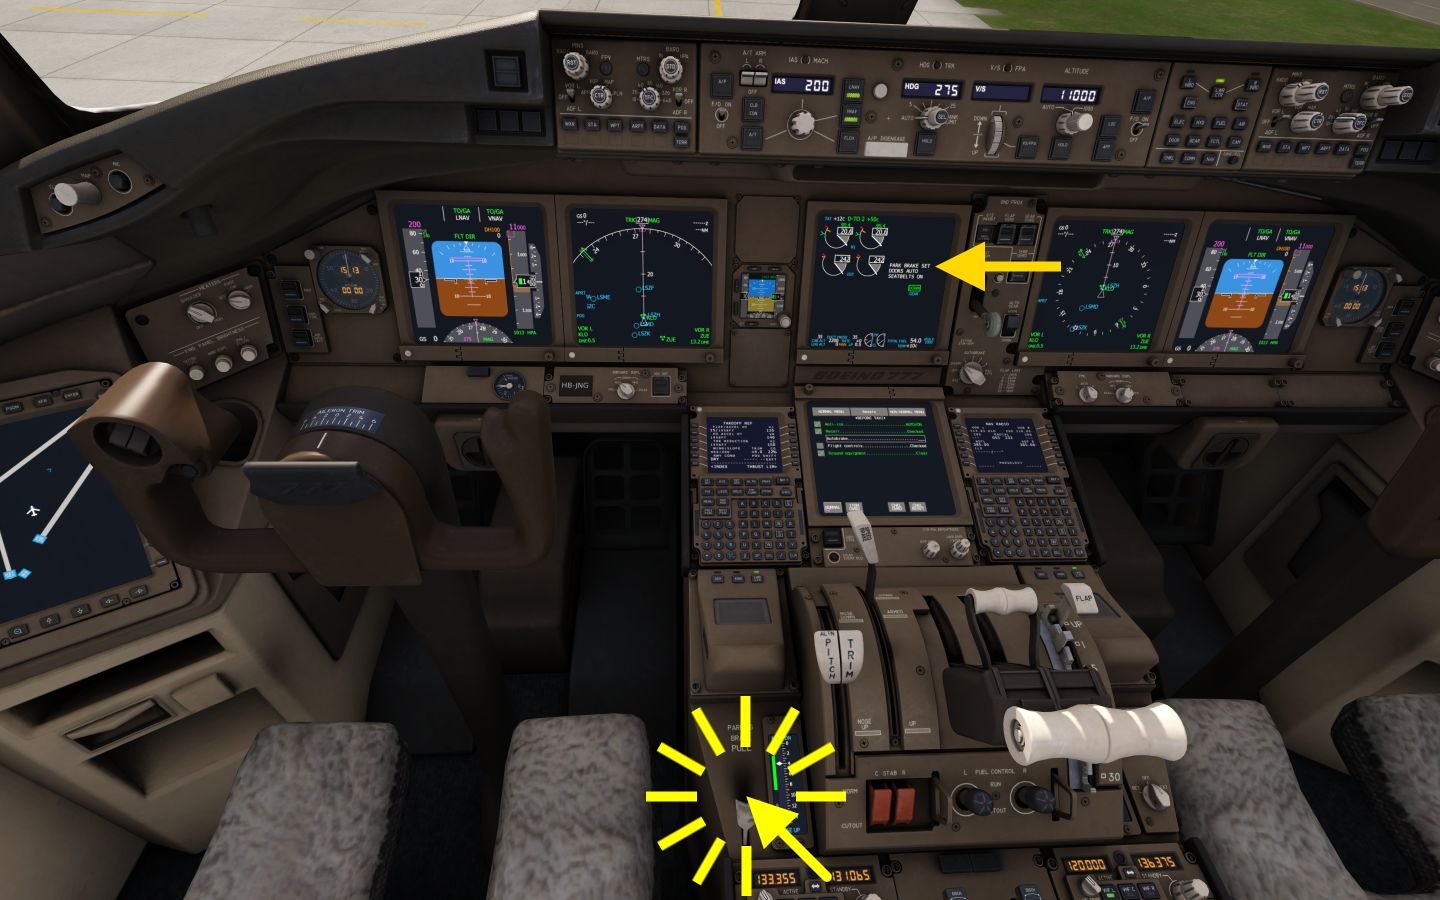
Look down and set the parking brake to prevent the aircraft from rolling away. On the EICAS screen you should see a white “PARK BRAKE SET” memo whenever the parking brake is set.
Preflight
We'll now set up the aircraft for the flight step by step. We'll begin with the optional CDU flight preparations, then continue with the (mandatory) MCP preflight and then finish with the preflight checks.
(Optional) CDU Preflight
You can skip this next step if you already set up the route with the Aerofly FS navigation map from the main menu!
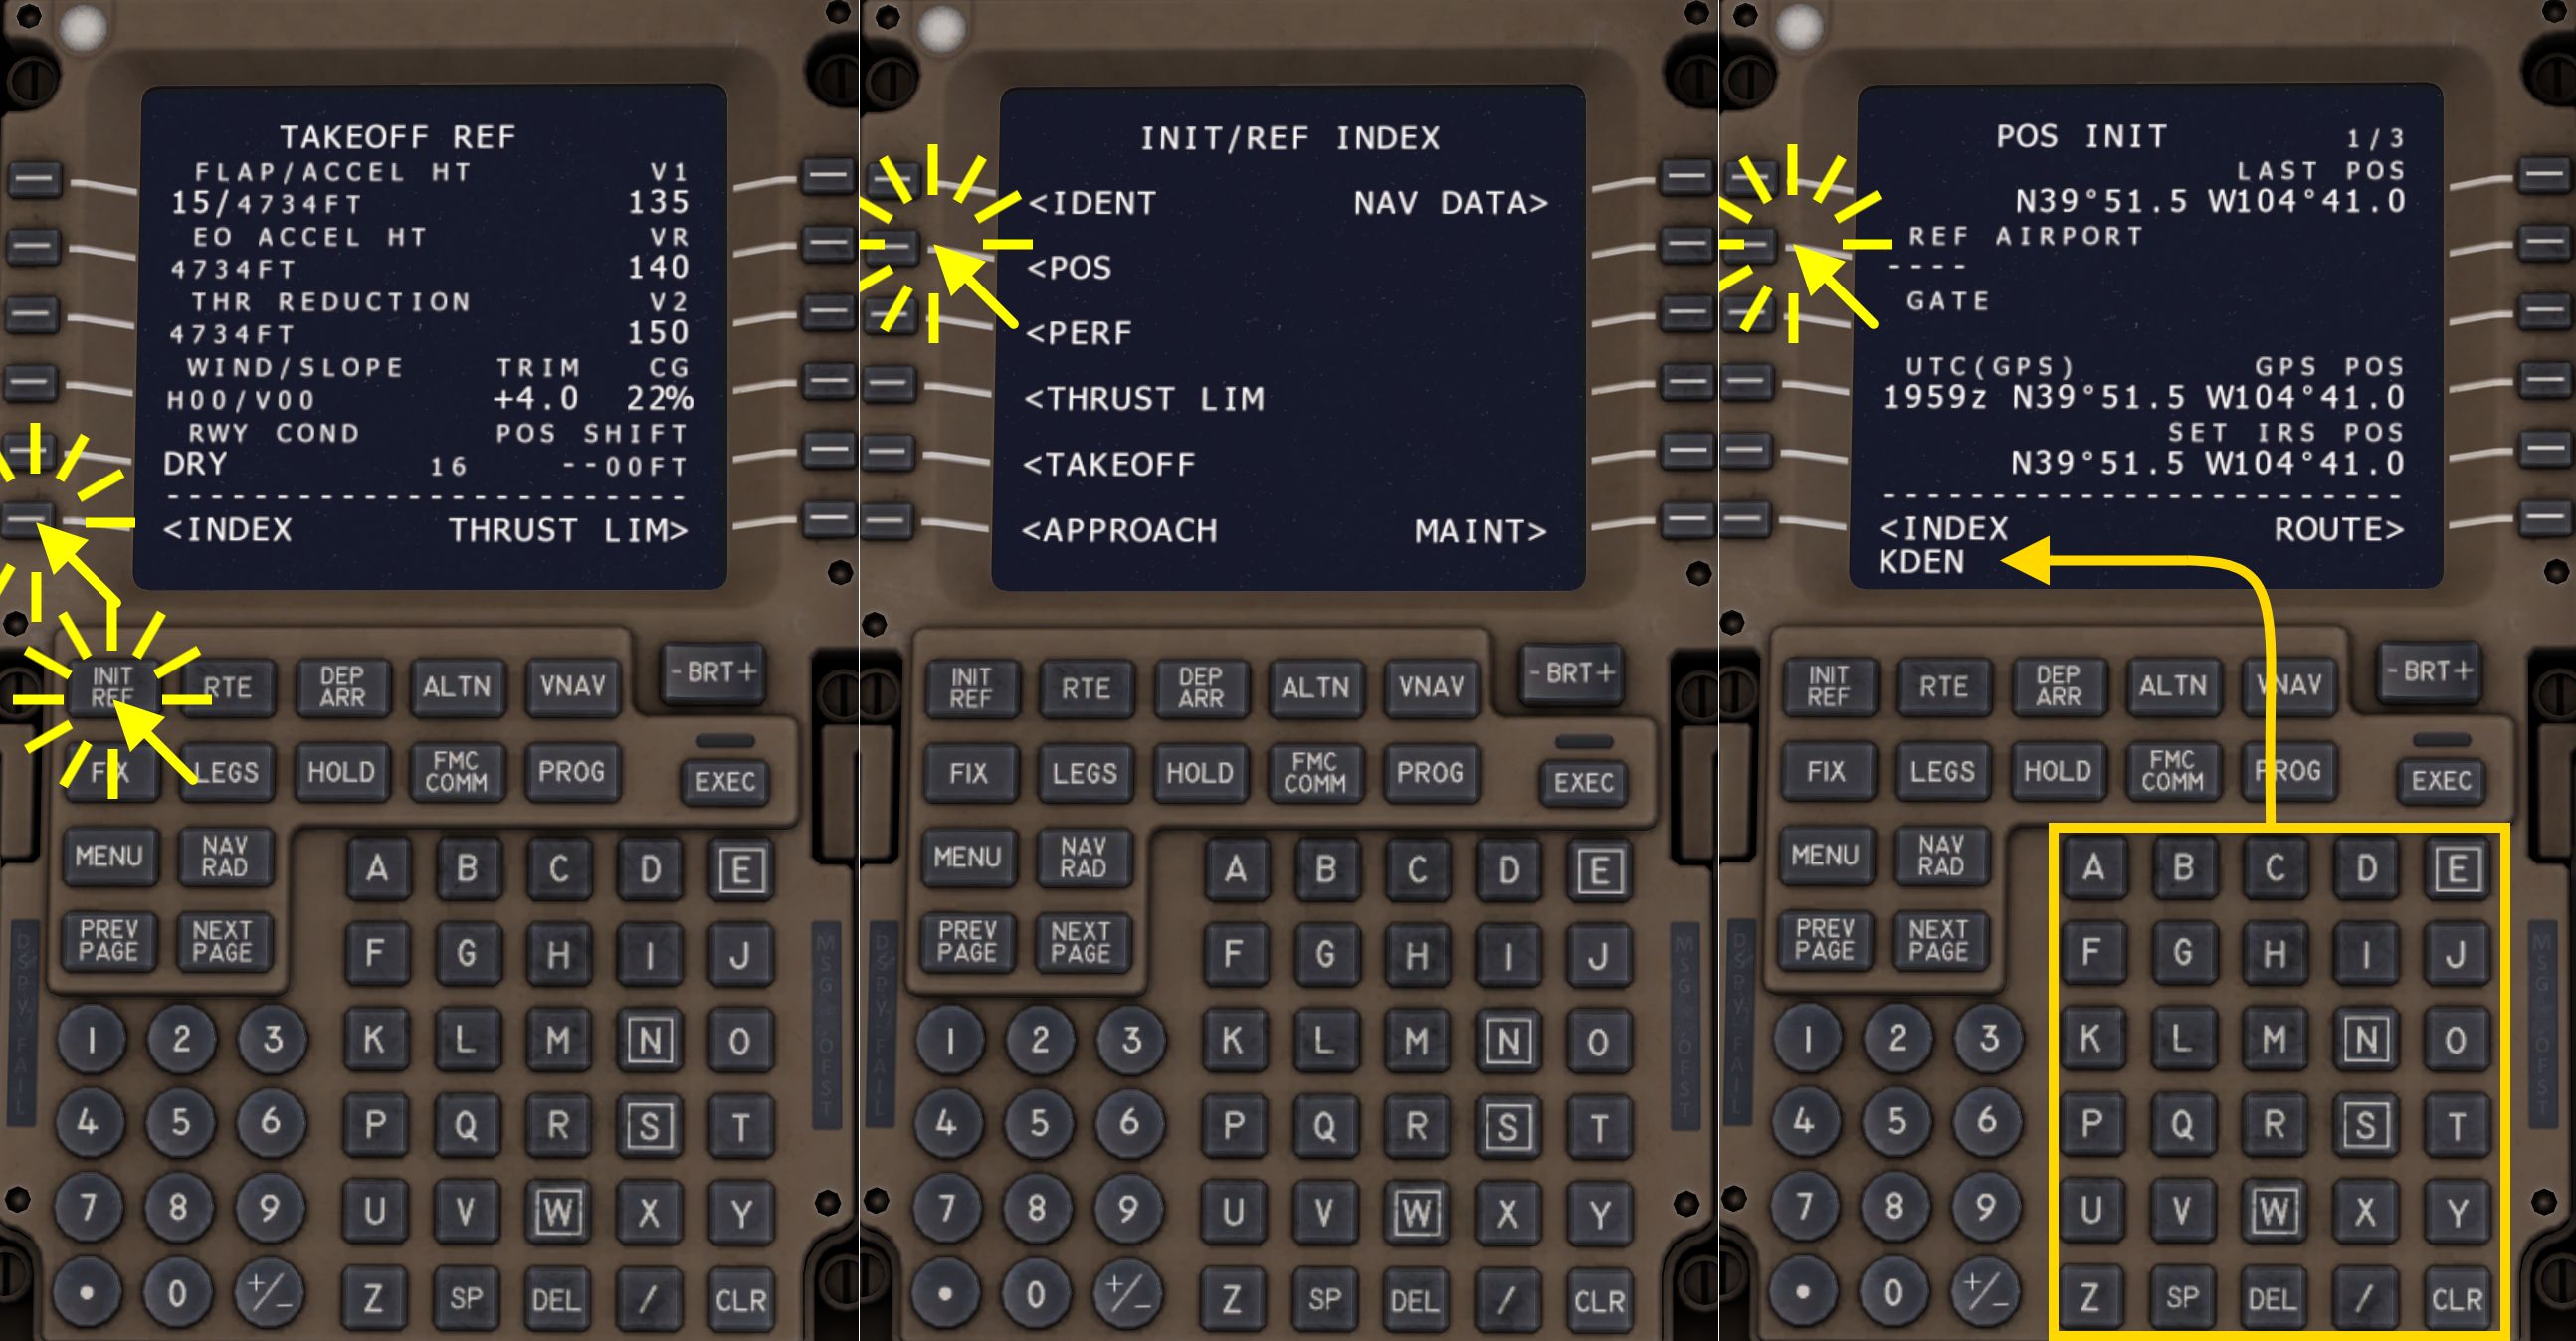
TAKEOFF REF
- Press the INIT REF button on the CDU.
One of the reference pages should open.
- Select the INDEX option in the lower left to see the INIT/REF INDEX page.
The index page is the main menu for the initialization and reference page. From here you can jump to any of those pages.
INIT/REF INDEX
- Select the POS INIT page by pressing the line select key next to POS
POS INIT
On the position initialization page
- type in “KDEN”
- and insert that text into the REF AIRPORT field.
Since we're starting at the ramp we'll leave the gate field empty.
The inertial reference system (IRS) is already aligned, so no further action is needed.
PERF INIT
- Go to the INIT/REF INDEX page as shown earlier.
- Select the PERF INIT (performance initialization) from the index page.
This page should already be filled. Later on you may have to insert the values there. These current values are subject to change.
RTE
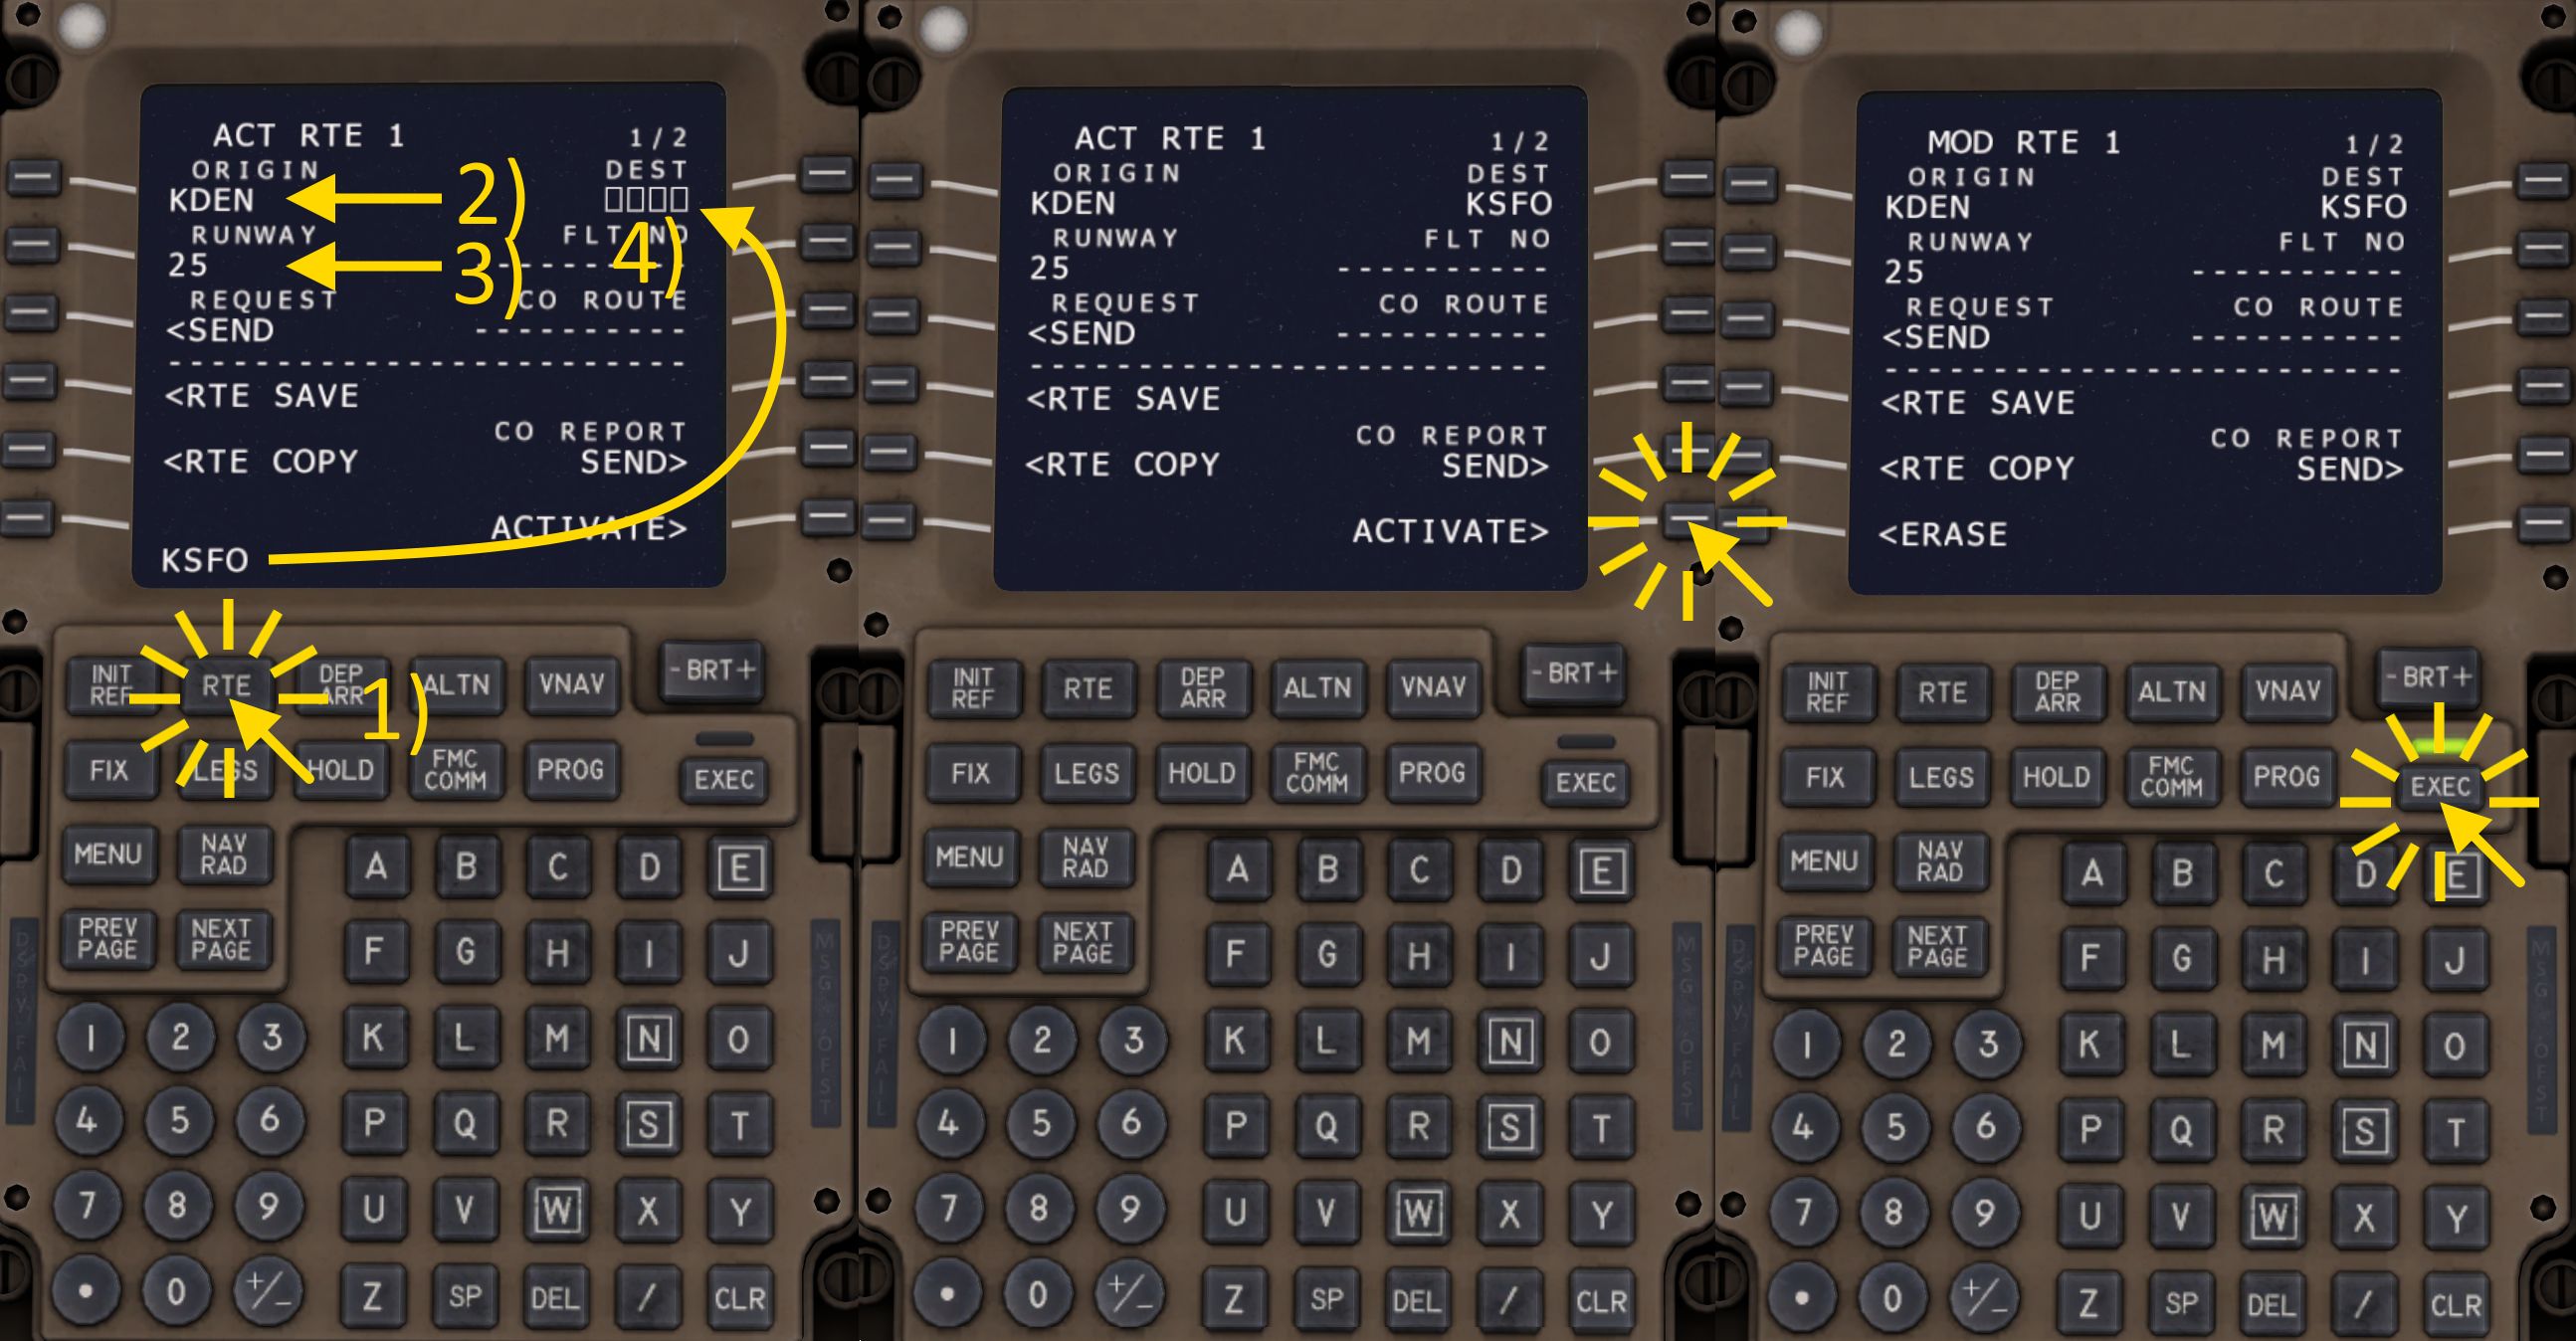
- Press the RTE button to display the route page.
- Type “KDEN” into the scratchpad and click the the line select key next to ORIGIN to insert it.
- Type “25” and insert it into the RUNWAY field.
- Enter KSFO in the DEST (destination) field.
This doesn't yet modify the route. We'll have to activate the new route and then execute the changes.
- Select ACTIVATE
- Press the EXEC (execute) button
DEP/ARR
We're now going to select the departure from KDEN and arrival into KSFO.
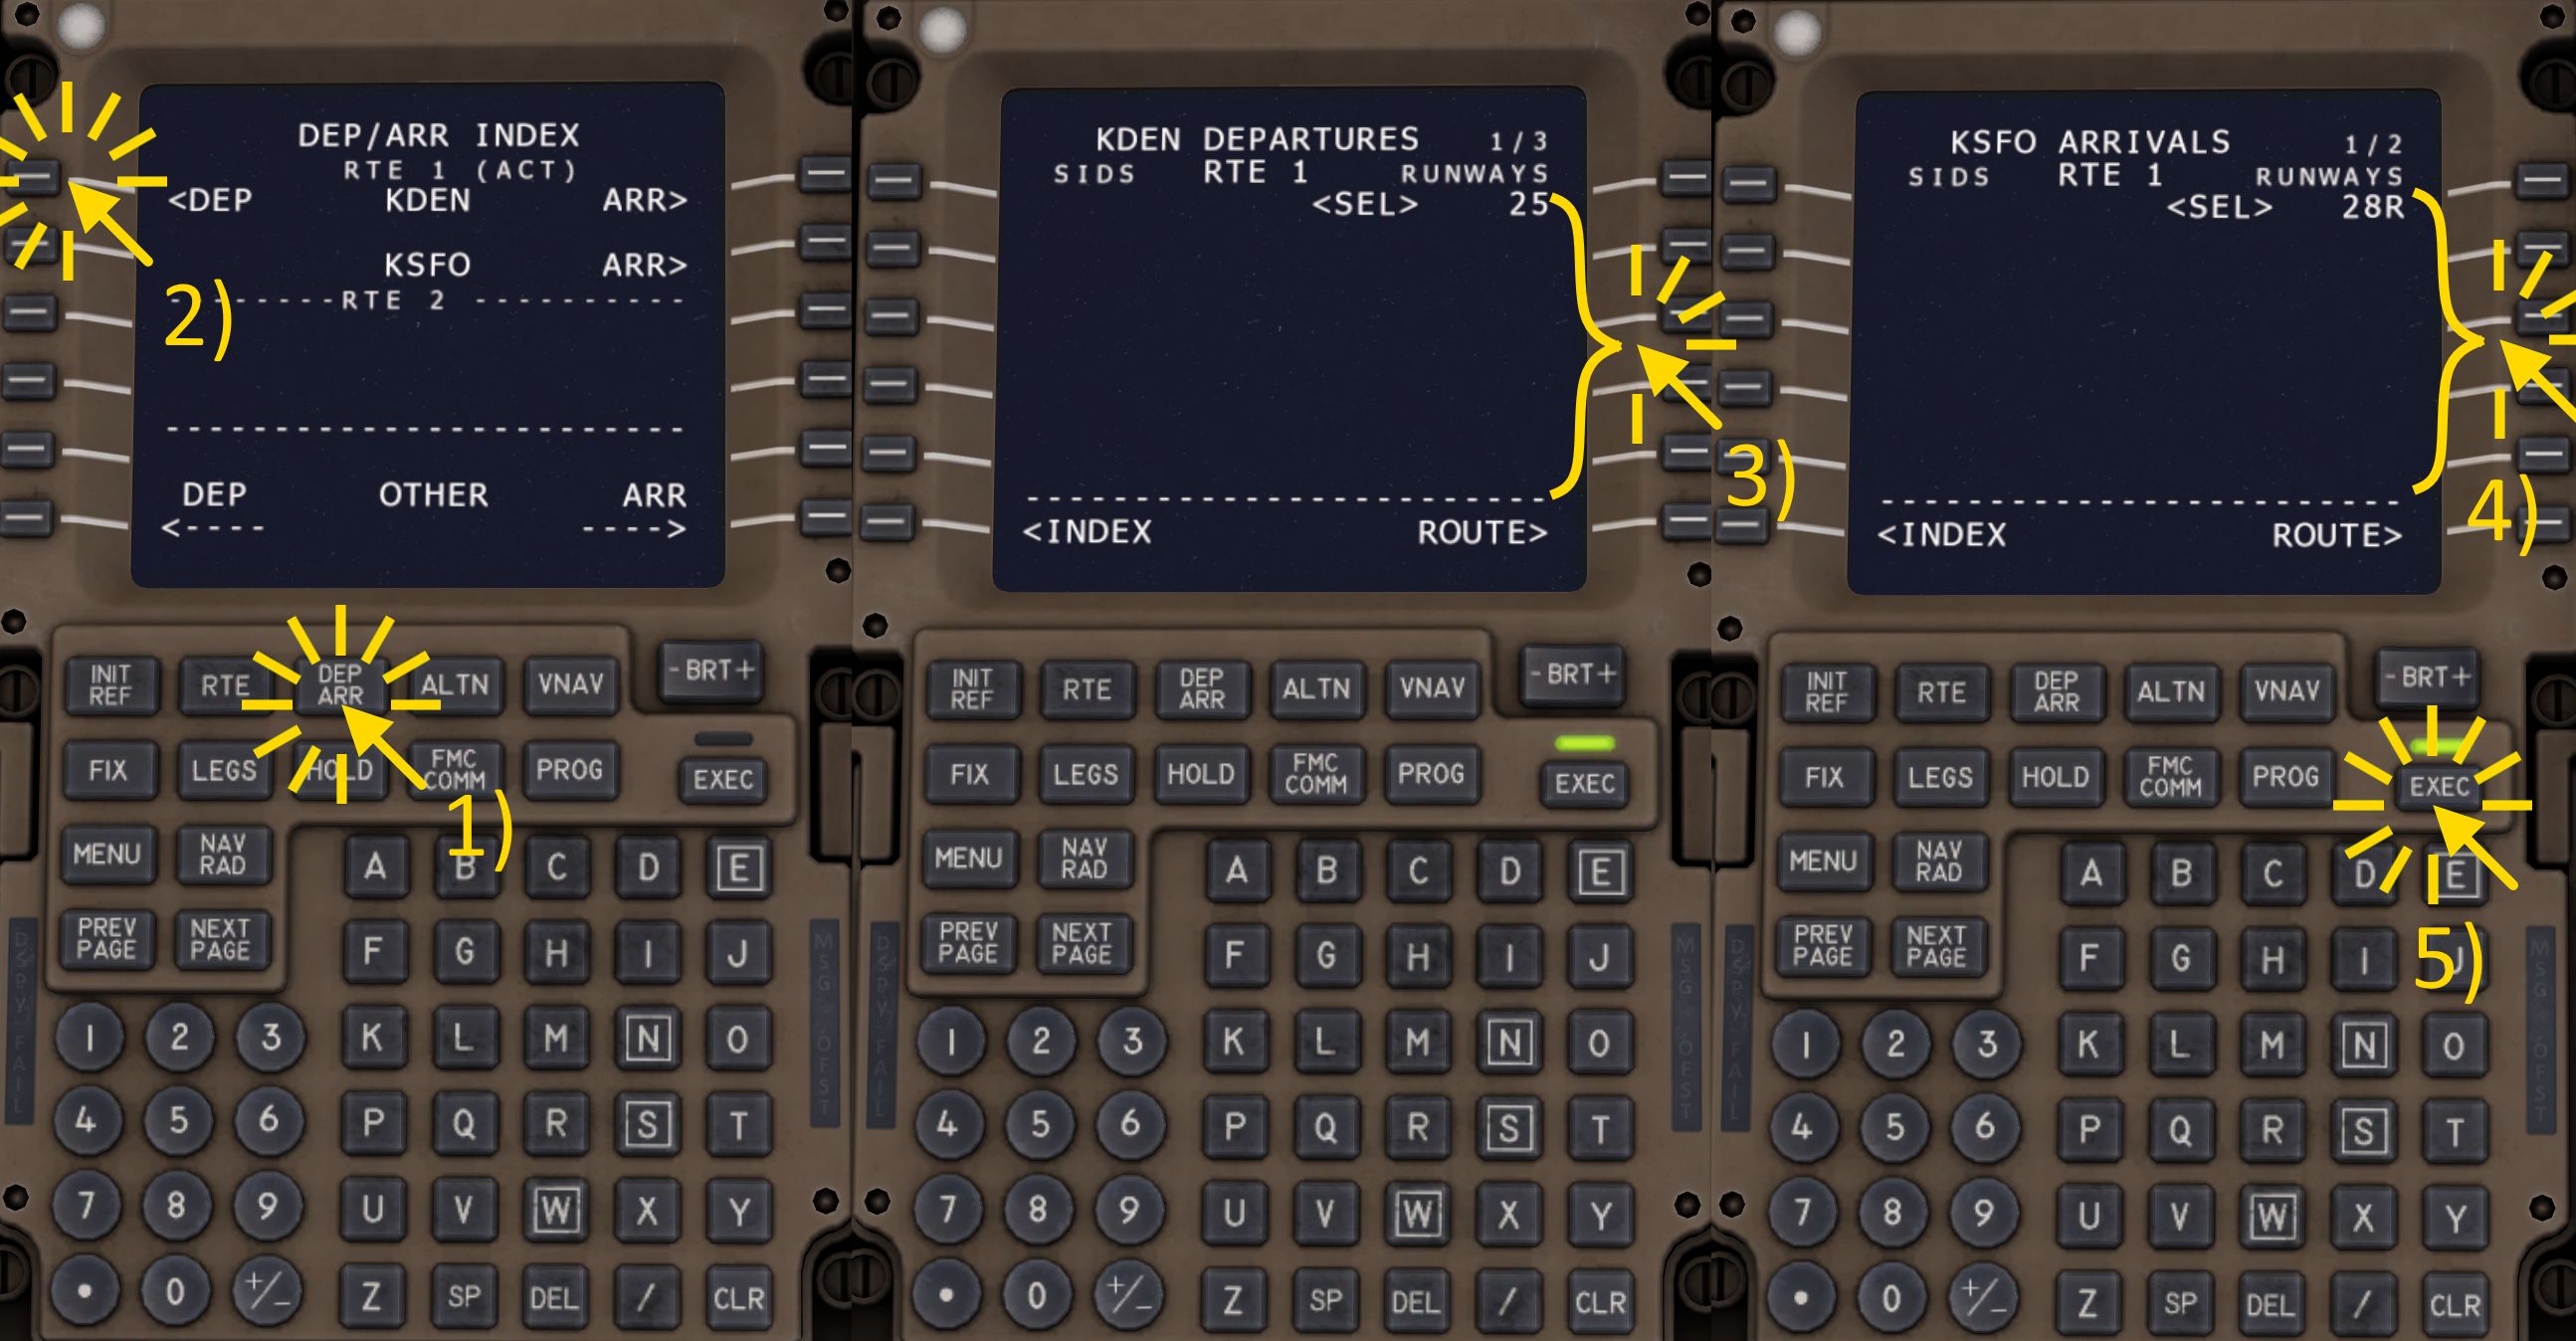
- Click the DEP/ARR button
- Select DEP (departure) on the left side
- Click on the line select key next to the runway 25 to select it. Scroll down with the NEXT PAGE button if needed.
- Click the DEP/ARR button again
- Click the ARR option next to the destination airport (KSFO).
- Select the runway 28R or 28L. 28L will allow us to fly an ILS approach later. This can be changed during flight.
- Execute these changes to activate the new departure and arrival runways.
Note - On the latest Aerofly FS 4 and Aerofly FS 2023 discontinuities may have been added to the route, just like in the real world.
On the flight plan legs page scroll through the list with the next page button. When you see a “NEXT” field with empty boxes select the waypoint below it with the line select key, which copies its name to the scratchpad. Then insert that into the empty NEXT field to close the gap.
TAKEOFF REF
- Press the INIT/REF button
- If needed go to the index page to select the TAKEOFF REF (takeoff reference) page.
Flaps 15 is selected as takeoff flaps per default in Aerofly FS. You can change this by entering “5” or “20” and inserting that text into the FLAP field.
Take note of the v-speeds on the right of the aircraft. For this flight we'll use the suggested V1 135 kt, VR 140 kt and V2 150 kt speeds.
Also take note of the pitch trim setting, in this case 4.0 units.
THRUST LIM
- Press the INIT/REF button.
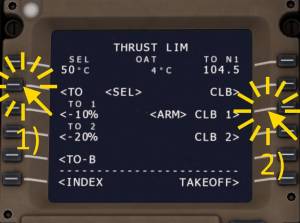
- Open the THRUST LIM (thrust limit) page via INIT/REF INDEX menu if you're not already on it.
For this flight we're not going to use a reduced takeoff thrust. But if you want to you can reduce the takeoff thrust by selecting an assumed temperature:
- Type in 50 for +50°C assumed temperature.
- Insert that into the “SEL” field in the top left corner
- Select CLB 1 on the right side to arm a reduced climb thrust rating
On the EICAS screen at the very top above the engine N1 display you should now see a “D-TO 2 +50C” text.
However for the tutorial flight we're going to select the standard takeoff rating.
- Select TO on the left
- Arm CLB 1 for the climb. This will activate at the thrust reduction altitude once we are in the air.
On the EICAS you should now see a green “TO” text above the engine N1. The green thrust limit indicators on the engine N1 scales should have gone up.
The final thrust is determined by the thrust lever position only. When you use the autothrottle then the ATHR will move your thrust levers to the selected thrust limit position. Disengage the autothrottle and advance the thrust levers to the maximum if you need more thrust. You can also press the TOGA button multiple times to cancel any thrust limits and go to maximum available go around thrust (GA).
During the climb if you want to keep the autothrottle engaged you need to come back to this THRUST LIM page to adjust the climb thrust limit. E.g. select CLB if you want to climb at a higher rate.
VNAV
- Press the VNAV button to display the VNAV pages
- You can step through the phases CLB, CRZ and DES with the PREV PAGE and NEXT PAGE buttons as needed
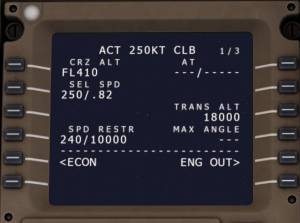
On this page you can adjust the cruise altitude during the flight. It should display FL410 at the moment since we selected that earlier.
- Check the transition altitude. It should be set to 18000ft for our flight.
- We're also going to keep the speed restriction of 240 KIAS below 10000ft.
FIX INFO
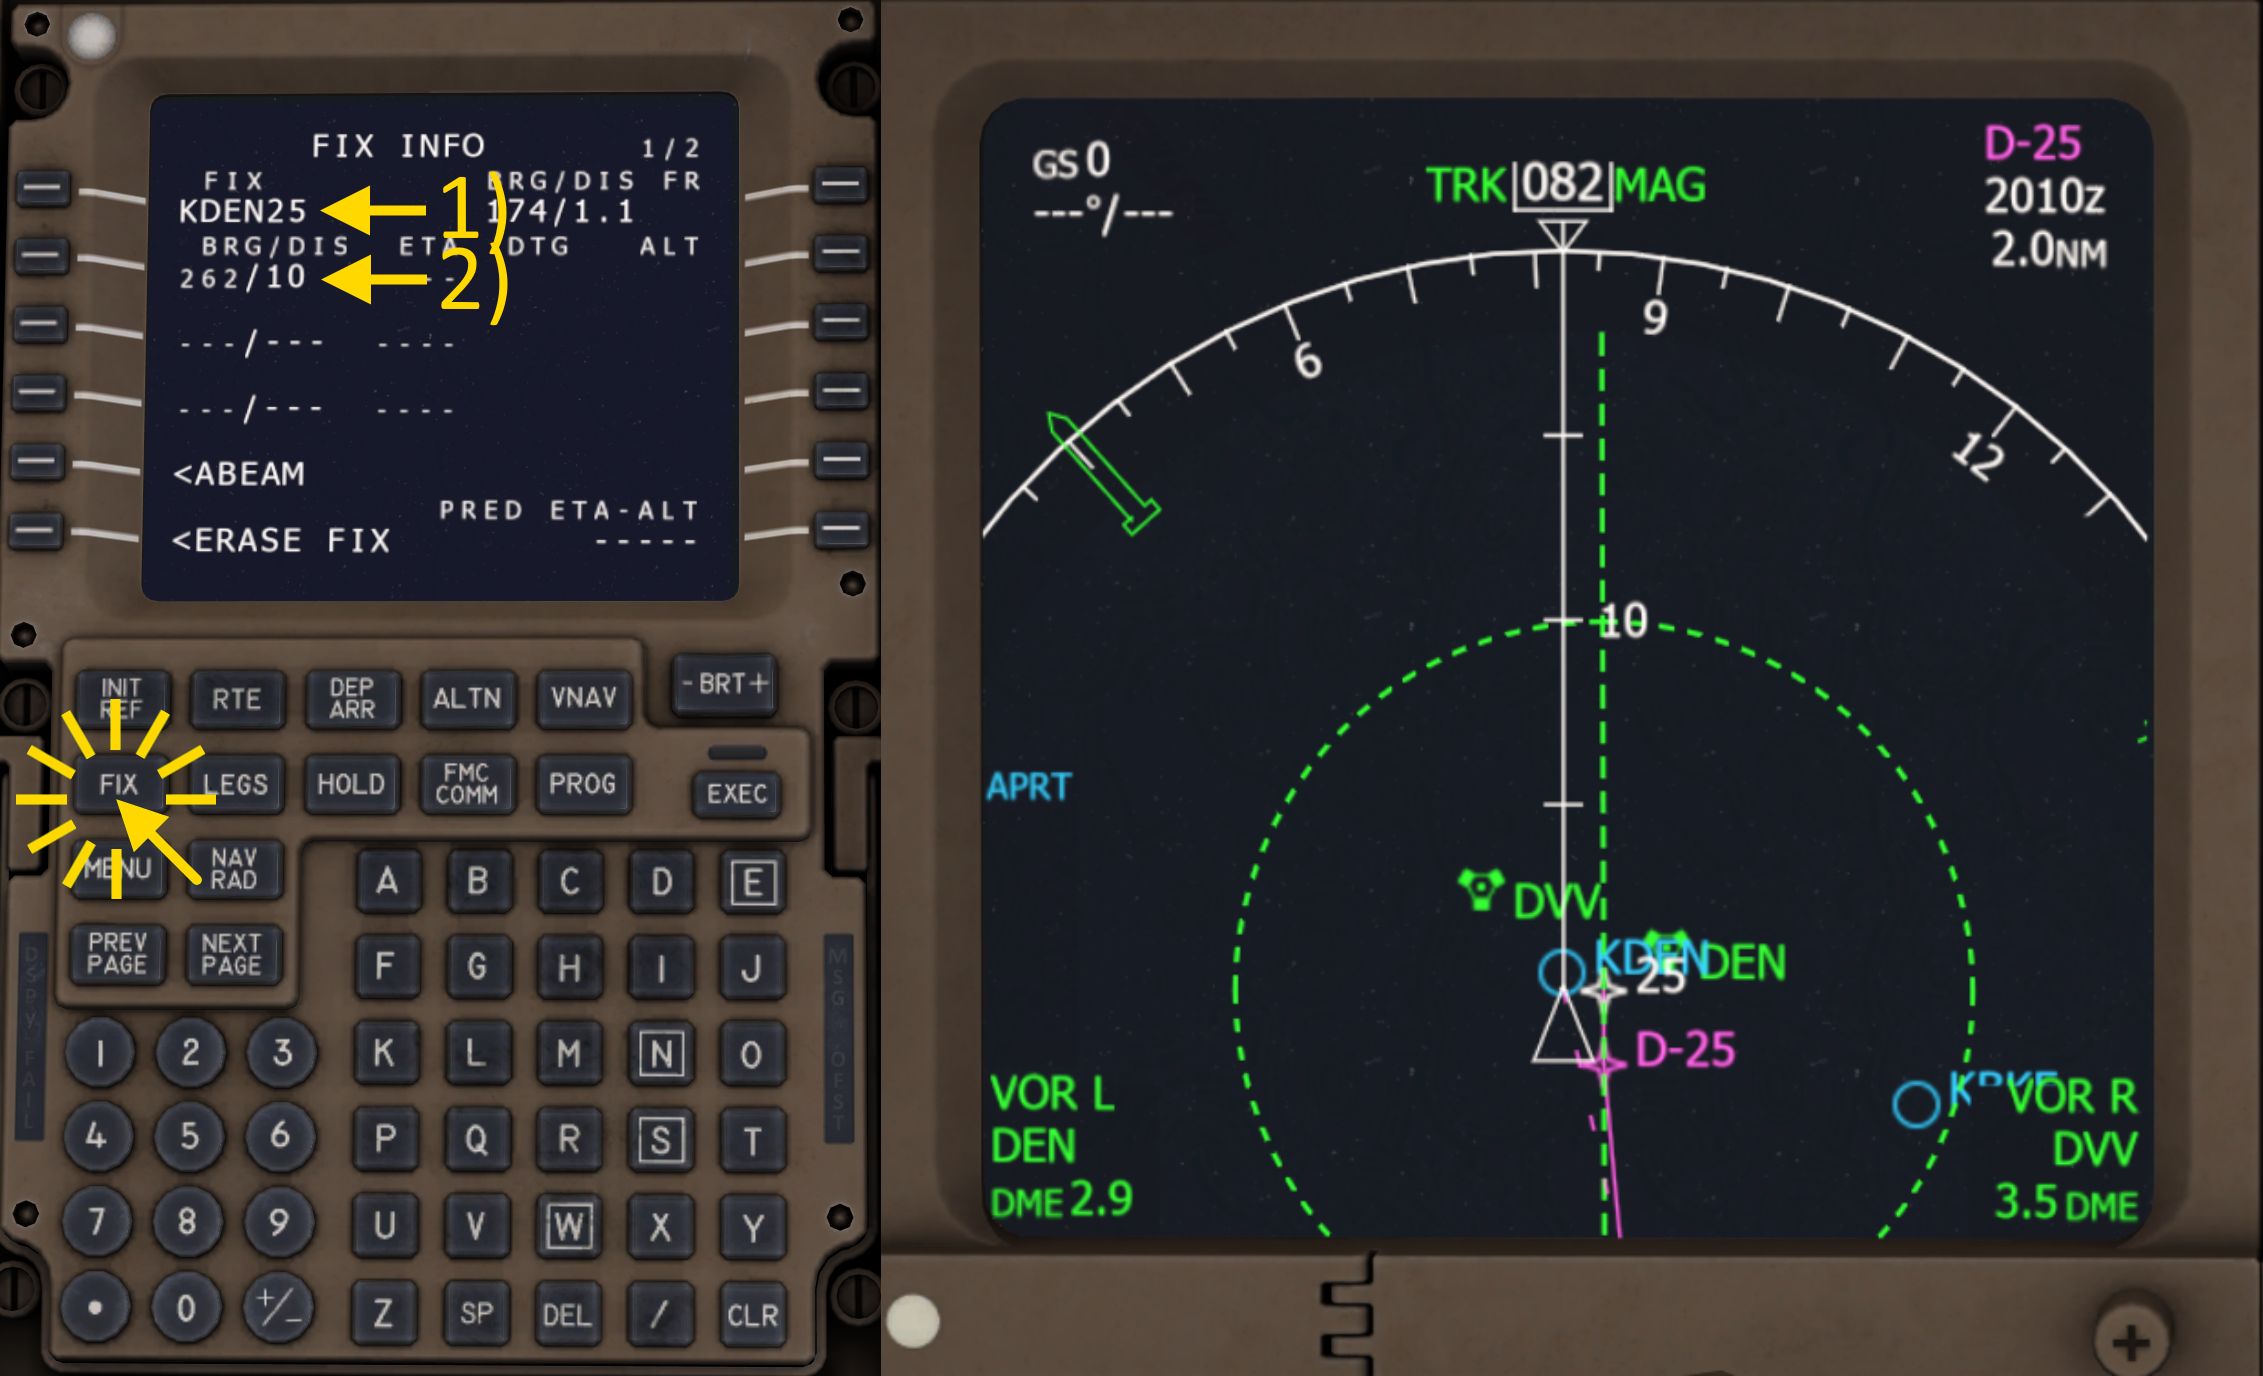
The B777 (and A320 and B747,…) have the ability to draw lines and rings on the navigation display. We're going to use this for reference for our extended runway centerline and to judge the distance to the runway.
- Press the FIX button to open the FIX INFO page.
- Type “KDEN25” for runway 25 at Denver airport into the scratchpad and select the line select key 1L to insert it into the FIX field.
- Type “262/10” and fill that into the BRG/DIS (bearing/distance) field to select a bearing of 262° (runway heading) and 10NM range.
The navigation display should then show the radial and range ring.
We're now finished with the optional CDU preflight settings.
MCP Preflight
We're now going to set up the mode control panel (MCP) for takeoff.
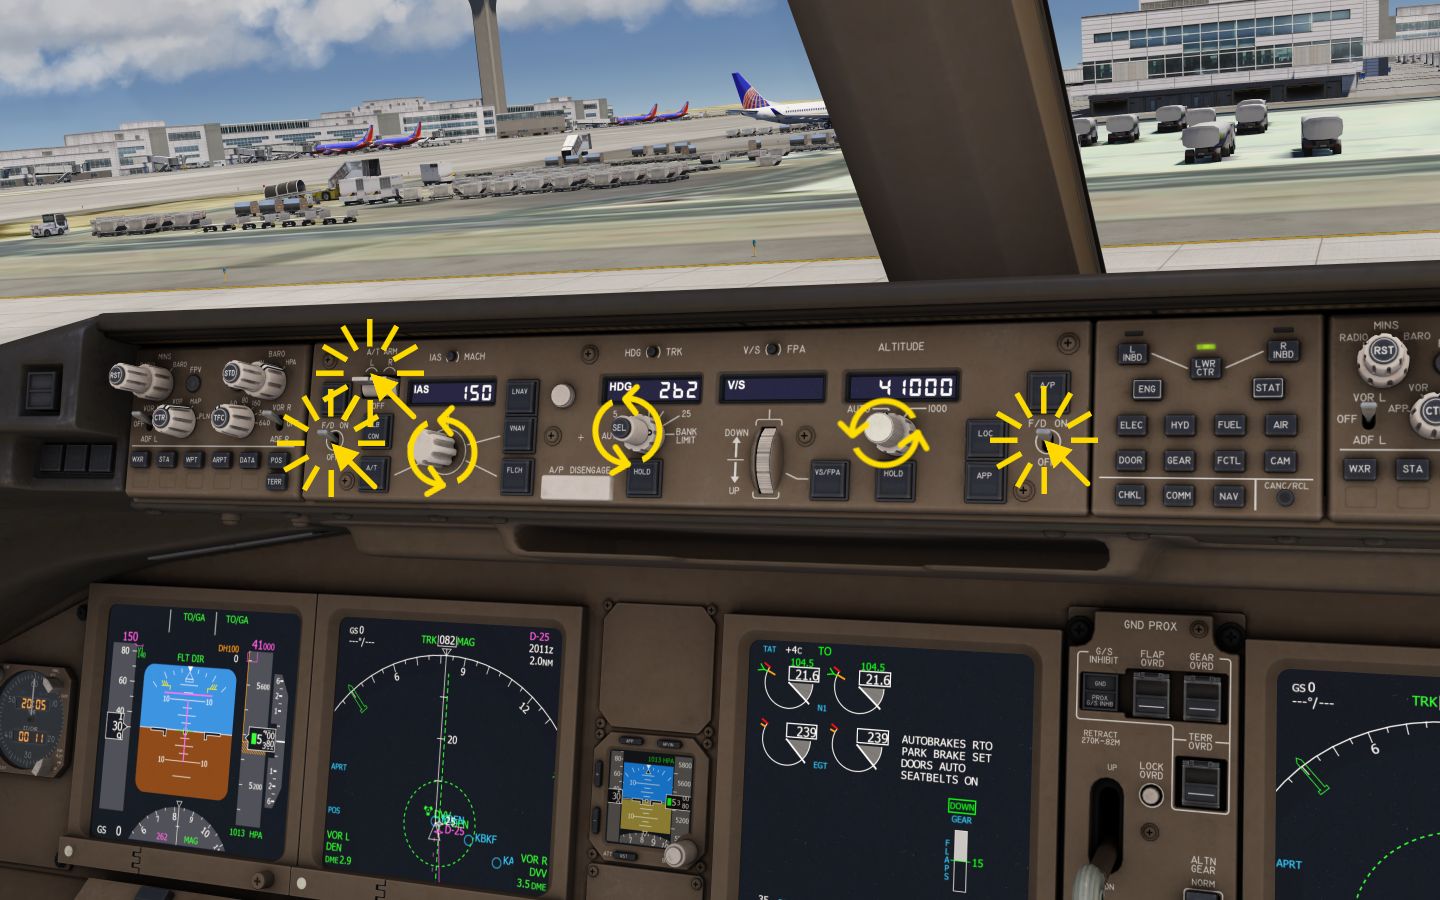
- Start by selecting the flight directors (F/D) to ON for the left and right side.
- Arm the autothrottle (A/THR) by setting the autothrottle switch to the upper armed position.
- Change the selected airspeed (IAS) to the V2 speed 150. You can see your current V2 speed by opening the CDU TAKEOFF REF page, which is displayed per default.
- Rotate the selected heading (HDG) to the runway heading, in this case 262°.
- Change the selected altitude to at least 1000ft above field elevation. We're going to set the cruise altitude right away, 41000.
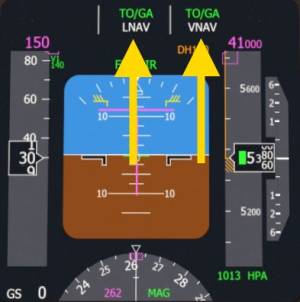
- Press the LNAV and VNAV button to arm the lateral and vertical guidance after takeoff.
Before Start
Before Start Checks
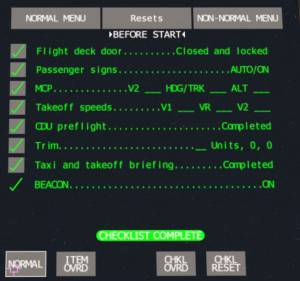
We're going to use the electronic checklists in the B777.
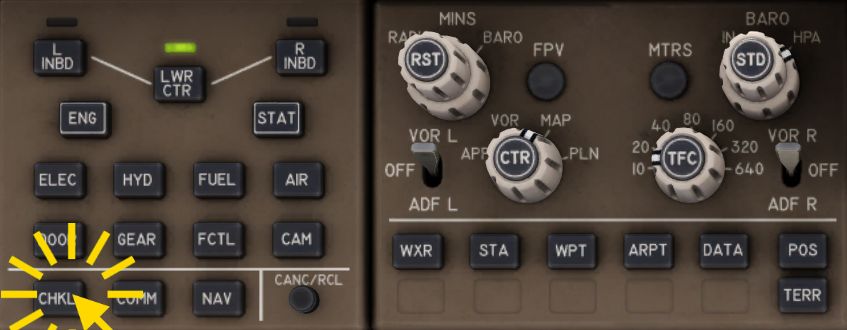
- Open the checklist page by pressing the CHKL button
Note: The following interactions are temporary solutions. This will probably change with upcoming updates.
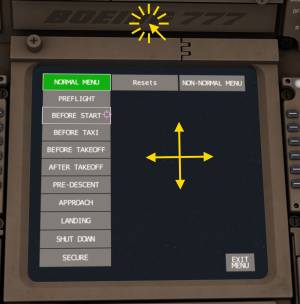
Move the mouse cursor over the lower center screen and hold down the left mouse button to move the magenta cursor on the display. To perform a click action on the screen click the Boeing 777 logo above the screen.
On a touch device simply touch the screen and drag the cursor that way. In VR you'll have to use a grab gesture.
- Move the magenta display cursor over the NORMAL MENU button in the top left corner of the screen.
- Click on the Boeing 777 logo to click the button on the screen
- Move the magenta display cursor over the BEFORE START button and click it (via B777 logo)
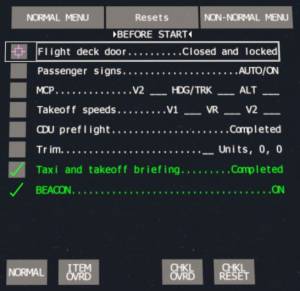
The cursor should move to the first unchecked item automatically.
- Perform the highlighted checklist item
- Click the B777 logo to check the item in the electronic checklist
- The cursor automatically advances
- Keep going through the checklist until the cursor jumps to the NORMAL button.
- Press the NORMAL button to see the next checklist
If you want to go back or open a different checklist you can also use the NORMAL MENU.
Complete the >BEFORE START< checklist
The MCP (mode control panel) was just set up in the previous step. We used V2 152, HDG 262, ALT 41000
Takeoff speeds are visible on the TAKEOFF REF page
- Click the INIT REF button on the CDU.
- If the CDU doesn't display the TAKEOFF REF page you have to select the INDEX option and then select the TAKEOFF REF option.
The TAKEOFF REF shows us the v-speeds: V1 135, VR 140, V2 150. Keep this page open.
The CDU preflight was done at the beginning or skipped by using the Aerofly FS route planner.
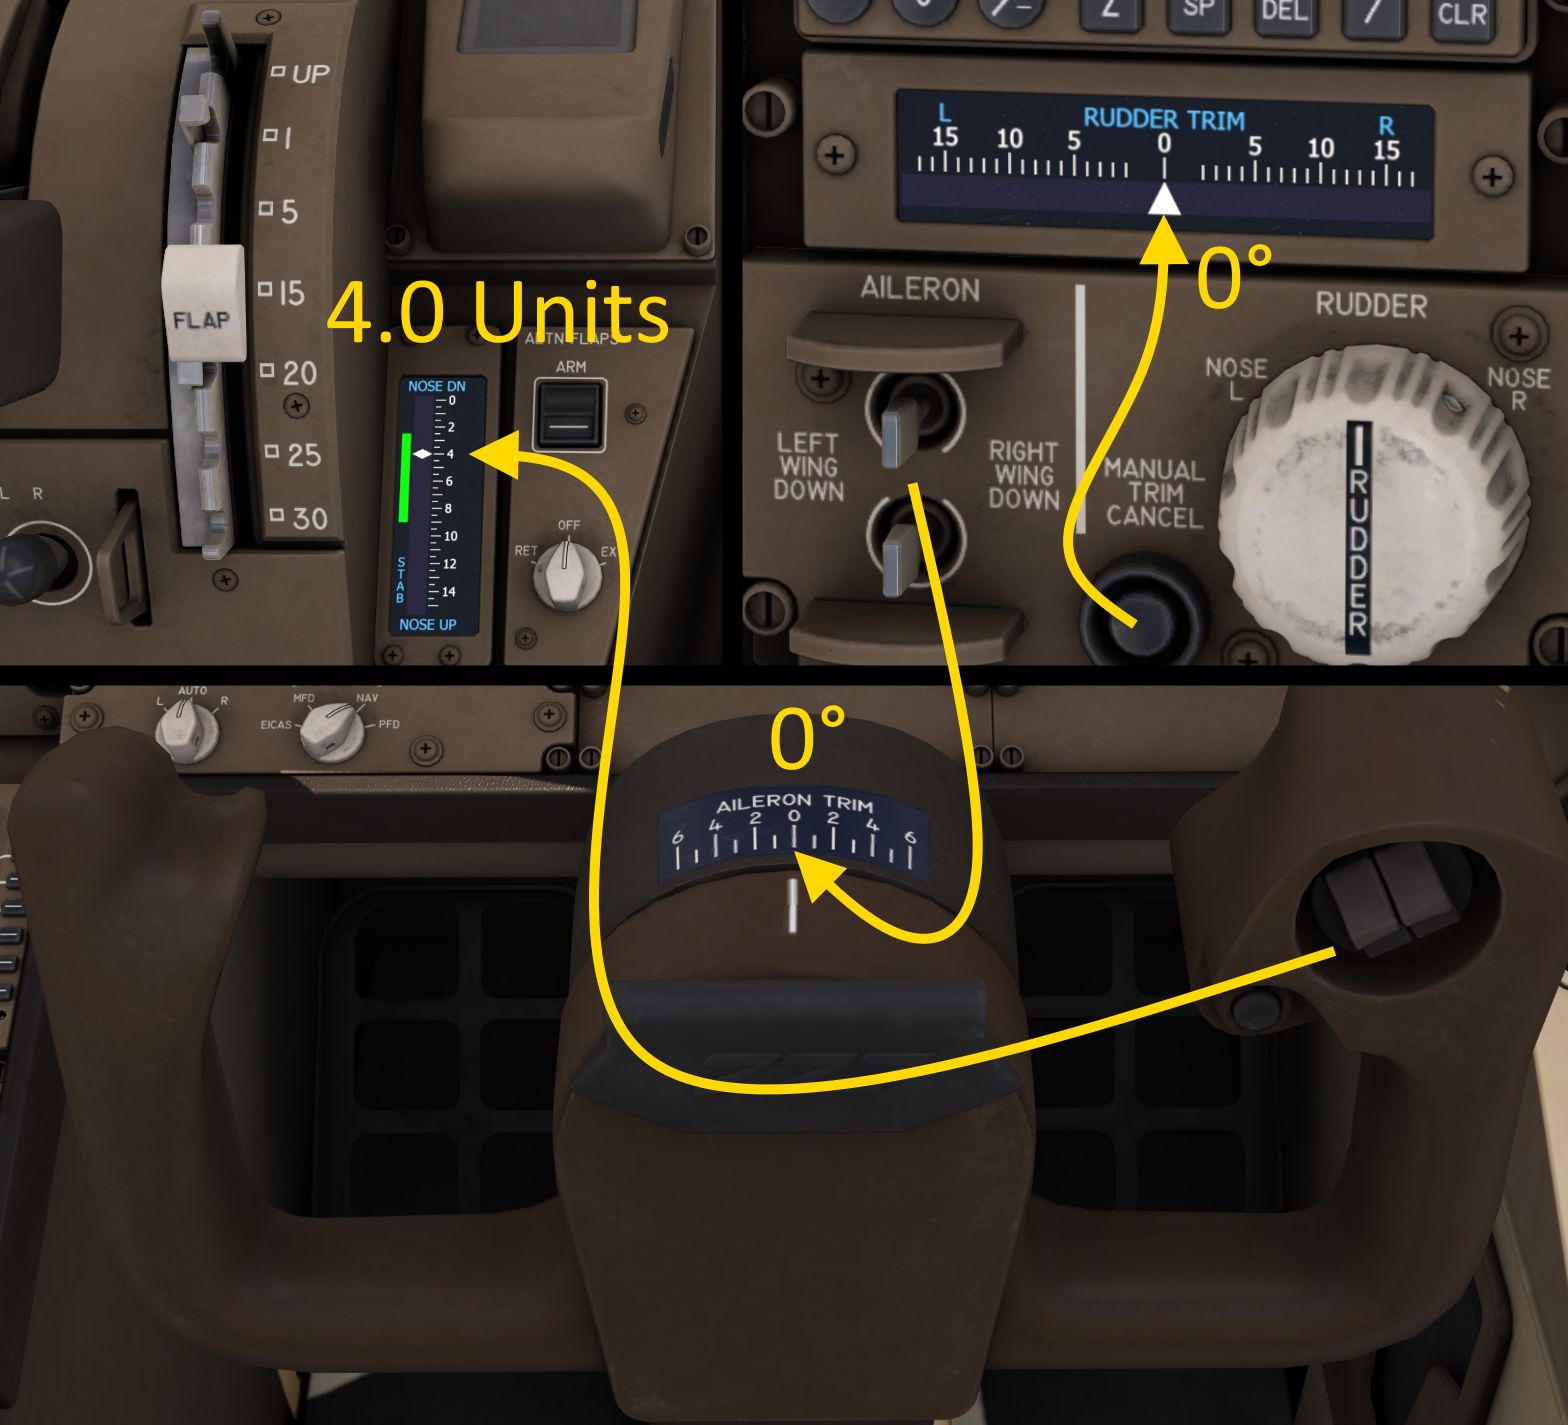
Pitch trim will be 4.0 units. Use the alternate pitch trim lever on the center console or the pitch trim switches on the yoke or your assigned commands to change the pitch trim to 4.0. The trim is already at that setting per default. Rudder and Aileron trim should be zero.
- After completing the checklist click the NORMAL button.
Before Taxi
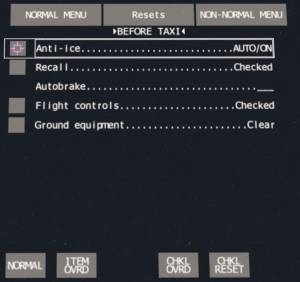
The >BEFORE TAXI< checklist should open automatically on the electronic checklist page. Otherwise you can select it from the NORMAL MENU.
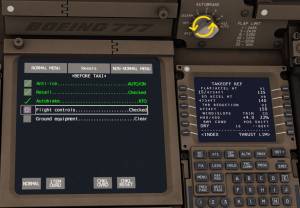
- Complete the BEFORE TAXI checklist now.
- Keep pressing the B777 logo to advance the cursor and perform the actions that are displayed.
- Set the autobrake to the rejected takeoff position (RTO)
- Perform a flight control check
- Set flaps to 15 units.
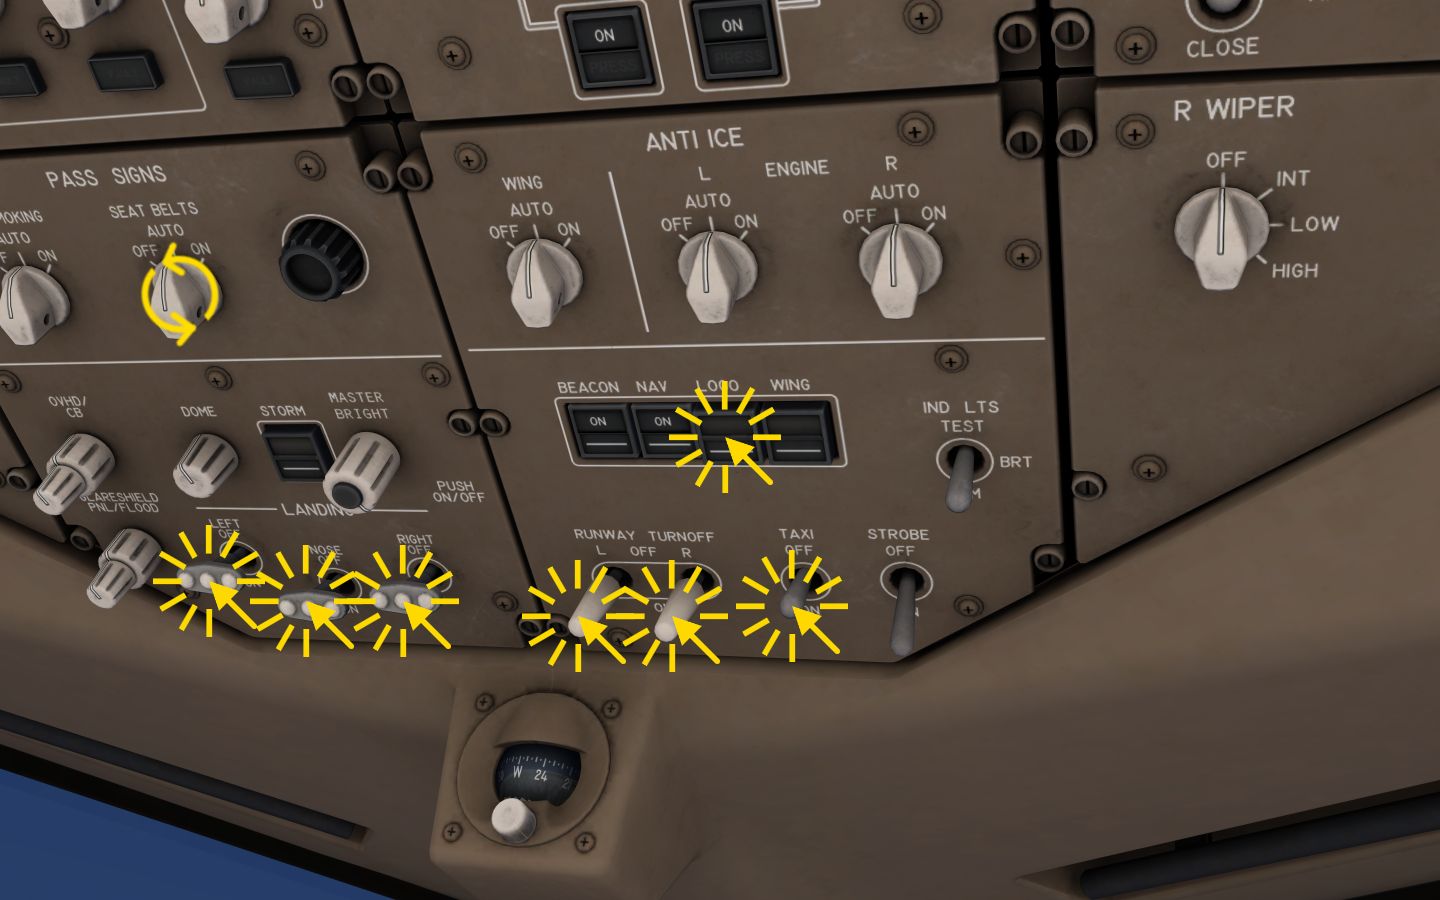
- Turn on the taxi light
Taxi
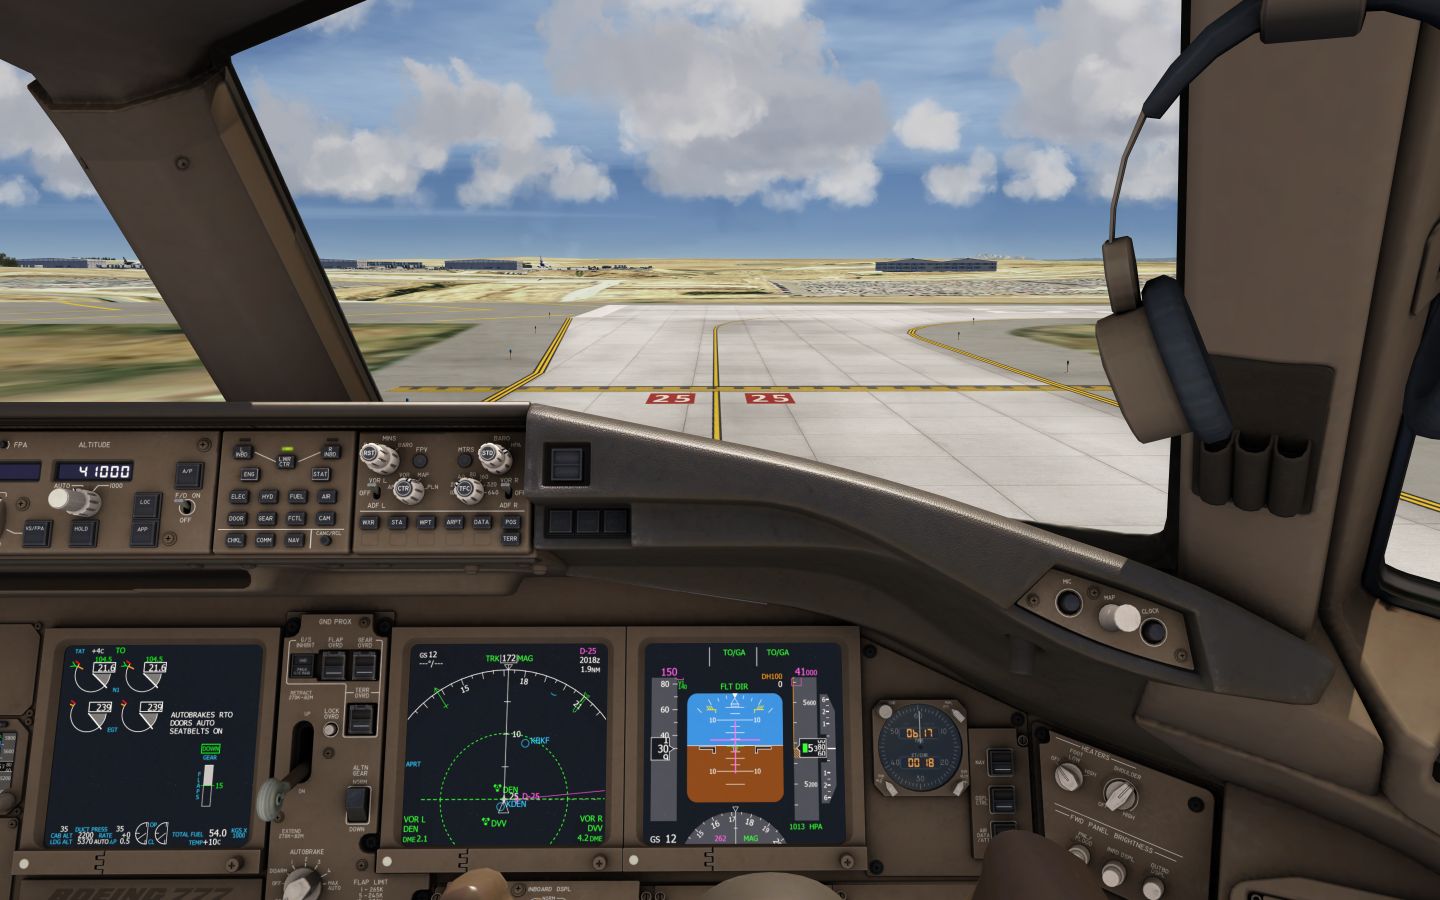
Release the parking brake and advance the thrust levers a bit to start rolling. Make two right turns and one left turn and head south towards the runway 25. Stop in front of the runway at the hold short lines.
Before Takeoff
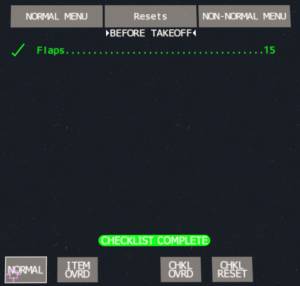
Let's quickly go through the before takeoff checklist:
- Flaps set to the takeoff position. We're planing to use flaps 15 and they are indeed set for takeoff
Line up on the runway now.
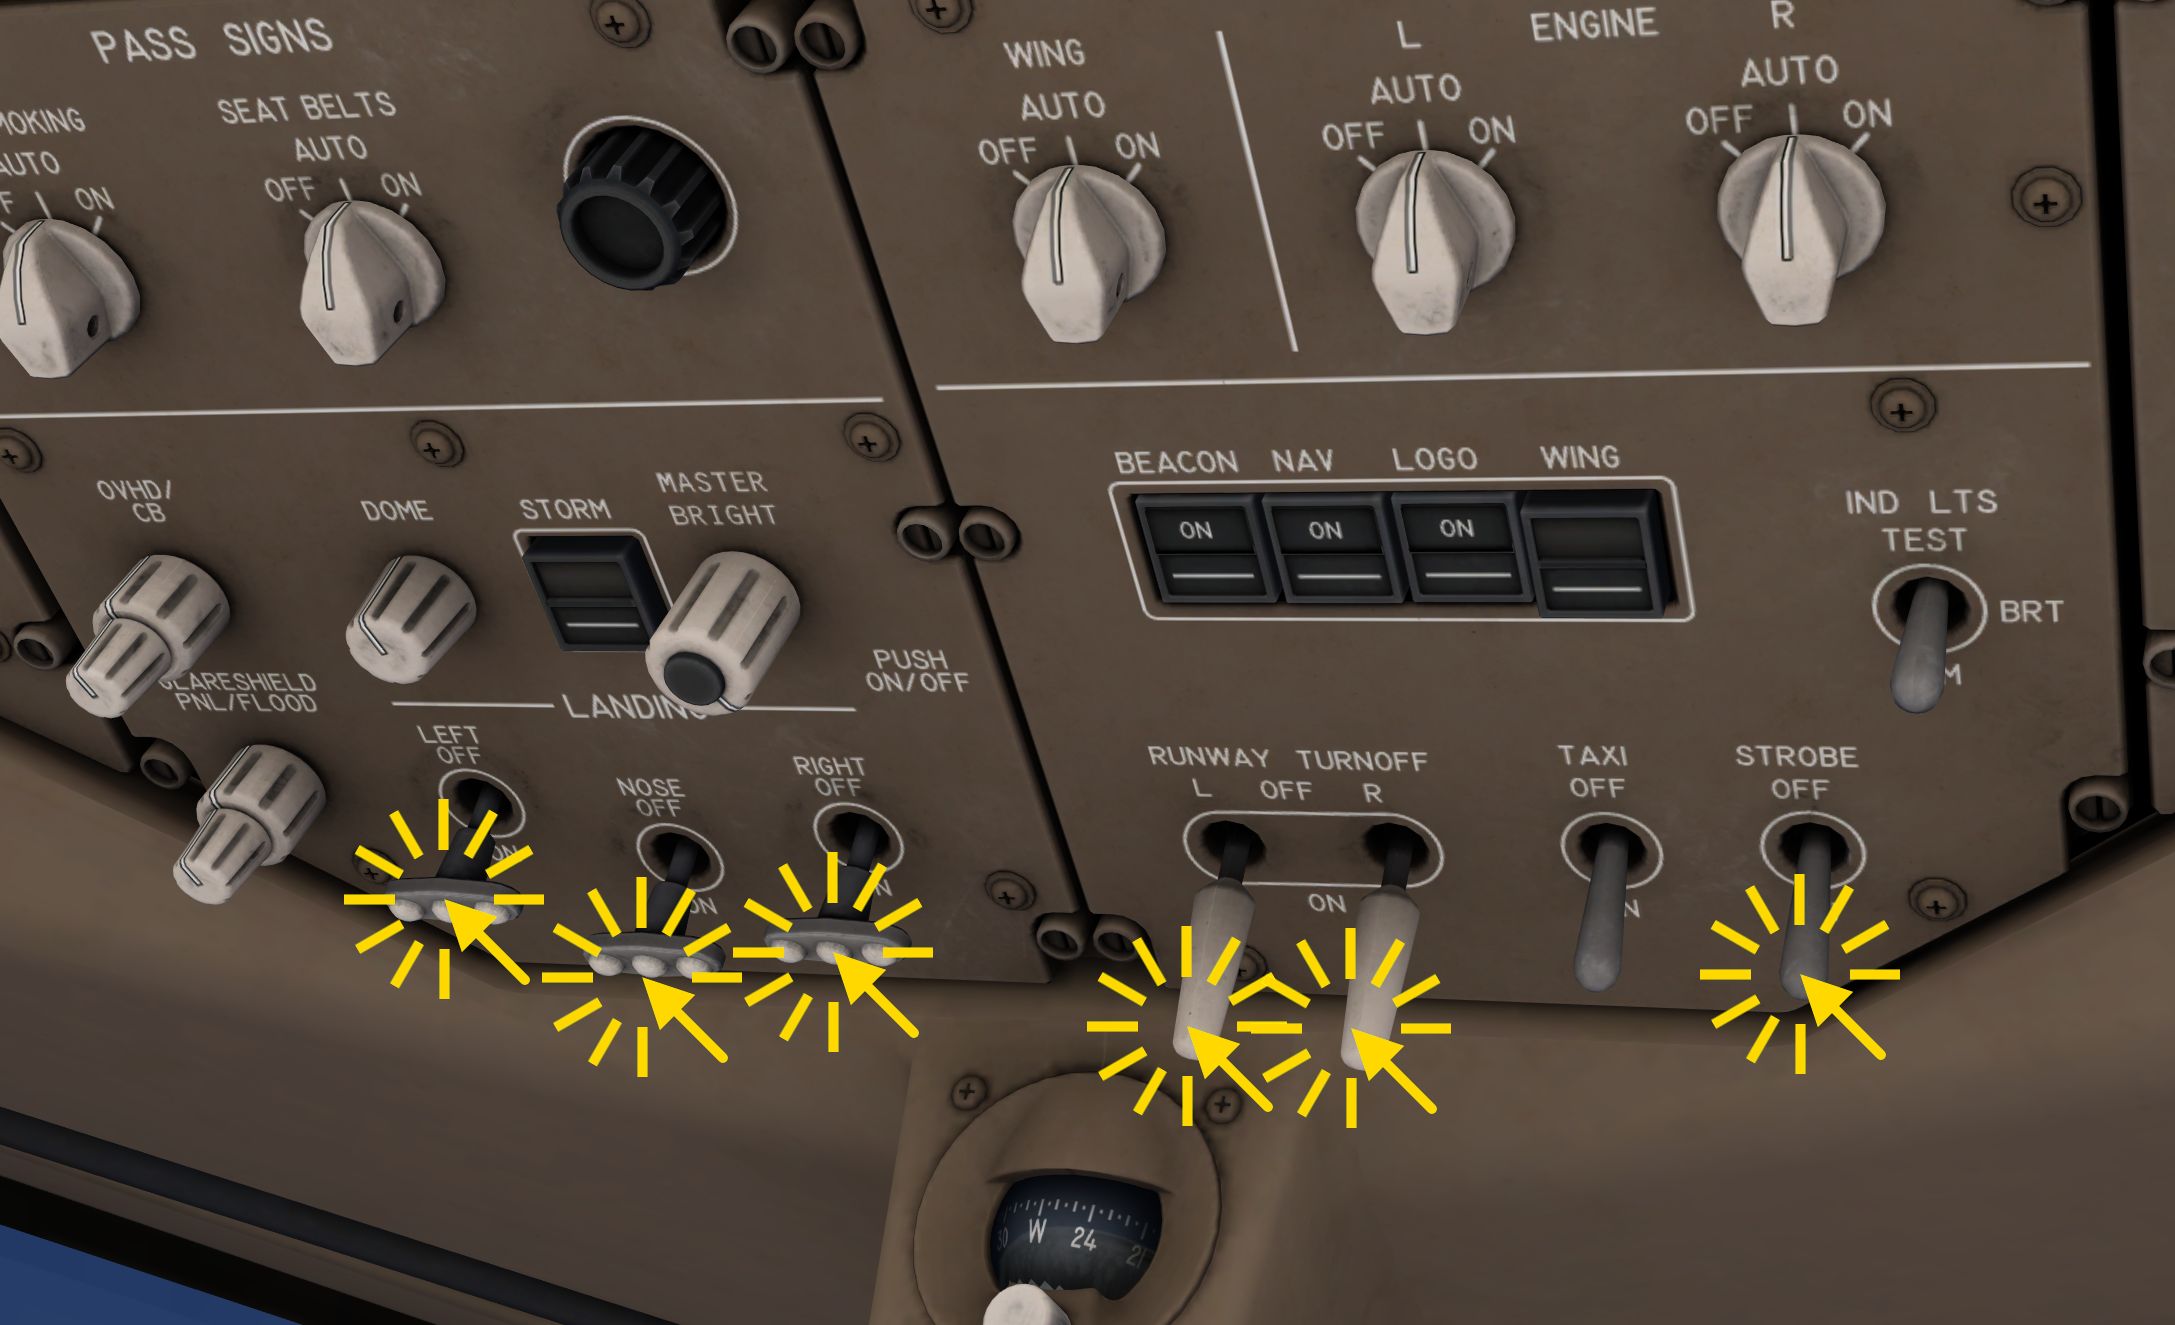
- Set the landing lights on.
- Set the runway turn off lights on.
- Set the strobe lights to on.
Takeoff
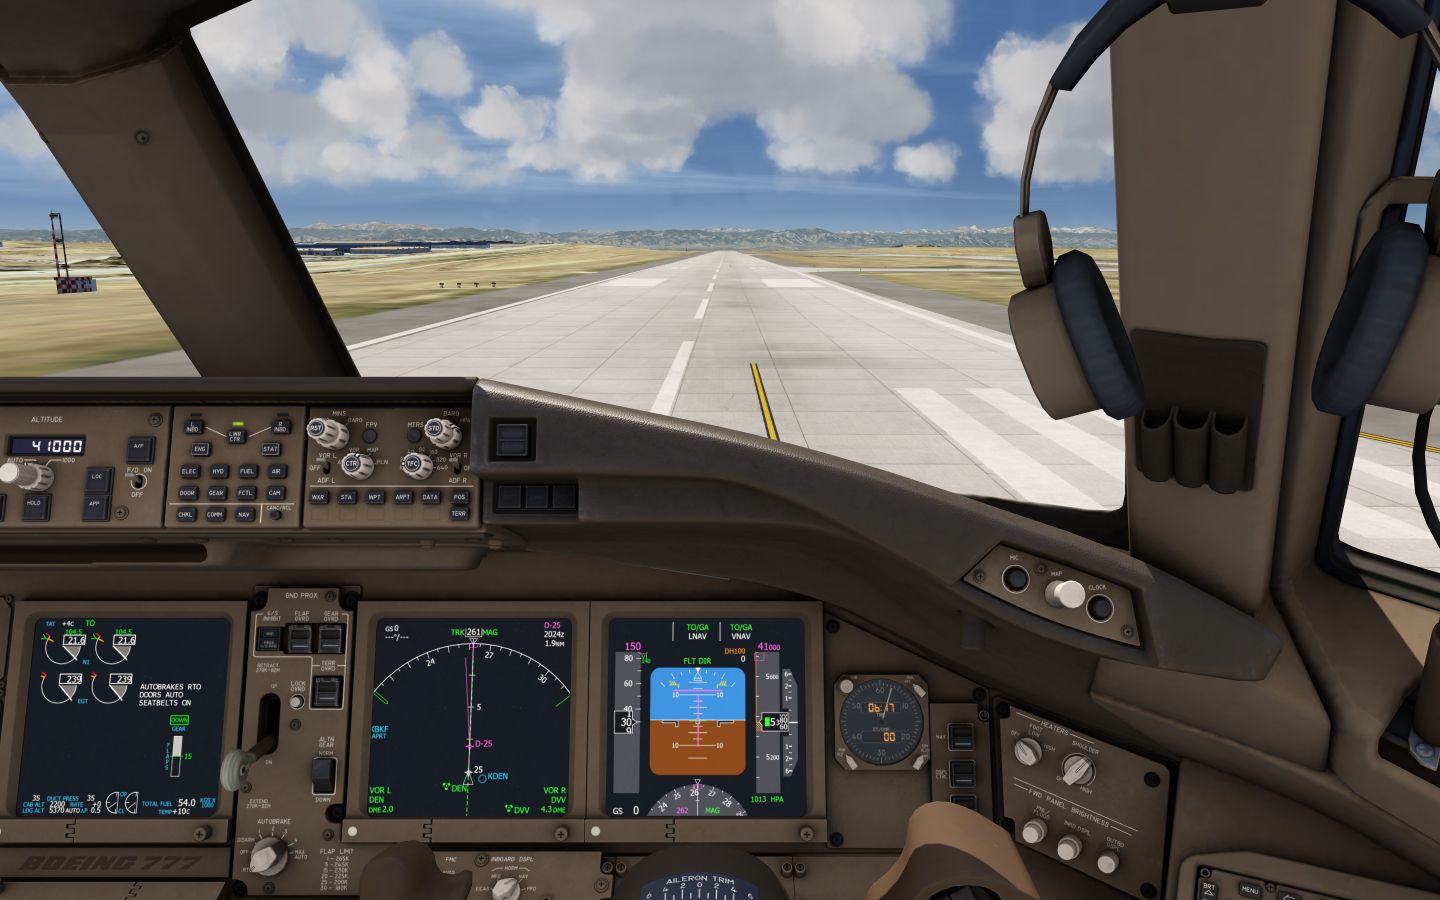
Let's take off.
- Advance the thrust levers to roughly 50% N1
- Wait until both engines have spooled up to the that target to avoid asymmetric thrust
- Press the TOGA buttons on the thrust levers or use your assigned TOGA buttons.
- Monitor how the autothrottle advances the thrust to the selected takeoff thrust limit
The aircraft accelerates
- Maintain the centerline with your rudder inputs
- Keep the yoke neutral
At 80kts the autothrottle mode changes to HOLD. The autothrottle is no longer powered and you have full manual control over the thrust. Do not change your throttle levers now unless you want to abort the landing or command a different thrust.
Past V1 you're no longer able to stop on the runway, take your hands off the throttle.
Airspeed is approaching VR
- Gently pull back on the elevator, keep pulling
Eventually the aircraft lifts off and you can see a positive climb rate
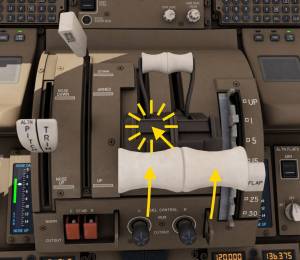
- Retract the landing gear. Default key command is 'g'. You can also click the gear lever.
- Pitch up further and follow the magenta flight director bars on the primary flight display
- At roughly 50ft LNAV should engage automatically. You can turn slightly left to stay on the flight plan when it's convenient.
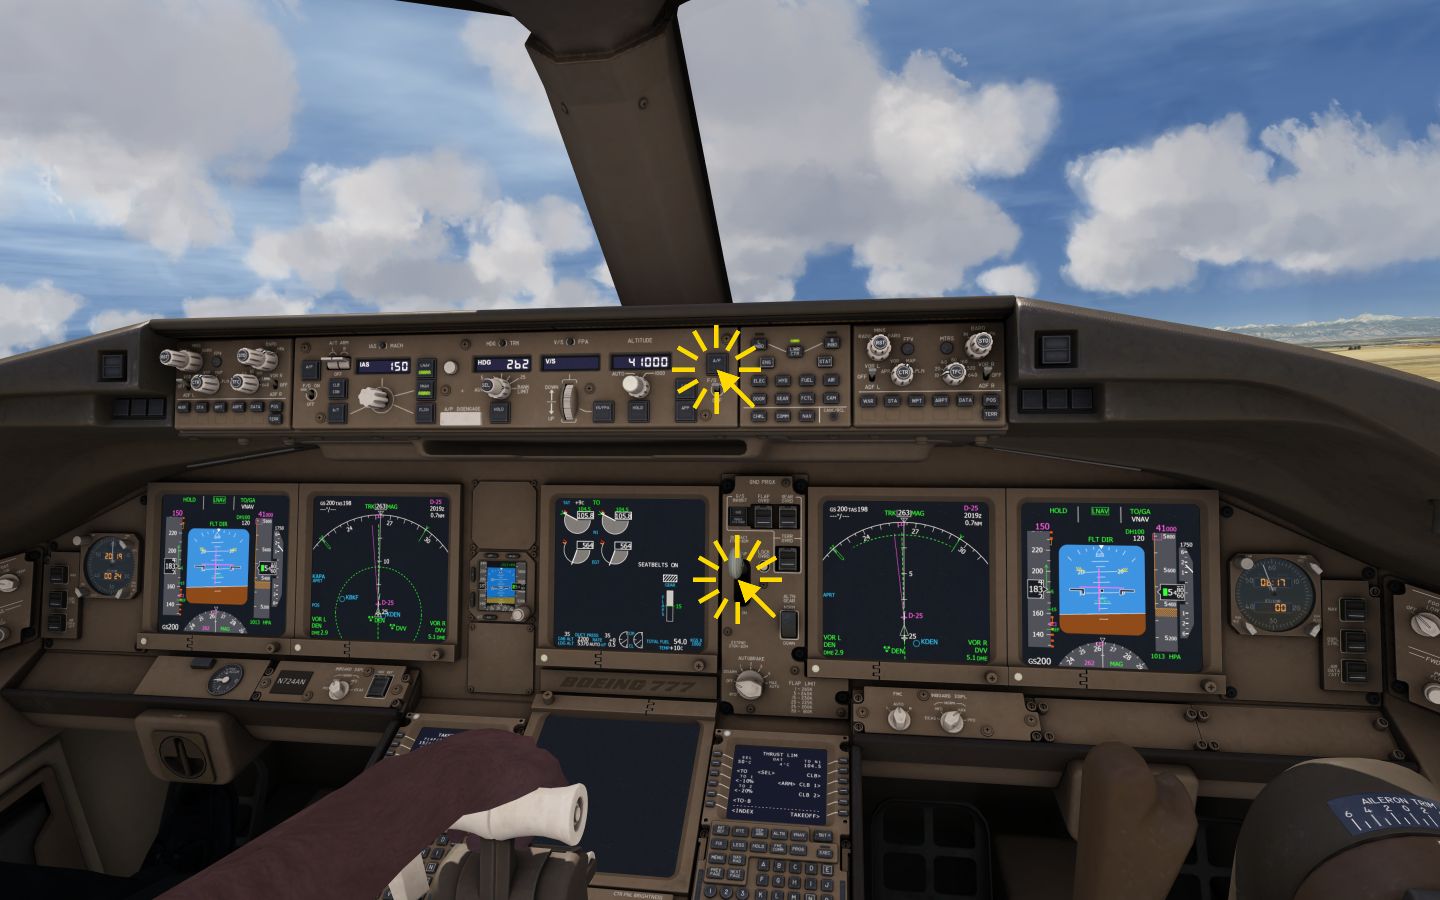
- Engage the autopilot. Default command is 'a'. You can also press either A/P button on the MCP (mode control panel).
After Takeoff
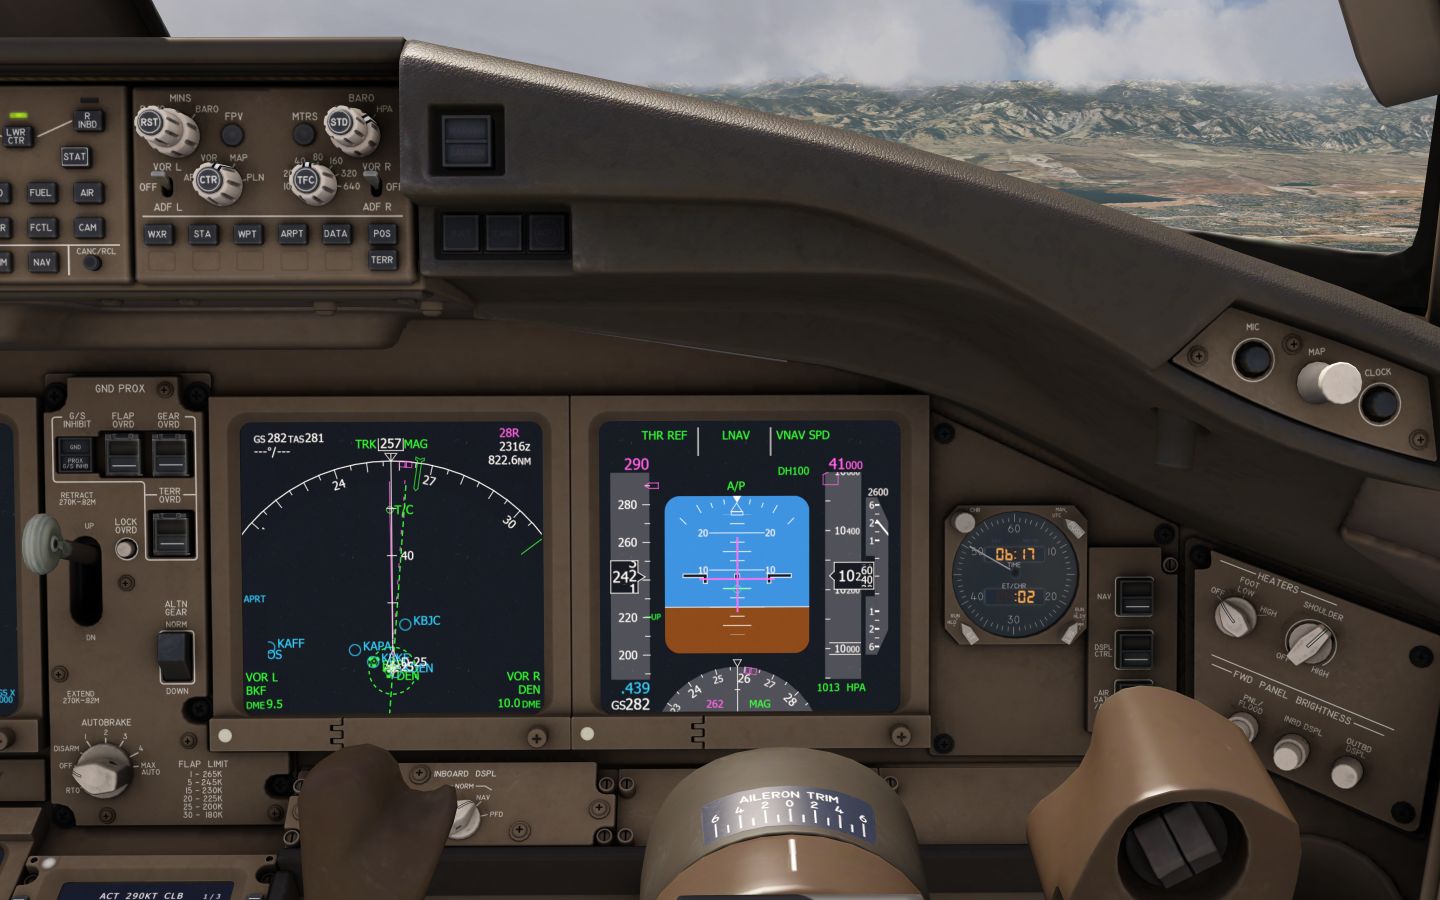
At 400ft VNAV will engage. The autothrottle turns back on in THR REF mode.
At 1000ft the autopilot pitches forward to pick up speed. The autothrottle reduces the thrust to climb. We armed CLB 1 earlier, this reduced climb thrust is now activated.
- Once you are above the speed labeled “15” you can retract flaps 15.
- When above the speed labeled “5” you can proceed to retract flaps 5.
- Above the “1” speed retract flaps to up.
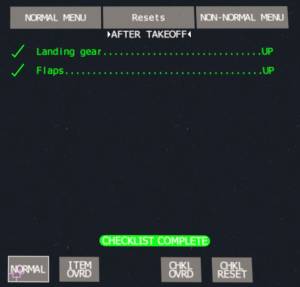
Let's quickly run the after takeoff checklist.
- Turn the taxi light off.
- Let the autopilot accelerate the aircraft to 250 knots.
Climb
During the climb we'll pass through 10,000ft and 18,000ft (transition height). The autopilot pitches forward and accelerates the aircraft to climb speed.
At 10,000ft
- Turn the external lights off. (Leave the strobe lights on)
- Turn the seat belt signs to off.
Transition Altitude
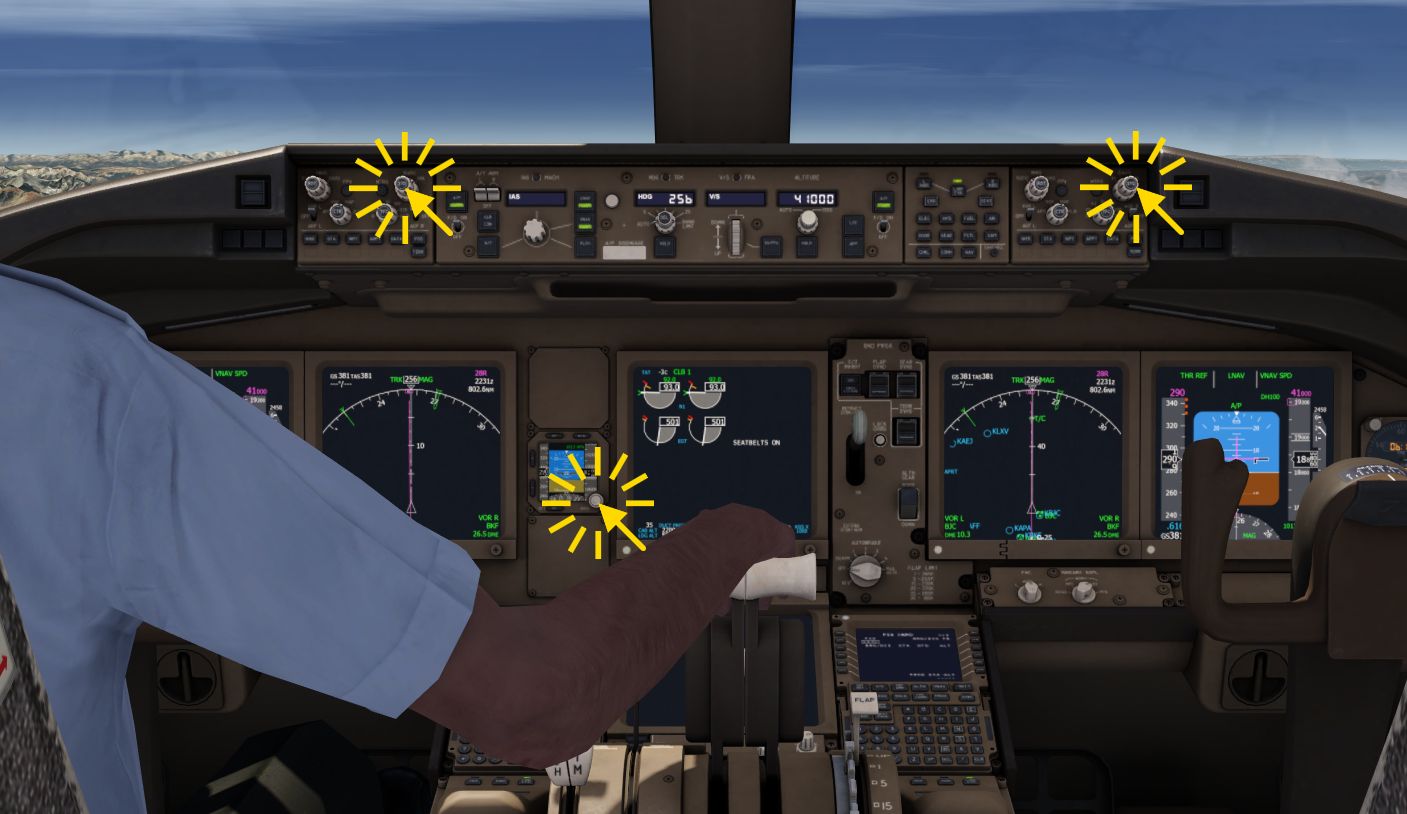
Reaching 18,000ft (transition altitude in the U.S.) we're switching all three altimeters to standard pressure
- On the left and right EFIS control panels push the STD button
- On the integrated standby flight display (ISFD) (small backup display) use the pushbutton on the set knob to set the pressure to STD.
Cruise
Sit back and relax?
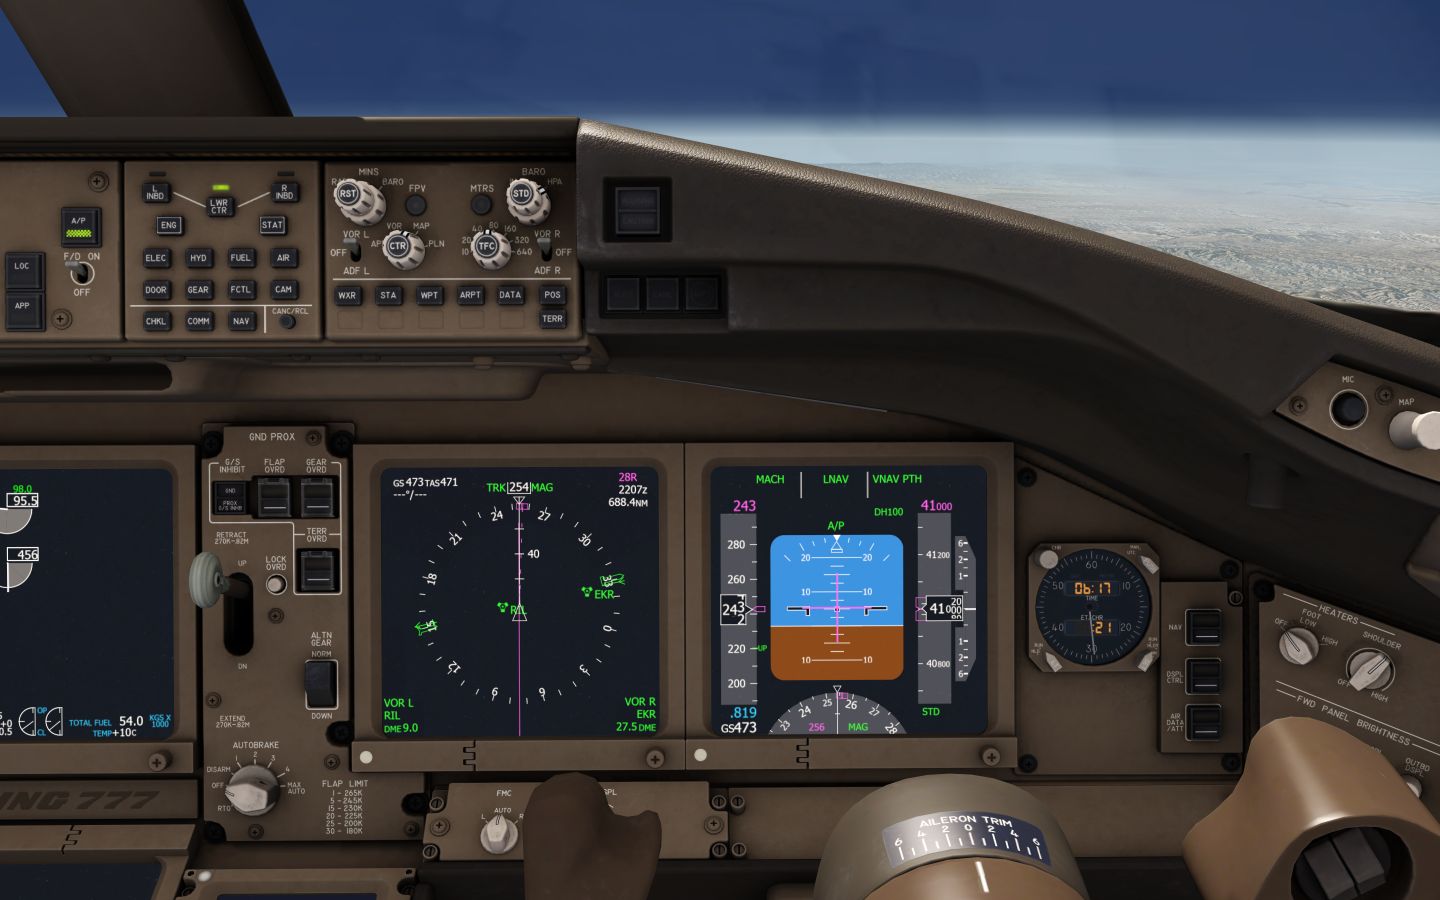
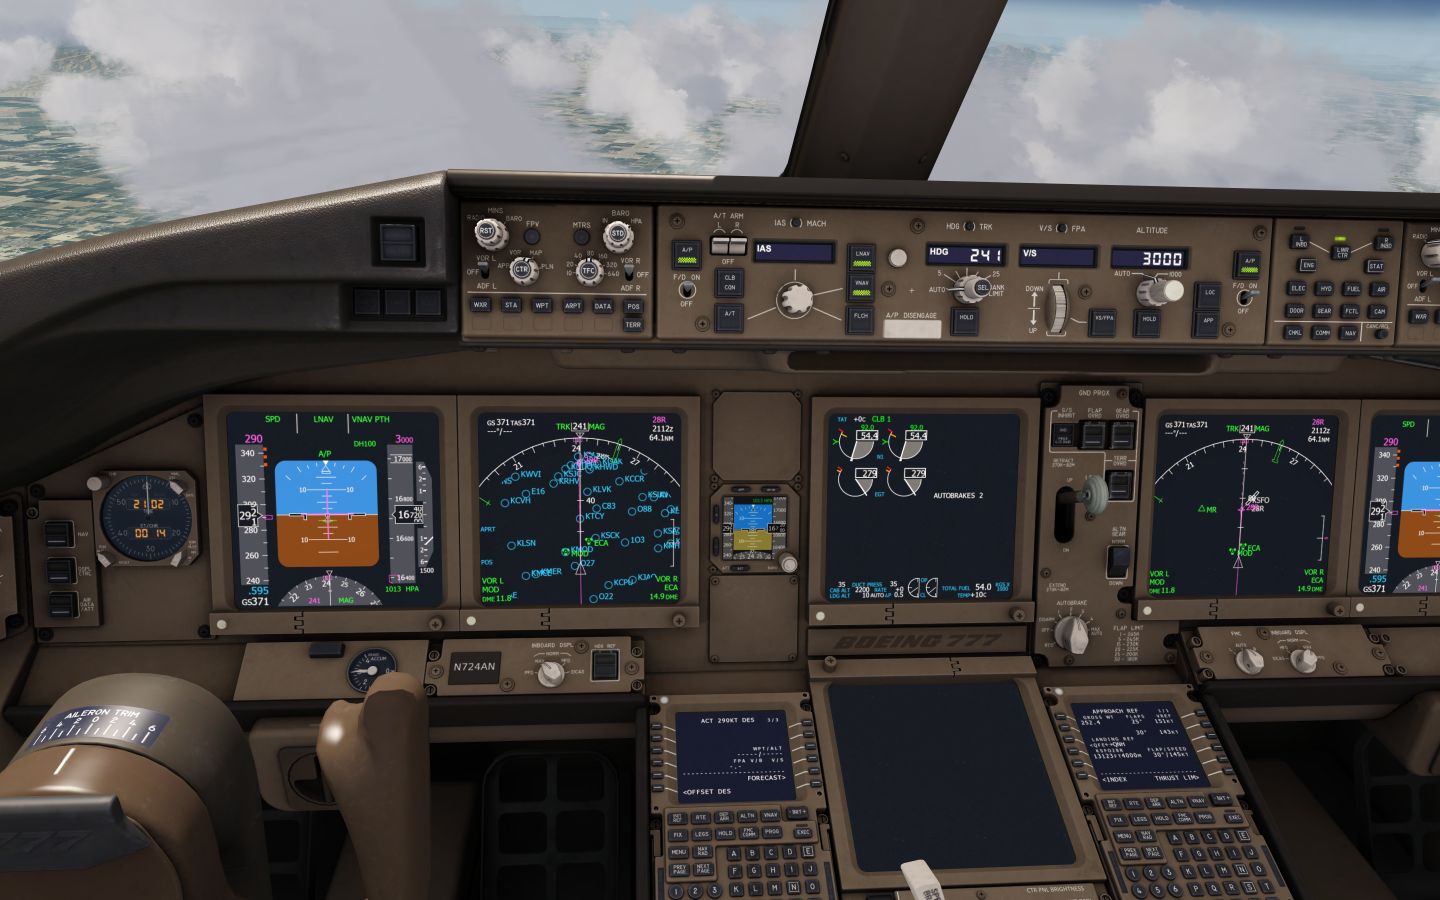
With LNAV and VNAV engaged the autopilot will follow the flight plan and also level off at the selected cruise altitude of FL410. There is no action required at this point except monitoring the flight progress.
Or just teleport?
You can go back to the main menu now and open the location dialog. Zoom out on the map and drag the map across so that you see the route up ahead.
Click on a point east of the airfields Lee Vining and Bryant Field. In case that you're not already at 41,000ft drag the altitude slider on the right to set 41,000ft. Drag the heading to line up with the route.
Resume the flight and immediately press 'a' to re-engage the autopilot. LNAV/VNAV should engage right away and after a short time the aircraft should stabilize itself at cruise altitude. We can now proceed with the pre-decent preparations.
Pre-Descent
VREF
The reference approach speed (VREF) will be 145 for flaps 30. You can select a different value in the CDU.
- Press the INIT/REF button on the CDU
- The APPROACH REF page should open. Otherwise use the INDEX menu as shown before.
- Verify the gross weight for landing and adjust it if needed
On the right side of the APPROACH REF page you can see suggested approach flaps and the associated VREF.
- Type in the flaps position you want to use and the approach speed, e.g. “30/145”.
- You can also pick one of the suggestions by pressing the line select key next to it. This copies the text into your scratchpad so you don't have to type everything. You can adjust the text as needed (e.g. using the CLR button)
- Insert the text into the field FLAP/SPEED
Minimums
For the decision height we're going to select a minimum radar height of 100ft. This should already be set per default. However, here is how you would adjust that setting:
On the EFIS control panel
- Rotate the MIN BARO/RAD outer ring selector to the RAD (radar altitmeter) position (or BARO for the barometric minimum)
- Rotate the inner knob to adjust the selected setting.
>PRE-DESCENT< Checklist
Let's open the electronic checklist again by pressing the CHKL button as shown before and go through the pre-descent checklist.
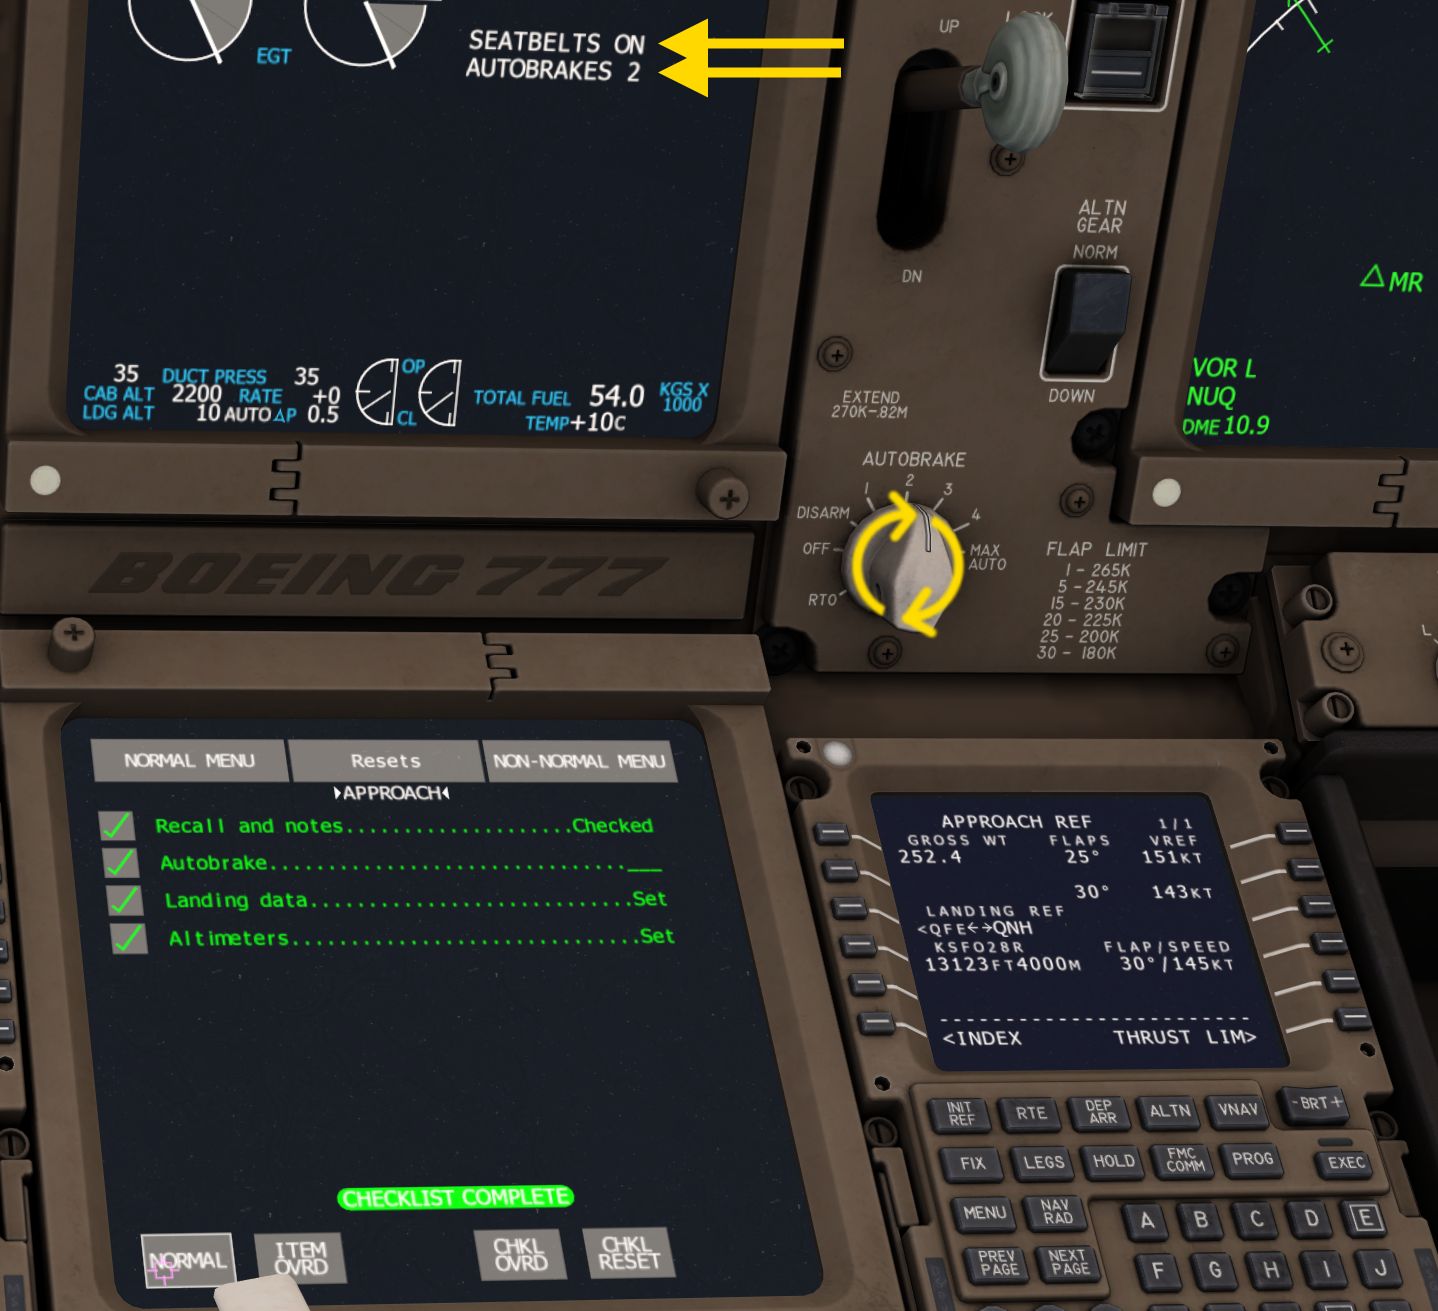
- Rotate the autobrake knob to the setting 2.
- The landing data is set, VREF 145, Minimums DH 100ft.
Click the NORMAL button on the checklist screen to advance to the approach checklist for later.
Approach briefing
We'll fly the ILS approach for runway 28L at San Francisco. The autopilot is programmed to take us down to 3000ft on LNAV to the final approach fix from where we can intercept the localizer and glide slope easily. We're already on an intercept heading at this time. We'll use the autopilot to fly the approach until about 1000ft above ground, then land manually. Wind is calm.
Descent
- Reduce the selected altitude by rotating the altitude knob on the MCP.
- Select 3000ft.
- Turn the seat belt signs on to get everyone seated and to signal the cabin to prepare the cabin for landing.
- Address the passengers that you are landing. Alternatively scream as loud as you can “WE'RE DESCENDING NOW”.
When the aircraft is flying in VNAV PTH (vertical navigation path) as shown on the PFD (primary flight display) in the top right corner, then the autopilot will automatically descent at the calculated top of descent point.
If you want to start descending immediately you can either push the altitude knob in or push the FLCH button. When you push the altitude knob in the aircraft will fly a shallow descent until it intercepts the programmed descent path again. With FLCH the aircraft will switch to flight level change and just fly towards the selected altitude with either idle thrust (descent) or climb thrust (climb, not applicable here).
In case you flew past the calculated top of descent point the autopilot switches into VNAV ALT mode. To correct this and to descent
- reduce the selected altitude and
- push the altitude knob in. Or push the FLCH button
- Consider extending the speedbrake to catch up with the pre-computed idle descent profile.
The aircraft will descent for quite a while. Monitor the vertical deviation on the navigation display and
- extend the speedbrake as needed to slow down.
- Retract the speedbrake when you notice that the autothrottle is increasing thrust.
For the majority of the descent you want to use idle thrust and as little speedbrake as possible to save fuel. If you need speedbrake that is a sign that you already wasted fuel before. If you need additional thrust during the descent it means that you waste fuel by flying lower than the most economical cruise altitude.
Note: You can also increase or decrease the speed. Push in the speed knob and rotate it to select a speed for the descent. When you fly slower you will glide further (up to a certain point). When you increase the speed you will descent steeper.
Approach
We're getting closer to our destination. It's time to prepare for the ILS28L approach into San Francisco. In the preflight we already loaded the approach with the CDU. Now the ILS frequency should be auto-tuned to 109.55 MHz and a the course should be set to 265°. On the primary flight display a white ISFO text with a DME distance should appear, together with scales for the localizer and glide slope as well as magenta diamonds for the ILS localizer and glide slope deviations.
The autopilot will level us off at 3000ft and VNAV will start reducing the target speed for the approach. The speed will now reduce quickly. We have to extend the flaps to fly this slow. On the primary flight display you will see the speeds UP, 1, 5, 15, etc. appear on the speed tape. When you fly close to one of these speeds or when the speed you should extend the next flap position. E.g. when you fly near the up speed “UP” you should extend to flaps 1. When you fly at or below the speed “1” you should extend flaps to 5.
Once a flap is extended VNAV will reduce the target speed further to slow us down. But the autothrottle will always keep us at a safe speed. Continue to extend flaps to the position 15.
- Extend the flaps either by grabbing the flap handle with the mouse, vr-hand controller or by dragging it on a touch screen
- OR push the assigned buttons (default key 'f' for flap extension).
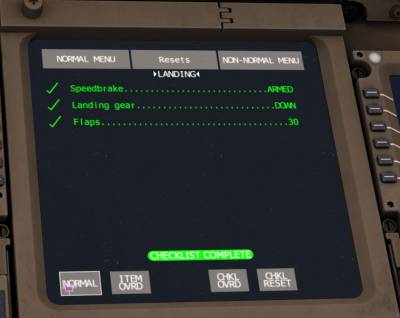
Let's verify that we didn't forget anything with the electronic approach checklist. Open the electronic checklist again by pressing the CHKL button as shown before. Press the NORMAL button once all items are completed to advance to the landing checklist for later.
Once ISFO is identified on the PFD and the received signals appear to be valid
- Push the APP button on the MCP. This arms the localizer and glide slope capture for the autopilot
Landing
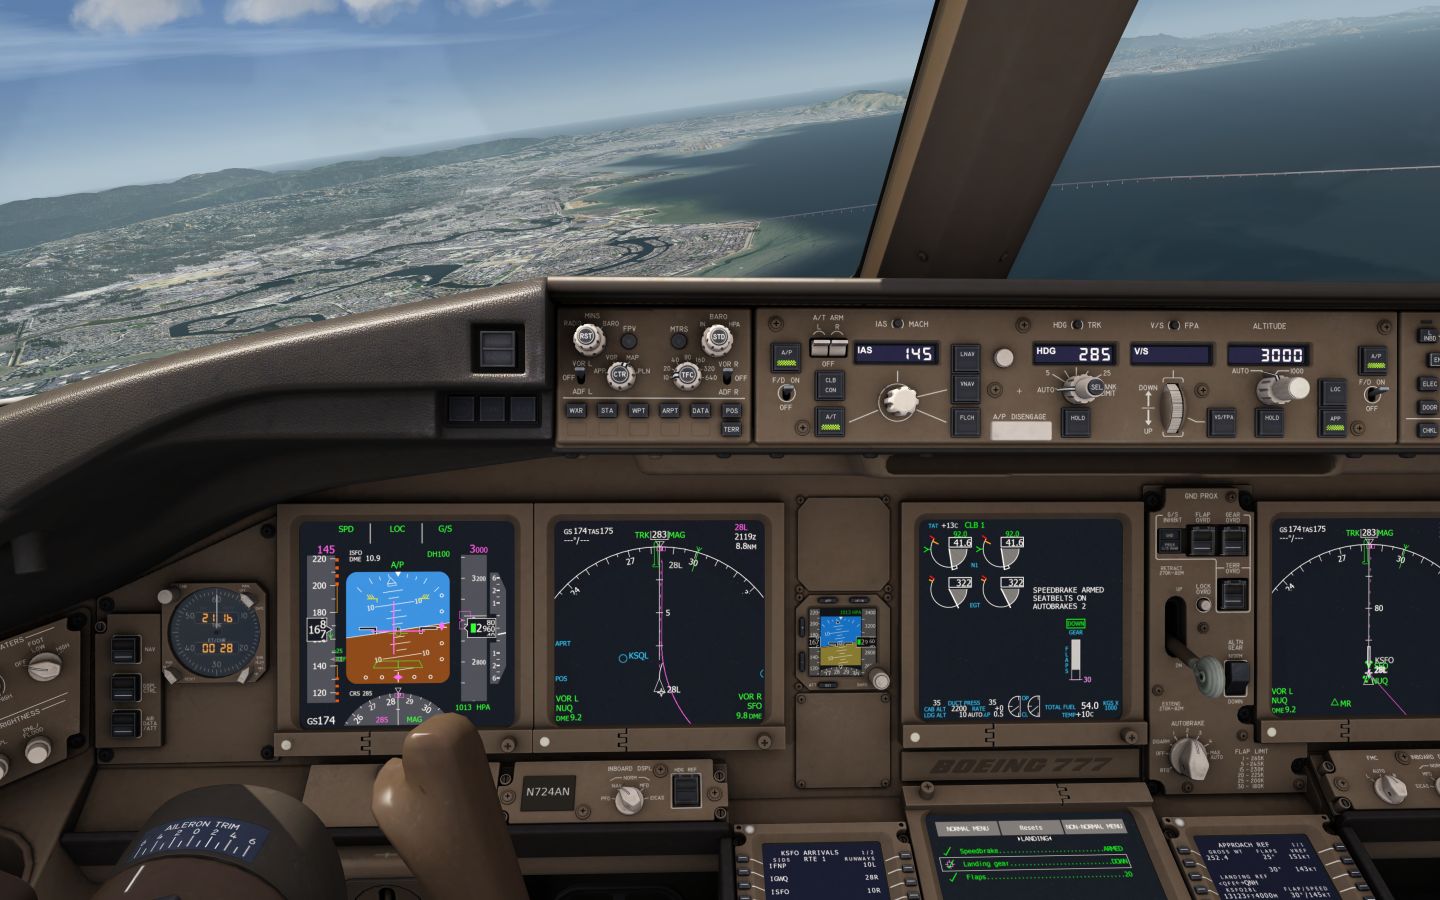
When the aircraft path intercepts the localizer signal the autopilot lateral mode will change to LOC. The autopilot turns the aircraft onto the approach course and tracks the localizer.
After the localizer is captured the glide slope can also be capture when it's intercepted. The vertical mode will change to GS.
USE CAUTION
Once the glide slope captures the autopilot selected speed will no longer be managed by the VNAV. You have to manually adjust the speed.
- Select the approach reference speed of 145 knots with the speed knob on the MCP.
- Select gear down to decelerate quicker.
- Extend flaps all the way to 30. Either grab the flap lever and drag it down or use the assigned keys (default 'k').
- Make sure that the autothrottle is still active and that SPD is announced in the top left corner of your PFD (primary flight display)
When the landing gear is down
- Arm the ground spoilers by clicking or tapping on the speedbrake lever. You can also grab the lever and pull it a tiny bit to set it to the ARM position.
- Check that SPEEDBRAKE ARMED is written on the EICAS screen.
- Set all external lights on (except wing lights).
The aircraft should be on localizer and glide slope at this point and the autopilot is still flying. We're cleared for landing.
Landing checklist
The landing checklist should be completed at this point. We'll read through to make sure. After completion hide the checklist again for landing by pressing the CHKL button again.
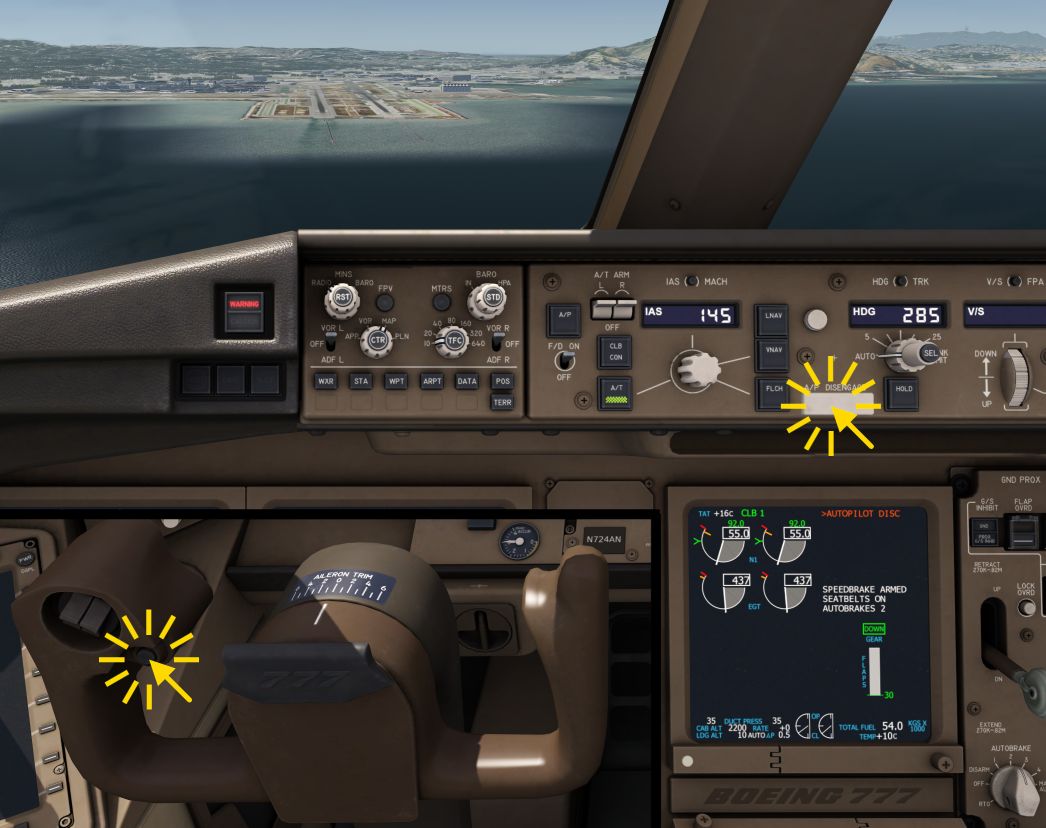
With the localizer and glide slope captured the autopilot will fly us all the way to touch down. But we won't let the airplane have all the fun and disconnect the autopilot when the approach looks stabilized, e.g. at 1000ft above the runway.
Fly the aircraft to the runway 28L touch down point - the big white rectangles on the runway, next to the white/red papi lights. The aircraft should be well trimmed so that only small corrections are needed.
After touch down
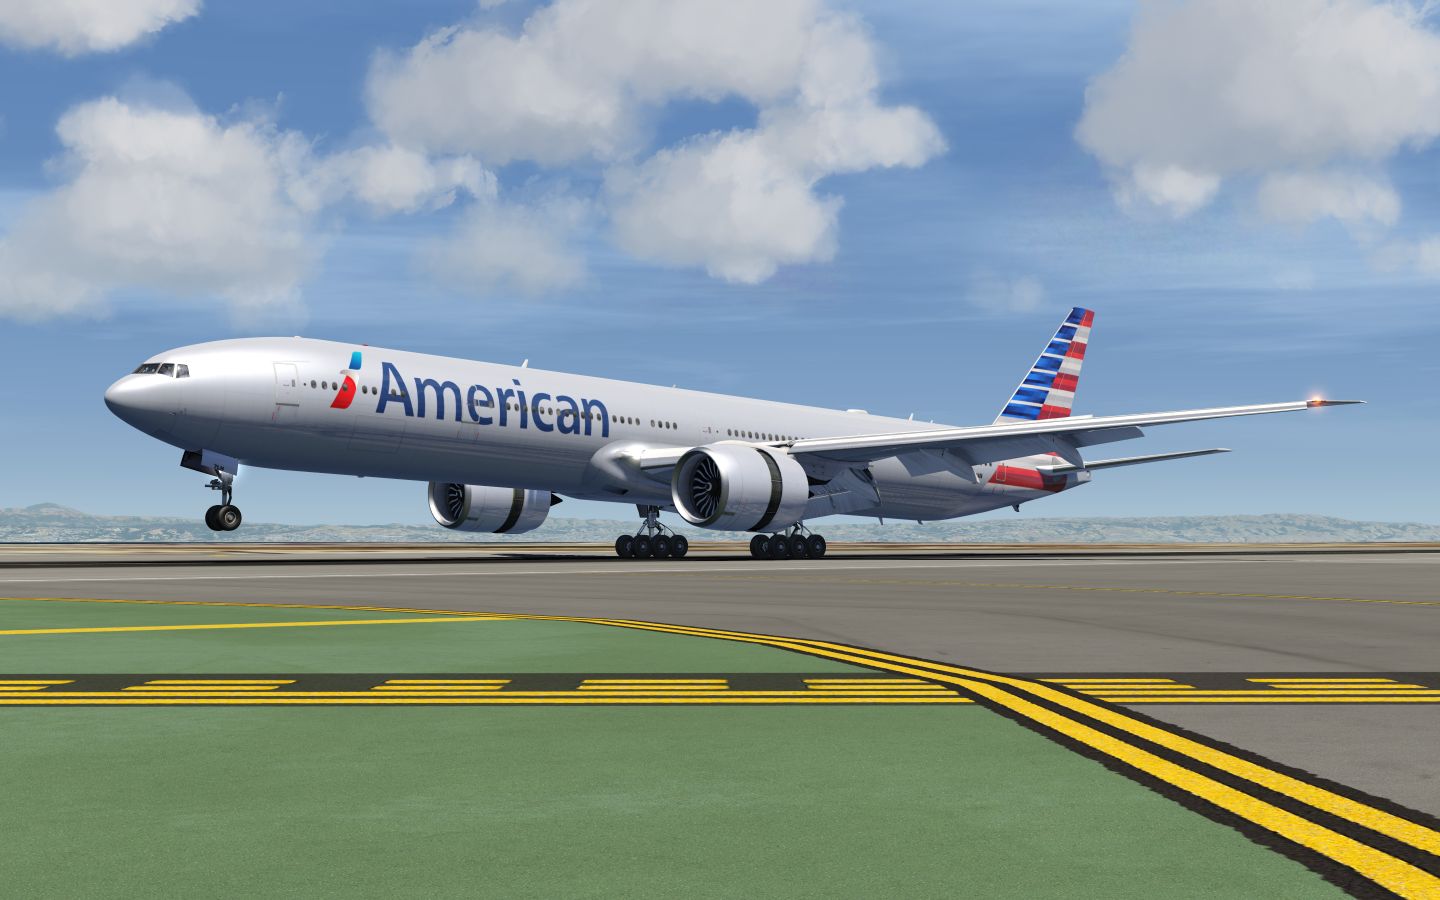
- immediately apply reverse thrust to reduce the wear on the brakes and to help us slow down quicker.
- At 70 kts slowly reduce the reversers, stow them below 60.
- Cancel the autobrake by pushing the assigned key briefly (default key is 'b' for brakes) or apply pressure to your rudder pedal brakes. You can also rotate the knob to DISARM or OFF and you could also fully retract the speedbrake lever. You can also briefly advance the thrust levers to automatically retract the lever.
Vacate the runway to the left at the next convenient high speed taxiway.
Go-Around
In case of a go-around perform these steps:
- Push the TOGA button on the thrust levers as shown for the takeoff
- Push it a second time if you need extra thrust
- Pitch up gently but still quickly to start climbing again
- Retract flaps to position 15.
- Disarm the spoilers.
- Select an appropriate go-around speed in the MCP, e.g. 200kts.
- Engage the autopilot and either continue on the go-around track that was automatically set when you pressed the TOGA buttons or press the HDG HOLD button to stay on current heading or use HDG SEL to turn to a specific heading.
- Let the autopilot capture the go-around altitude.
- Decide further actions.
After landing
Exit the runway to the left once the speed has decreased enough.
- Turn off the landing lights and runway turn off lights, make sure the taxi light stays on.
- Retract the flaps.
- Move the speedbrake lever to the down position.
- Stop the timer.
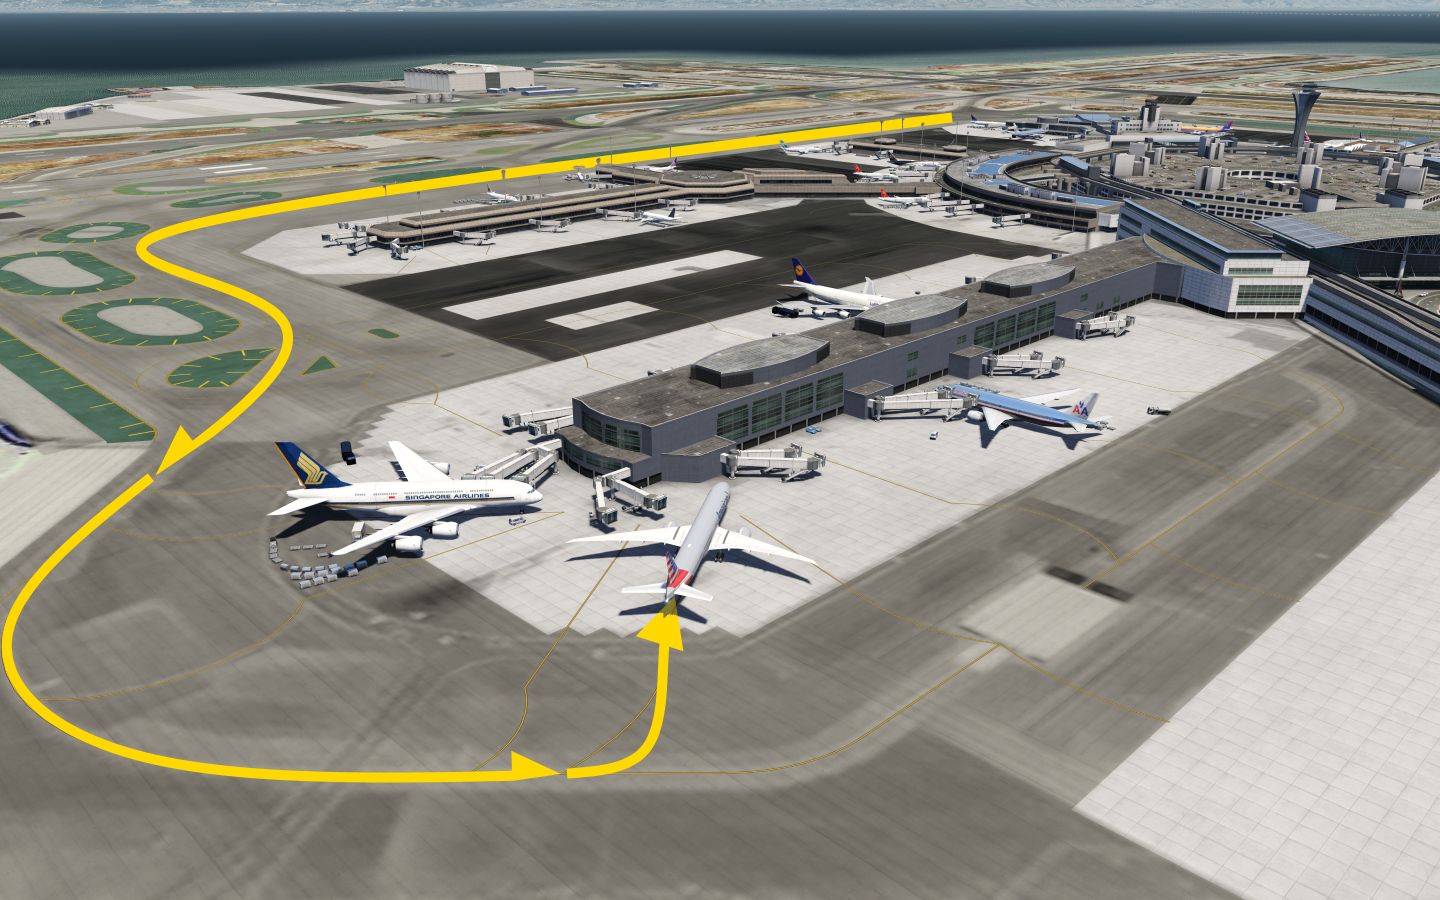
Take a right and continue in the same direction that you landed. Then turn left at the end of the terminal buildings, follow the taxiway all the way to the end where it bends around behind the end of the terminal buildings and the parked Airbus A380.
Find a good parking spot, e.g. the one next to the A380.
This concludes the Boeing 777-300ER flight tutorial.

