The purpose of this guide is to help people who would like to try Larry's Lynx Mk 7 chopper but are intimidated by all the buttons.
larrylynx Please do not read this article, it will make you cry or rage.
Our goal is to get the chopper started and flyable with as few steps as possible.
Once you've achieved that, the mystery and magic is broken, and you should then read the manual cover to cover a few times and follow the startup instructions properly.
For now, we're in that scene from movie Jumanji, where The Rock is under fire and running toward a chopper he's never flown before. He doesn't care about breaking the machine, and has no time to test the systems first, just jump in and hope fly to safety, I mean crash softly somewhere else.
The controls we care about are located on the center consoles, mostly ceiling and floor between seats.
We must prepare these items:
1. Electricity
2. Fuel
3. Engines
4. AFCS/ASE (can fly without)
5. TANS/Doppler (can fly without)
6. Trim (can fly without)
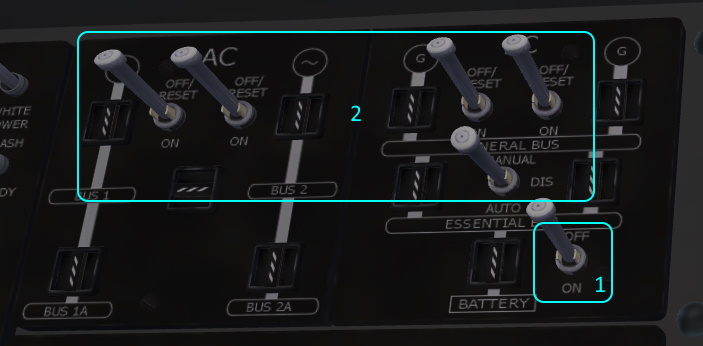
Battery
1. Battery on
2. All AC and DC on
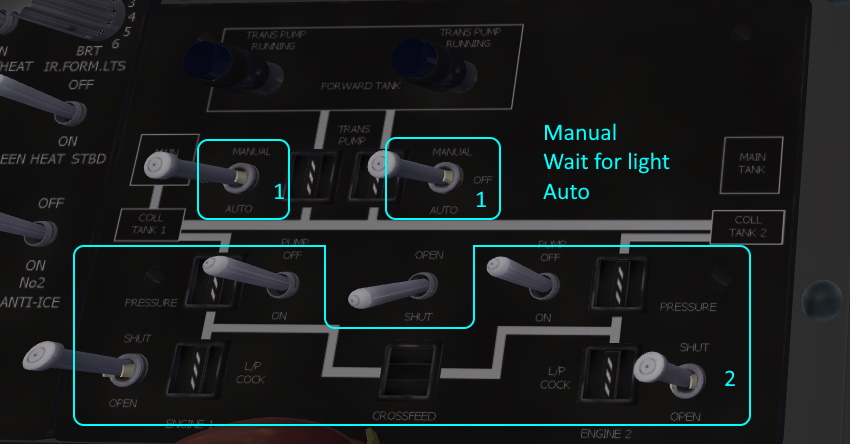
Fuel
1. Up to Manual first
Wait for blue light above
Down to Auto
(Repeat for both sides)
2. All on except crossfeed
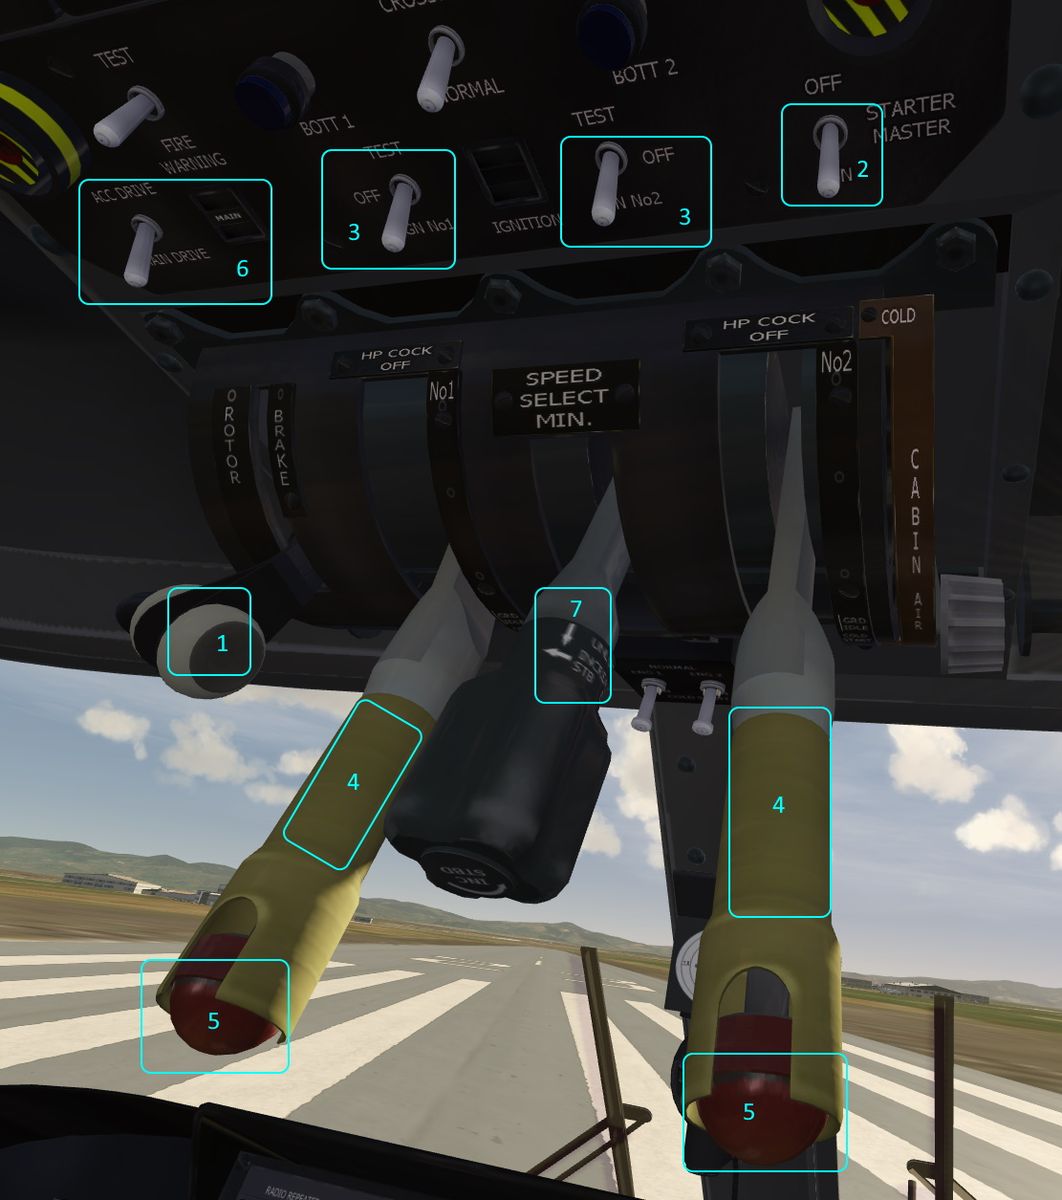
Engines
1. Rotor Break down to off (if not already)
2. Starter Master on
(Left side first)
3. Igniters down to on
4. Move the throttle cock down a bit (or all the way)
5. Press the red starter button
(Repeat for right side, shift camera to see what you're doing)
6. Set drive from ACC to Main
7. Speed Select all the way down
(Move both throttles all the way down)
!!!
At this point you could pull back on the collective and head into the sky.
However one warning remains on the central warning panel, AFCS.
AFCS / ASE helps stabilize the chopper, so best continue with the next few steps.
!!!
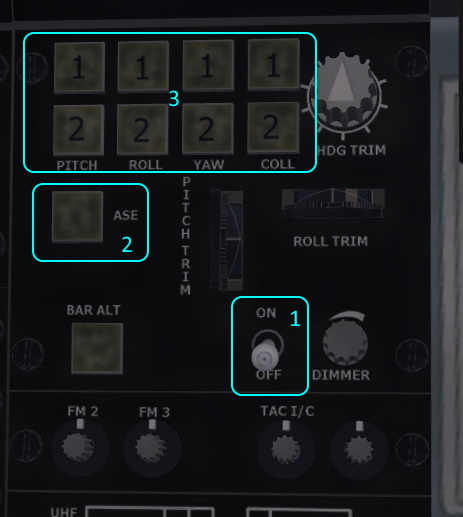
AFCS / ASE
1. Turn AFCS panel switch on
2. Press ASE button (lights up)
3. Press all these buttons (light up)
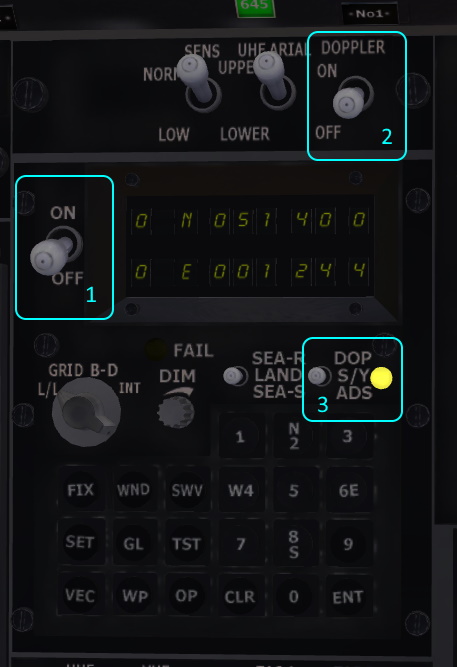
TANS / Doppler
1. TANS system on (Fail light illuminates)
2. Doppler On (Fail Light extinguishes)
3. S/Y Switch (Selects Doppler, nearby light extinguishes)
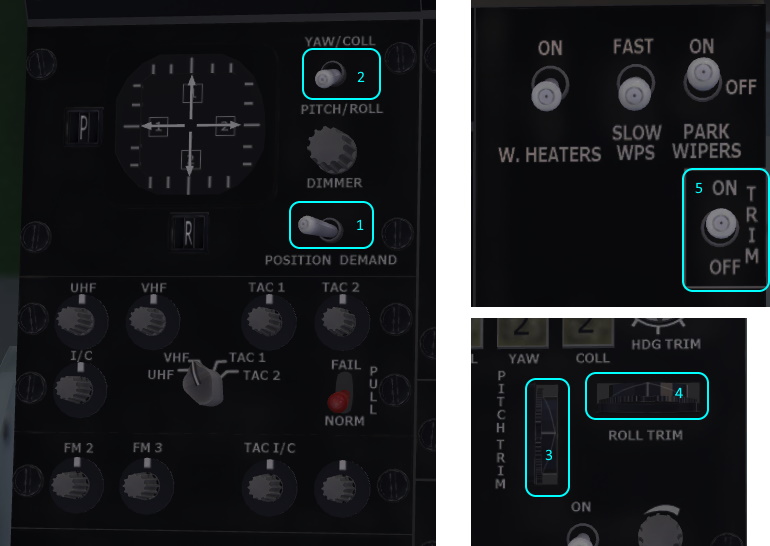
Trim
1. Position/Demand switch right to Demand
2. Pitch/Roll switch down to Roll (if not already)
3. Trim Pitch 2 clicks Backward
4. Trim Roll 2 clicks Right
5. Cyclic Trim On (Needed for ASE)
When configured as described, you will observe calibrated trim on the needle gauge to left, and any trim you supply from the simulation inputs.
Find the cockpit lights on the bottom left end of the middle console and flashy lights on the top left of the middle console.
After flying and landing or crashing, go read the manual and try to follow all the startup and shutdown instructions.
EDIT: Updated and added Trim.
