 English
 Deutsch
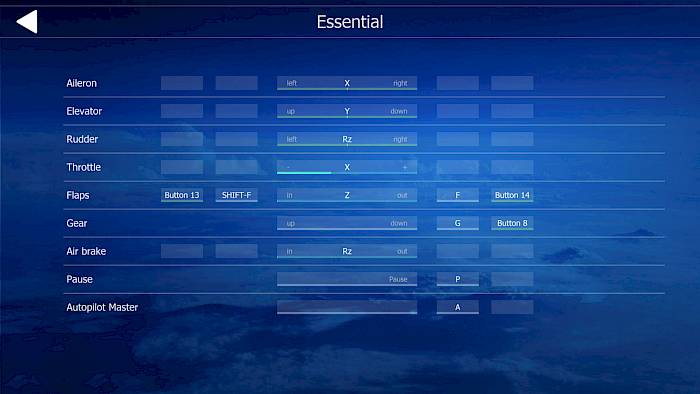
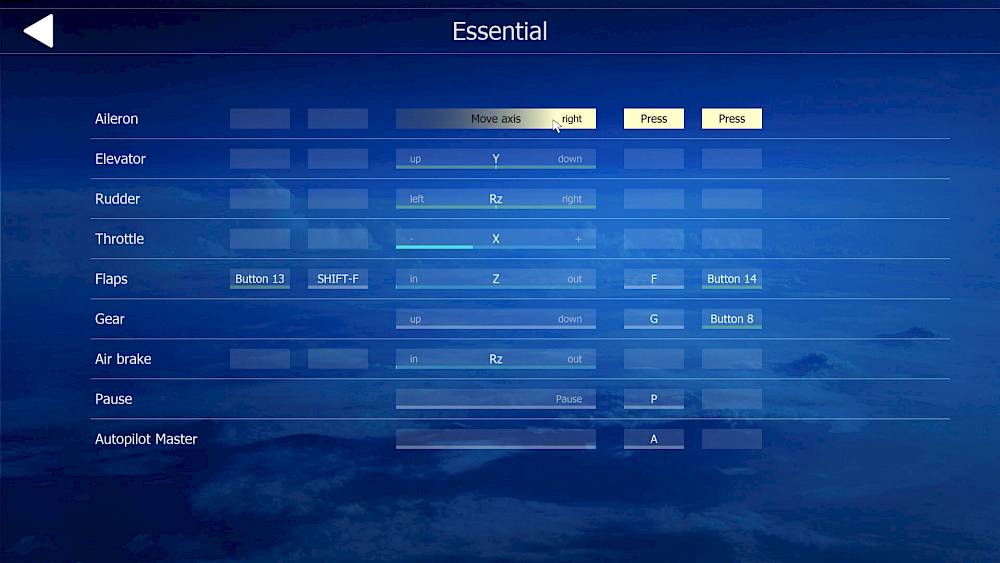
Essential
The “Essential” menu provides quick access to the most important flight control assignments such as:
- Throttle
- Elevator
- Aileron
- Flaps
- Gear
- Air-brakes
- Simulation pause
- Autopilot master
In Aerofly FS pretty much all USB input devices can be used. For a very large number of common input devices we even created default assignments so that you can plug in your new device and use it out of the box. Aerofly FS also supports having multiple different input devices at the same time so that you can take full advantage of your hardware setup. Using the controls menus you can customize the assignments for your input devices.
If you don’t know what a function does then don’t assign it.
In Aerofly FS we assign input axes, buttons, keys, etc. to a certain function and one input can be used for multiple functions. Functions that are important but are not assigned will be automatically generated from other similar inputs. For example: If you have no input for your rudder axis assigned then the aileron input will be used to generate a rudder steering command on the ground and in the air the rudder is automatically controlled to fly a well coordinated turn. And if no nose wheel steering tiller axis is assigned it is automatically generated from your rudder input, allowing you to turn on the spot on the ground easily.
The “Essential” menu provides quick access to the most important flight control assignments such as:
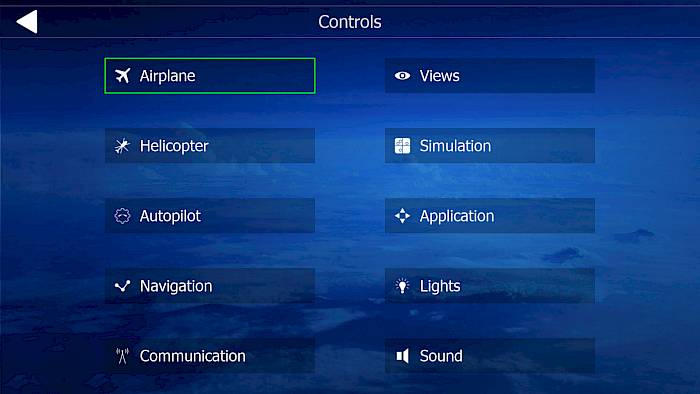
In the “General” menu you can find a categorized list of control assignment menus such as:
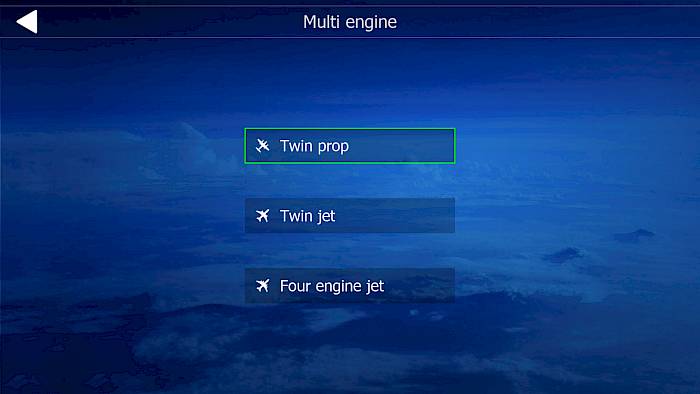
For users with advanced hardware setups there is a dedicated multi-engine menu, which allows you to assign specific throttle quadrant layouts for different aircraft categories. These include:
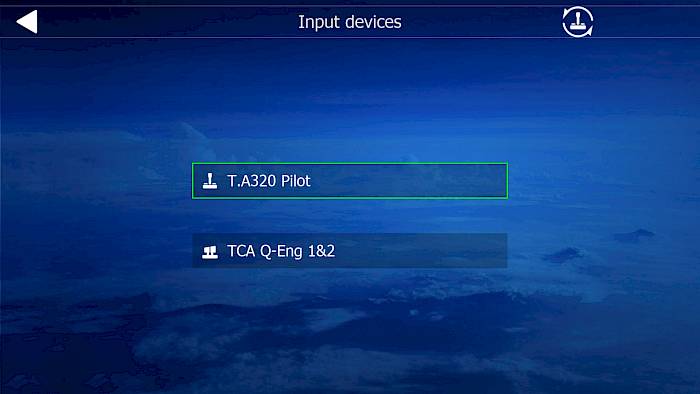
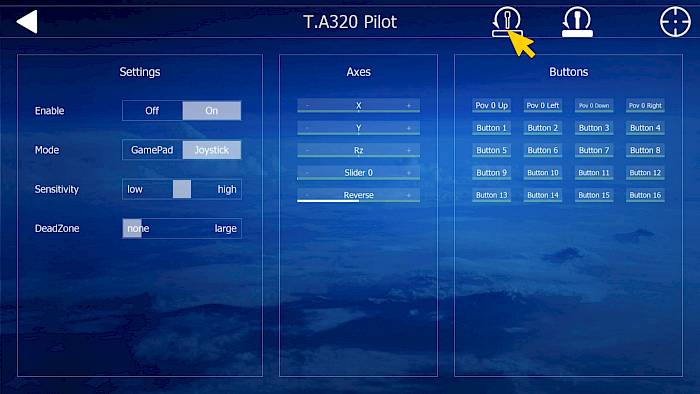
The “input devices” menu shows a list of your input devices and gives access to :
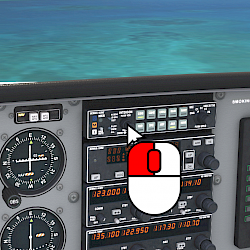
All assignments in the controls menu are performed with a few simple steps.
Tip: If you click on the far left side of the axis field the axis will highlight the left side. If you click on the middle or right side the right side will be highlighted. Make sure to always move your input device towards the logical direction that is highlighted.
Tip: If your landing gear switch is already in the “gear down” position and you want to assign the “gear” function it is advisable to set the switch to the up position first.
To invert the control direction of an axis or switch:
To remove and re-assign the axis just repeat the process above but with a different axis on the same device.
To delete the assignment click on the assigned button, key, switch or axis to highlight it, then press the backspace key or delete key on your keyboard.

Keys and buttons can have multiple functions assigned to them. When this is the case a small yellow caution triangle is visible next to the assignment box.
Note: Some assignments like brakes, reverser and air-brakes can be assigned on the same key without issues. It’s also possible to assign aircraft category specific things like magneto switches and jet engine master switches at the same time because there is no aircraft that has both things.
You can also have multiple different joysticks assigned to the same input axis. This usually works well and only the last input that was moved is used for the airplane but if you experience issues such as the brakes not being released or the throttle not moving forward please delete all assignments for that function first and assign only one device to this function.
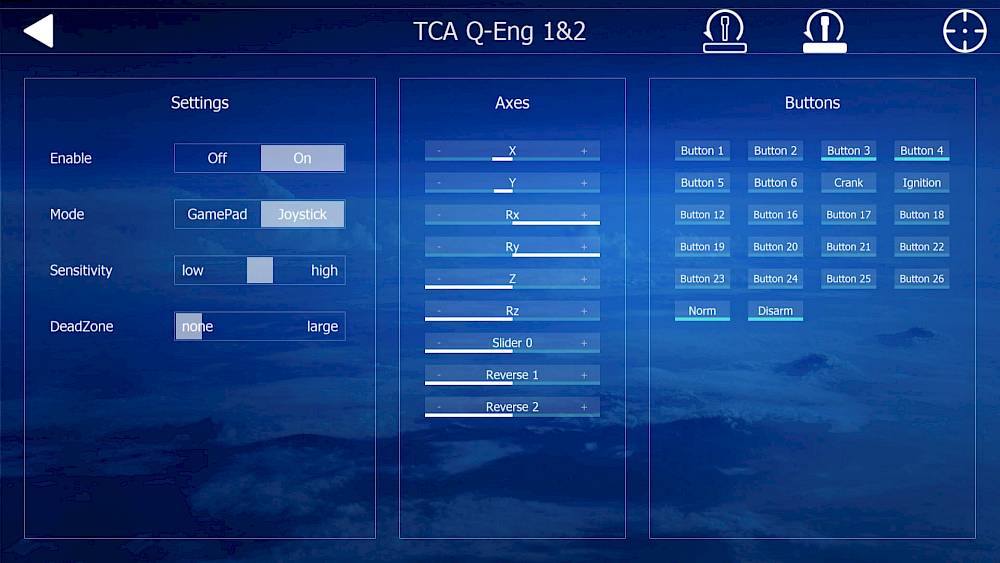
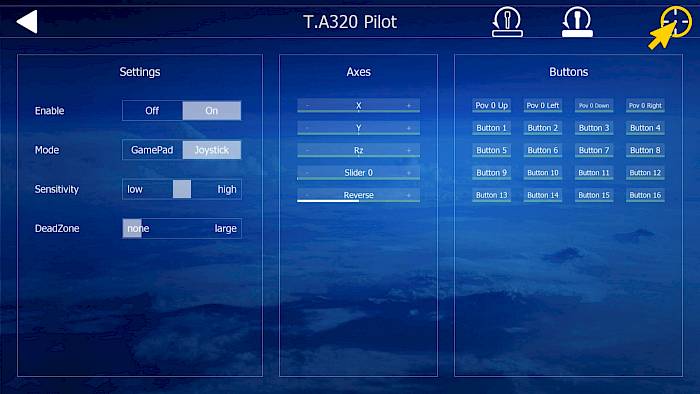
From the Controls menu select the “Input device” menu and then the device that you want to adjust. In the device menu you can see a preview of all input axes and buttons.
From the Controls menu select “Input devices” and then select the device from the list.
Then follow the steps in the menu.
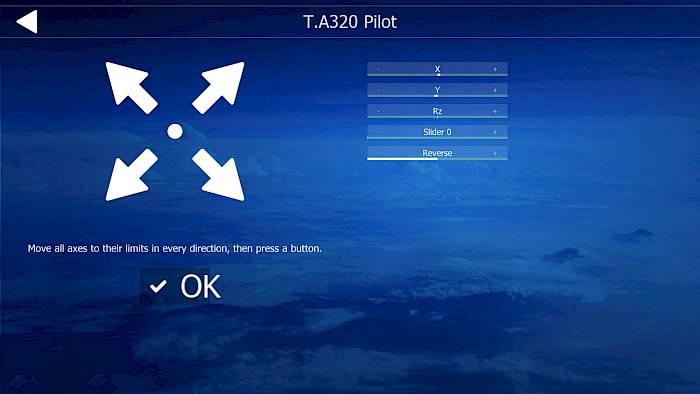
In the first step
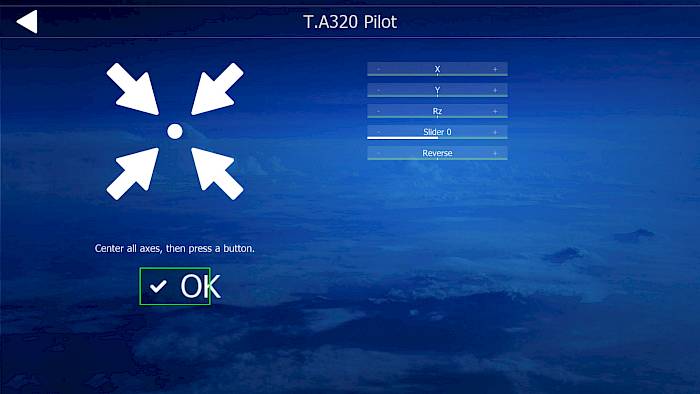
In the second step
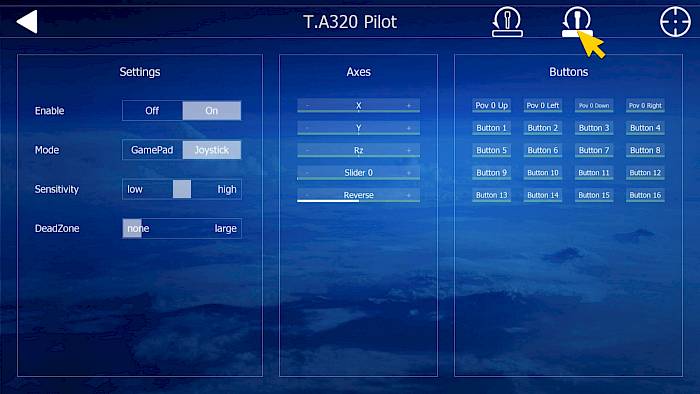
To reset the input device in Aerofly FS to the default assignments (“factory reset”):
In the menu that opens select “Yes” to reset the assignments to default.
To remove all the Aerofly FS input device assignments and start from zero:
In the menu that opens select “Yes” to remove all assignments of this device.
Input devices such as the Thrustmaster TCA throttle quadrant with Add-Ons are pre-assigned correctly in Aerofly FS so that you usually don’t have to change any multi-engine settings. But there are a lot of hardware devices on the market and users may want to change the settings so we created a dedicated menu for this.
Recommendations
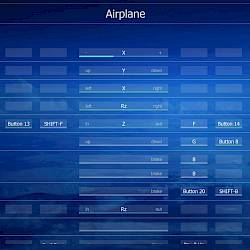
The single engine category can be assigned in the Essential and General, Airplane control menus. These assignments include:
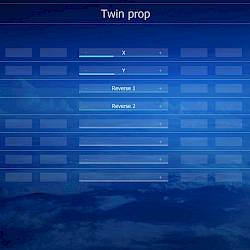
Aircraft such as the Baron B58, King Air C90GTx, Dash8-Q400, etc. all fall into the twin prop category. In this category you can assign:

This category covers a lot of the airliners, such as: Airbus A320, Boeing 737 (Classic, NG and MAX), 777, 787 but also the Learjet, F15, F18, etc.
Note Do not assign airbrakes, spoiler arm flaps, etc. unless you want to override the default axis assignment. We recommend leaving these assignment blank if you want to keep the same lever assigned.
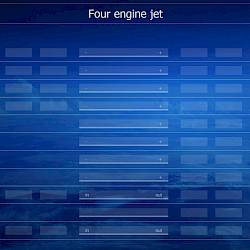
This category affects four engine jets like the Airbus A380 and Boeing 747.
Note If you don’t have four hardware levers for these then please don’t assign anything in this category. If you already have twin engine assignments set up then the engines 1/2 of the quad jet will be controlled by your engine 1 assignments and the engines 3/4 will be controlled by engine 2 inputs from the twin jet setup.