
'profi' mode! Beautiful job! Thanks so much for the effort!
--Rich
'profi' mode! Beautiful job! Thanks so much for the effort!
--Rich
'Shift +Insert' is what I use.
-- Rich
I tested your output path 'C:\' and scenproc throws an exception error. Make a directory with any name you choose, for example 'TOC_output', then change your export line to:
ExportTOC|C:\TOC_output|SLC
Do not use a '\' at the end of the full path name.
- Rich
ps: Don't try to just dump your toc into your C: root directory using just 'C:' as the root. I did just to test. The script ran to completion. It said it wrote the file. But' it's not in the root directory. Either it really did not write the file, or I have a test toc, who knows where, on the C: drive. LOL
For my Family, today is a day of togetherness and reflection.
Thank You Jeff for the kind sentiment, the team's hard work and perseverance.
Happy Thanksgiving

Yes. It is always good to have alternate methods. I would like to give it a try.
Regards,
Ray
Ray if you get stuck, see my response in this thread:
Detect buildings through photo scenery?
-- Rich
I've used this process to generate 'ground' clutter in some areas. If you are intimately familiar with the area, you might not get the results you are hoping for.
The trick is to try and get scenProc's texture filter editor to give you discrete buildings. The screenshot posted has many of the buildings smeared together in blobs. The blobs will detect as a one structure. It's helpful to work in smaller areas.. like 1/4 the size yet filling the screen. Pixels between structures are your friend.
here's some code to get you started using 'polygons' not a single point as you mentioned. I haven't tried single centroid point methods.
<--
# Run this after you have generated your .tfc filter
#-----------------------
# Import the inf that points to your target bitmap
ImportINF|C:\AERO FS tools\EarthWork\AreaFSInfo_Lp0_SnapOff_N040354610_N040342831_W074404549_W074383633.inf
SplitGrid|0.25|*|building="*"
# Load the tfc and detect the polys. Add 'building:yes' tag to each poly
DetectFeatures|FTYPE="RASTER"|C:\AERO FS tools\EarthWork\structure_detect.tfc|String;building|yes|NONE
#
MergeGrid
# Generate shape file
ExportOGR|FTYPE="POLYGON"|ESRI Shapefile|C:\AERO FS tools\EarthWork\structure_detect_TEST.shp|building
#-----------------------
-->
<--
# Run this on the shapefile you created above
#-----------------------
#Load shape and Filter to buildings.
ImportOGR|C:\AERO FS tools\EarthWork\structure_detect_TEST.shp|*|building|NOREPROJ
SplitGrid|0.25|*|building="*"
# Generate some structures (replace the create block below with something that makes sense for your area)
# RESIDENTIAL only just some filters for variety so you can see 'something'
CreateAF2Building|building="*" And FAREARAT>0.7 And FLENGTH < 14|1|1|gable|residential|0
CreateAF2Building|building="*" And FAREARAT>0.7 And FLENGTH >= 14 And FLENGTH < 20|1|1|gable|residential|0
CreateAF2Building|building="*" And FAREARAT>0.7 And FLENGTH >= 20 And FLENGTH < 28|2|1|gable|residential|0
CreateAF2Building|building="*" And FAREARAT>0.7 And FLENGTH >= 28 And FLENGTH < 30|2|1|gable|residential|0
CreateAF2Building|building="*" And FAREARAT>0.7 And FLENGTH >= 30 And FLENGTH < 32|2|1|gable|residential|0
CreateAF2Building|building="*" And FAREARAT>0.7 And FLENGTH >= 32 And FLENGTH < 34|1|1|gable|residential|0
CreateAF2Building|building="*" And FAREARAT>0.7 And FLENGTH > 34|2|1|gable|residential|0
#
MergeGrid
# Export the TOC file
ExportTOC|C:\AERO FS tools\EarthWork|structure_detect-Residential_TEST
-->
My true feelings: trying to get the filter to work correctly by fiddling with settings and samples is a huge time sink IMHO. For mass fill on areas you don't care about Crispy's road tracking method is probably better.
Lately, in areas I care about.. I go to JOSM and generate my own buildings similar to the methods you outlined in your earlier post.
Have Fun (that's what it's supposed to be all about)
PS: You can also import the shapefile into JOSM and clean it up. Then export the layer as a .OSM file and run scenProc on that.
--Rich
In my screen shot post I should have mentioned that in addition to the nodes used to 'draw' the shape (that are declared as 'building= yes'), there are additional single point node lists that reference the 'center point' node of each of the storage tanks and do indeed declare them as:
<tag k="man_made" v="storage_tank"/>
The problem is the definition of 'building' in OSM is too broad and includes storage tanks . (And pretty much anything that was 'built' by man.) There's a lot of discussion but not a lot of agreement on usage. OSM is crowd sourced.
scenProc parses and runs into the building shape object. The filters used in the script code tests the area ratio of the circular 'building' and generates a square. It's working as expected.
In this particular instance there really is no way to 'filter' these tanks out (other than an 'exclusion_shape.kml'). Even if scenProc were aware of the tank 'center point' tag lists it would still not be able to relate the referenced virtual center points back to any particular 'building=yes' shape. it would have to calculate the centroid of each building shape and 'guess' it was close enough to to be a tank.
--Rich
Something in the code is recognizing a round tank as a building and placing a square building at that location and that is not correct.
I took a look at the OSM data and sure enough the author set the property of each of the tanks drawn to 'building=yes'.
-- Rich
Beautiful job Kai !
Looks great!
-- Rich
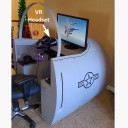
I use the Multi-Panel but the display is totally blank so you can't monitor to the flight or provide AP inputs from the panel
Ray I thought you solved the blank panel by upgrading to Win 10?
--Rich
Wow, I never realized you could leave the project and return

It already does. In the Actions area of the left sidebar, select "Choose Actions To Run" and check what you want to run.
I thought it was possible, but I had an issue trying to get it 'restarted'. I would reload AeroScenery but 'Start' would be grayed out. I just realized that though the tiles were outlined in orange, I had to re-select them to bring them into focus which enabled 'Start' (face palm). Works great!
Thanks Nick!
-- Rich

Anyway, there's still usually some artistic and manual work to be done on orthopohotos before geoconverting...
To this end it would be nice for AeroScenery to have a 'process up to geoconvert' and the ability to load and 'resume' project capability where one would have the opportunity edit the ortho photos prior to geoconversion.
-- Rich
Although the aircraft are modeled 1:1 the perception of scale will vary on a per individual basis.
IPD, Inter Pupilliary Distance, is the distance between the center of the right eye to the center of the left eye of the viewer. If the distance between the two "cameras" or viewpoints which represent each eye in the virtual world are a different distance than the IPD of the person viewing the scene, the world scale will be out of wack.
The IPD can be adjusted on VR headsets by changing the physical distance between the lenses. You do this routinely to get the most comfortable view with the least blurry and maximized sweet spot area. Again you are adjusting IPD for a comfortable experience with minimum eye strain and maximum sweet spot.
Unless the application queries the headset IPD and adjusts the application 'stereoscopic camera IPD', the world scale will appear incorrectly to the viewer.
An example would be DCS World, it does not query the IPD but also has a user adjustable parameter for IPD / World Scale.
Most of the time I fly the Baron. I know that the cabin in the cockpit is 3'6" wide (~1067mm). I cut a piece of 1" PVC pipe to that length to use as a 'gauge'.
I have my Oculus Rift on sitting on the ramp in the Baron. I adjust my seat (mapped to my hotas) and hold the PVC gauge in front of me and tip the the headset off my face and peek out at the gauge. If you try it you will find you can more or less simultaneously view the PVC gauge and the instrument panel cowling and doors.
After a few trips to the VR menu I came up with a value of +38 for the Baron. It's in scale now for my personal IPD. These numbers won't work for you unless your eyeball distance is exactly the same as mine.
-- Rich
My only assumption is that you are using custom buildings and not our default cultivation files
Actually, as I posted, in December I created a standard cultivation toc with a single definition similar to:
<[building][element][0]
<[vector3_float64][position][lon lat 0.000000]>
<[float32][direction][0]>
<[float32][length][120]>
<[float32][width][120]>
<[int32][floors][32]>
<[string8][roof][flat]>
<[string8][usage][industrial]>
>
I was unable to see this building until it 'ghosted' in as I approached. Again I was not 'attaching this to an existing airport, but rather to a 'dummy' airport with it's own tsc. Experimenting with the 'size' parameter had no effect on the distance. At the time I just assumed that was the way it worked. I will say that I have not experienced (or at least noticed) the ghosting effect with any other 'cultivation' I have created. And all of those are also not tied to an existing 'airport'.
-- Rich
I'm guessing the new graphics engine added a 6km radius cultivation bubble
In December 2017 I was trying to wrap my head around the 'size' parameter in the tsc file. I made a simple test object, a single cultivation code block with a single 'sky scraper' 400' x 400' x 32 floors. Placed it in the middle of long island NY and ran my tests. I can tell you that I experienced everything you've noted in you subsequent posts and can verify that the transparency 'fade' in aspect was happening with the December 2017 engine.
My tsc location was the center of the skyscraper. I don't associate cultivaion with an airport location, rather use the' dummy airport tmb' method.
-- Rich
Ken thanks for boiling the process down! Inspired me to try the ScenProc texture filter tool rather than scratch build include polygons for vegetation. Many bleary hours saved ![]()
One note, in your Layer #6 - How to add a bunch of trees (kenventions 9/05/18) pdf example script:
---
# this line generates a broadleaf tree for 80% of the tree coordinates with each tree between 8 to 25 feet tall
CreateAF2Plant|FRAND >= 0.2|8;25|0|broadleaf|0
# this line generates a conifer tree for 20% of the tree coordinates with each tree between 10 to 20 feet tall
CreateAF2Plant|FRAND < 0.2|10;20|0|conifer|0
---
The units are actually meters rather than feet.
Thanx again for your efforts.
- Rich
AFAIK there are still a few features on the switch panel that do not work or are iffy and only works on some of the planes and not others. This would be the magnetos and some of the light switches.
Ray I agree, the Switch-panel needs some work. I noticed that the 'magnetos/start' switch is treated as an axis in the 'Controller' setup section. Rotating the 'switch' shows only three possible states rather than five. The 'Master' switches seem to be flaky in the Cessna as well. I'll be honest in saying I probably was more interested in having a physical gear switch and indicators with the purchase of the Switch-panel. That section seems to work as hoped. The Autopilot Multi-panel seems to work very well.
- Rich
I had been following this thread and became excited to see the success you all were having with getting the Saitek stack to work.
I had been contemplating getting the Multi-panel and Switch-panel over the years with FSX but never pulled the trigger.
I decided the other day to order via Amazon the Logitech versions of the two devices. They arrived today so I sat down with this thread ready to pull up Regedit.
Well I downloaded 'Flight_Panels_x64_Software_8.0.150.0.exe' from the Logitech support site. Install and ran the test programs...
Presto, everything worked. The Multi-panel lit up just fine. No registry hack needed with the Logitech versions and Win 10.
I have only tried the Baron and Dash-8 so far. I didn't even open controller setup in FS 2. Everything 'just worked' and thankfully plays nice with my Warthog HOTAS.
Just relating my experience today should others be interested in the post Logitech acquisition hardware.
- Rich
Looks Great! Looking forward to it!
Your "z_axis_offset_in_degree" values should be -90, 0, 90