
 English
 Deutsch
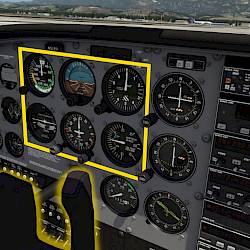
Cessna 172 Cockpit Introduction
In this cockpit introduction tutorial we explain the instruments in the Cessna 172 and the control elements.
Aerofly FS can simulate full takeoff procedures from cold and dark for the aircraft, including all commercial airliners and the popular Cessna 172 trainer. The cold and dark configuration is an aircraft state with all engines shut down and cooled down (cold) and all systems turned off, lights off (dark). This is the aircraft state that would be found after the aircraft has been parked for a while or over night and the aircraft is now prepared for the first flight of the day.
Note - We recommend reading the Cessna 172 Cockpit Introduction first if you are a complete beginner.
Please don’t apply the information that you learned in the tutorial in the real world directly without taking real world flying lessons with a certified flight instructor. This tutorial is applicable to simulator flying only.
In this cockpit introduction tutorial we explain the instruments in the Cessna 172 and the control elements.
Learn how to use the location menu to start in the air, ready for takeoff, on final approach or parked on the ground.

This tutorial explains the steps how to set up an instrument approach.

In this tutorial we show how to use the missions menu to select from thousands of real world flights and challenges
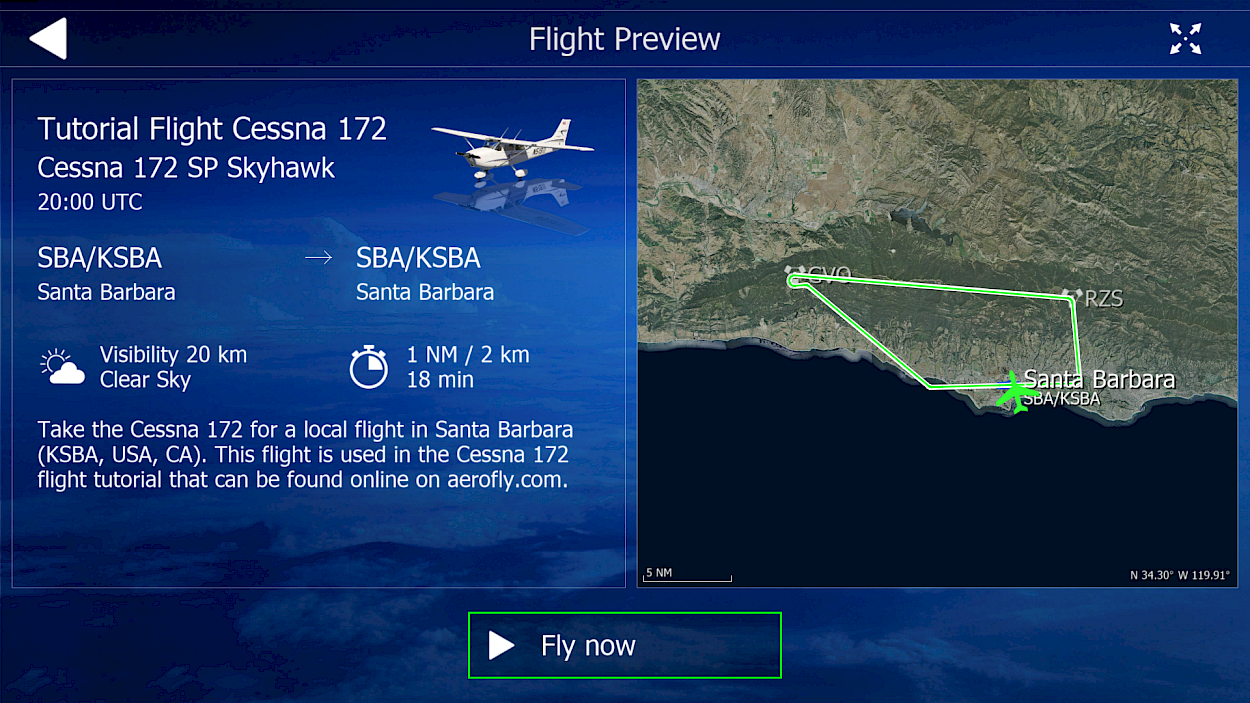
KSBA RWY07 CESRA RZS GVO ILS07 KSBA
This route can be selected from the missions menu. Select the Cessna 172 in the aircraft menu, then go to the Missions menu, Aircraft list, select the C172 preview image and then locate the “Tutorial Flight Cessna 172” mission. When you see the mission preview select “Fly now” to set the navigation route automatically.
The preset conditions are
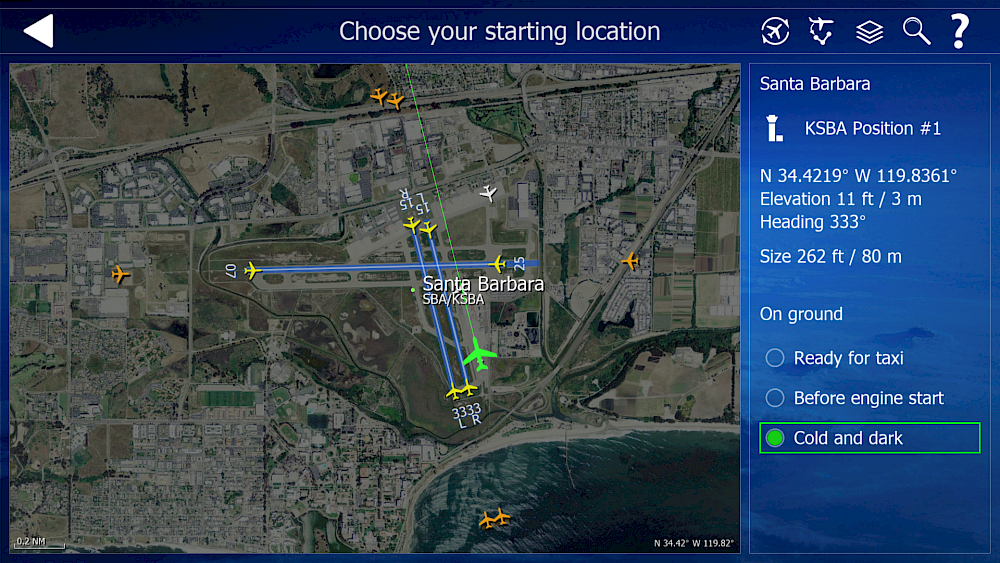
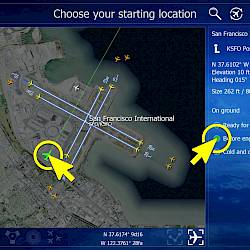
To select the cold and dark setting first select the aircraft in the aircraft menu and then select a parking position using the location menu. After selecting a parking position you will see options for “ready for taxi”, “before engine start” and “cold and dark”. Select the latter to start with all engines and systems off.
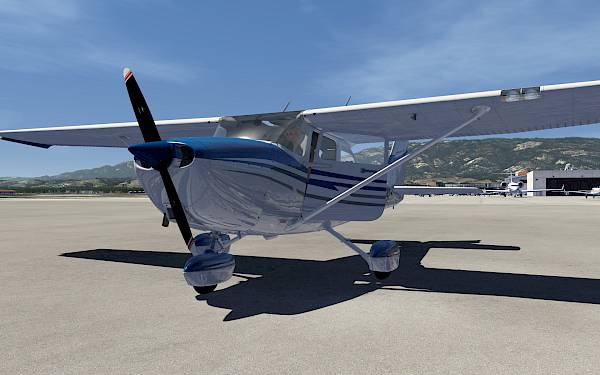
For our cold and dark tutorial we’re using the southern park position at Santa Barbara Muni (KSBA).

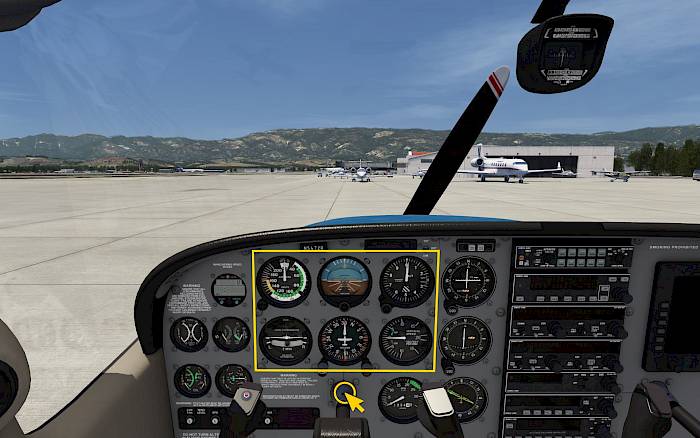
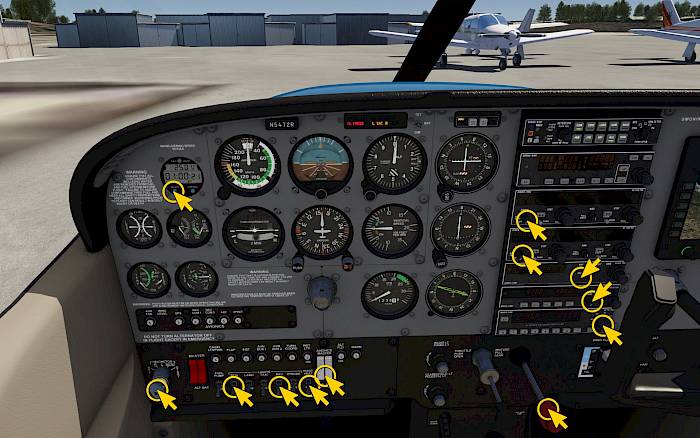
When you change to the cockpit view you can see the instrument panel of the Cessna 172 in front of you. The panel features the typical six-pack instrument configuration with the following instruments from top left to bottom right
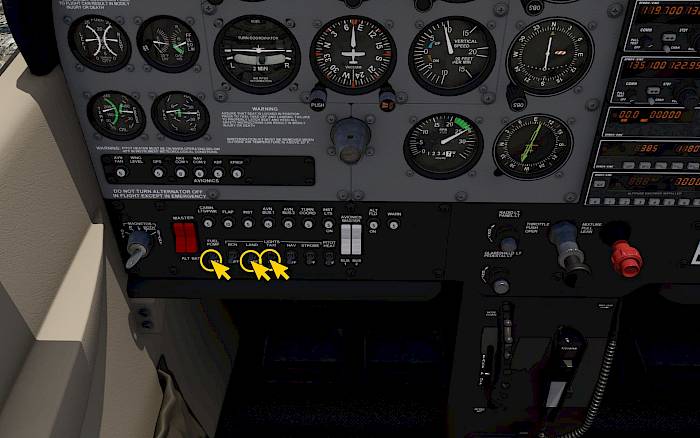
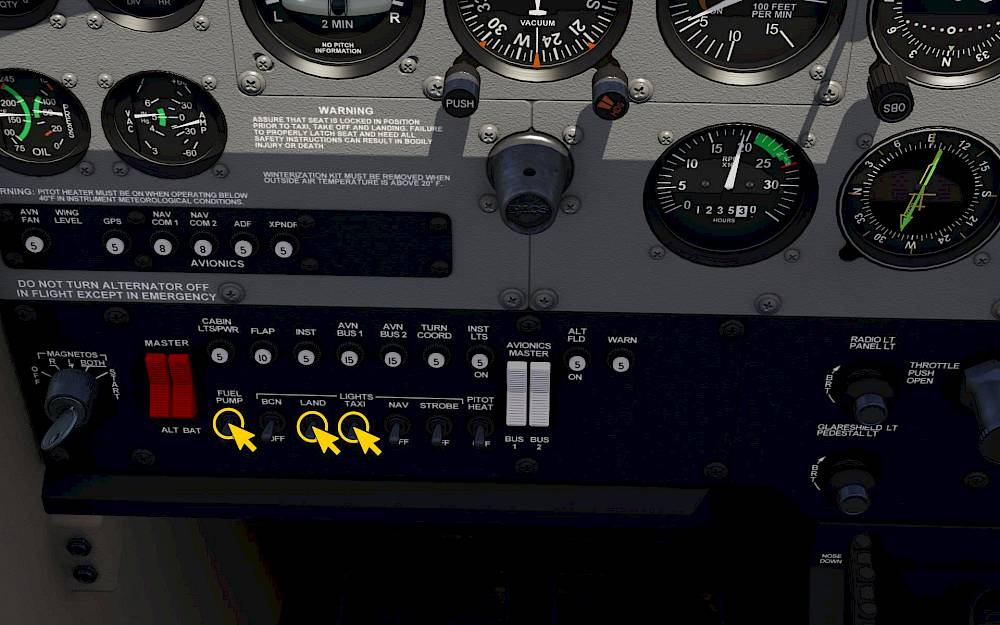
You can hide the yoke to see the switches behind it

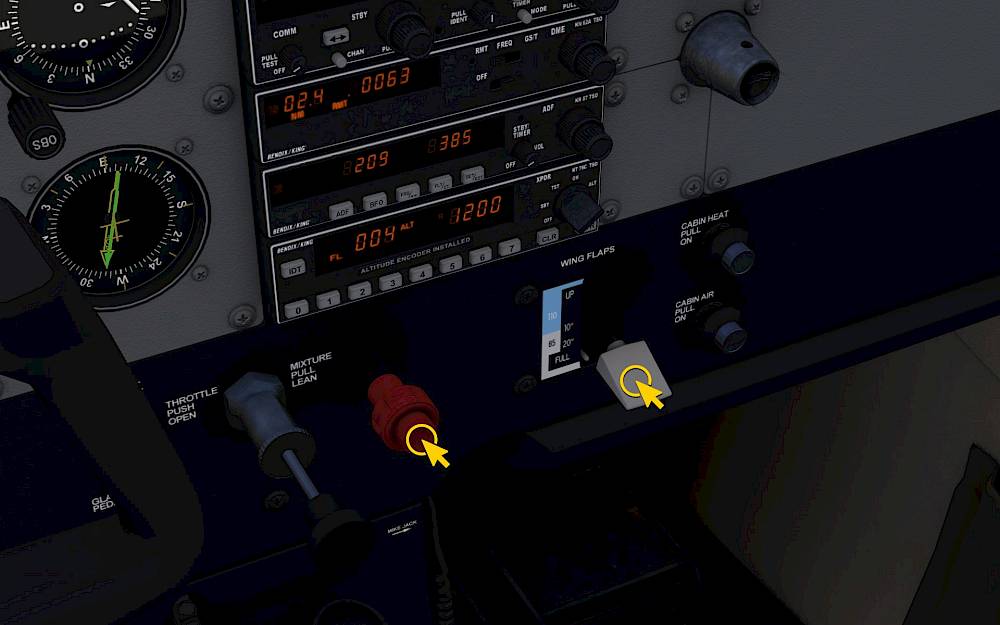
The Cessna 172 has two fuel tanks, one in each wing. With the fuel selector you can control which fuel tank is used in order to balance the fuel level in both tanks throughout the flight. To prevent the fuel flowing from one side to the other when the aircraft is parked the fuel selector is set to only one side.
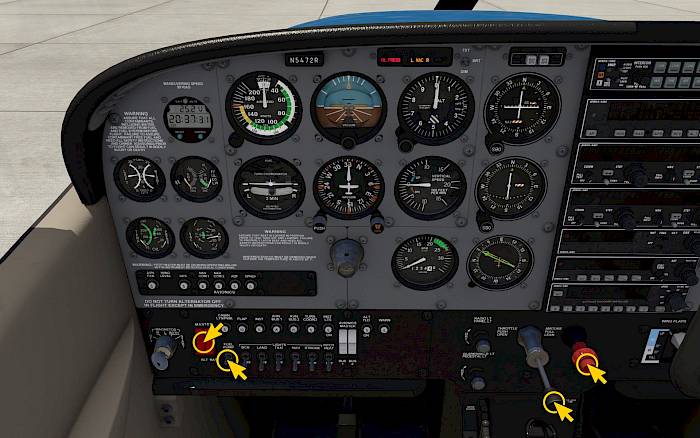
In this aircraft we have a 24V battery. It is used to drive the electric starter, just like in your car and after engine start it is charged by the engine generator. In case the engine fails some of the instruments remain powered for a while to allow for a safe emergency landing. To avoid the battery being drained it is turned off when the aircraft is parked.
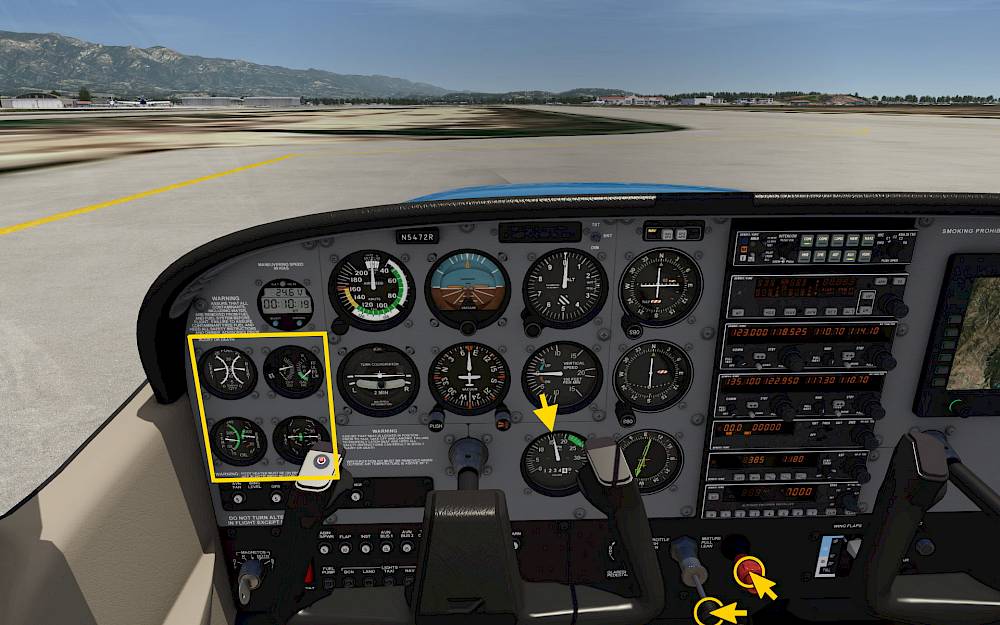
When the engine started successfully

With the engine running the LOW VOLTS and other warnings should have gone away. Check the ampermeter to see if the battery is indeed charging now.

We can now start taxiing to the runway but we have to do a run-up still. We’ll make a stop in the run-up area next to the runway.
Taxi to the run-up area near the departure runway. This is an free area where we can test our engine without causing damage to nearby buildings or other aircraft. We’re doing this test to check if all engine parameters are normal and if both ignition magnetos are working.
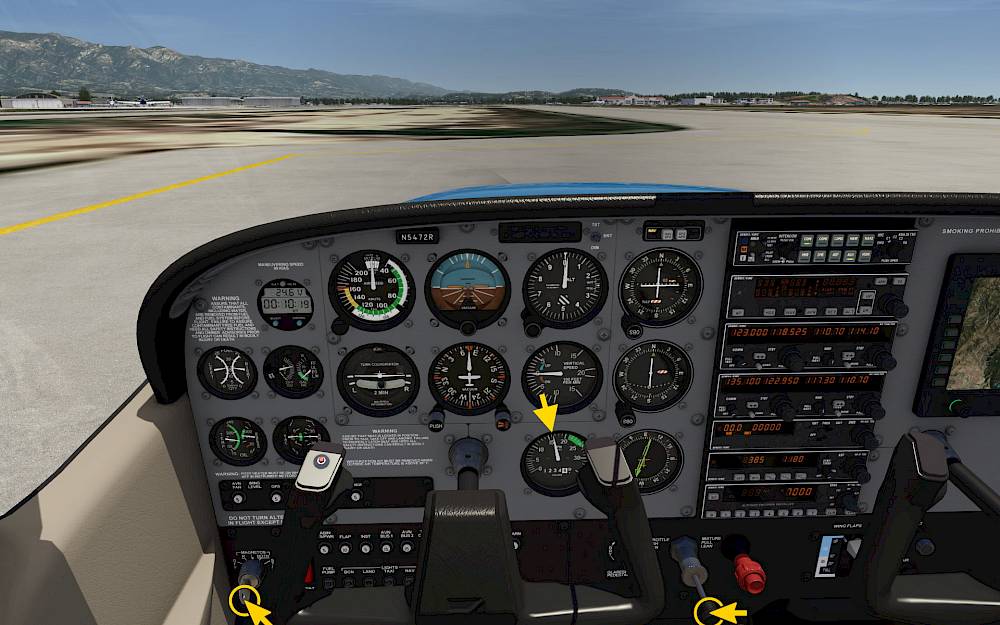
Let’s test the two ignition circuits of the engine now.

Now we’re testing the engine idle.
Run-up check complete
Continue on the taxiway and taxi to the yellow hold short line in front of the runway.
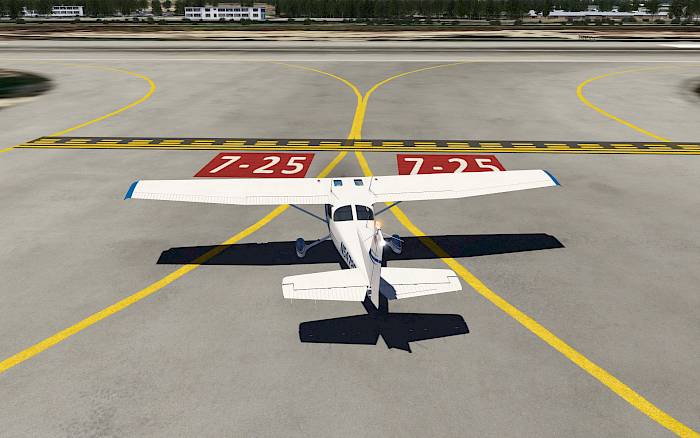
Always check for traffic even if ATC has cleared you onto the runway. Check both left and right. Once you cross the hold short line:
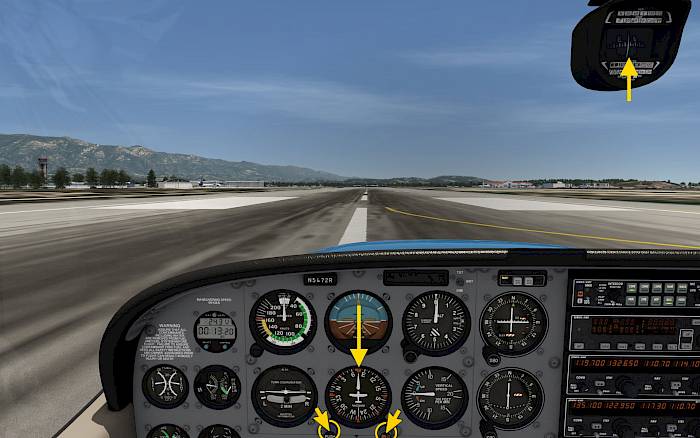
The aircraft should lift off between 50 and 60 knots
After lift off

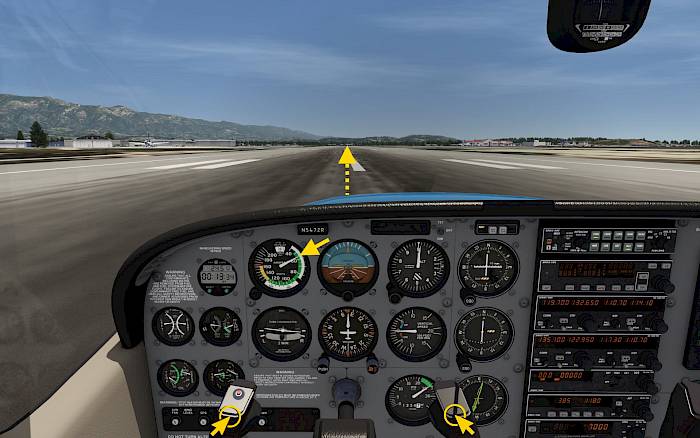
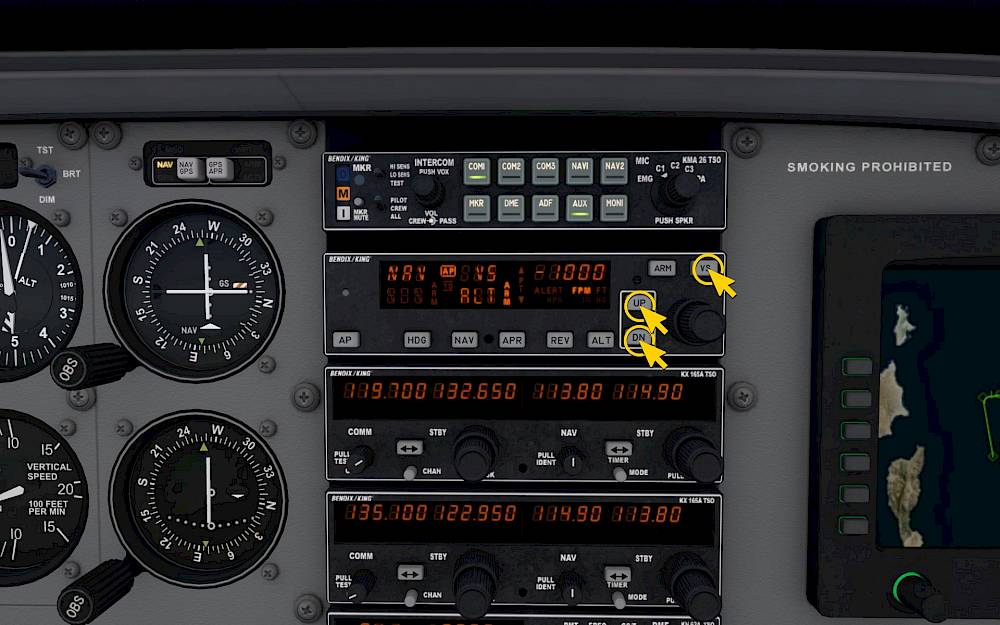
Once we’re above a safe altitude we can engage the autopilot.
We’ll continue our climb at 75 knots.
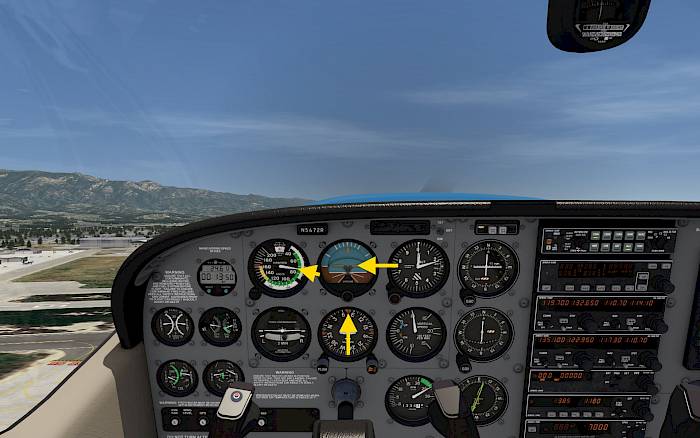
The autopilot levels the plane at our pre-selected 5000 feet altitude. The plane will reduce the pitch attitude which means we will gain speed. We’re in control of the airspeed and have to adjust throttle throughout the entire flight.

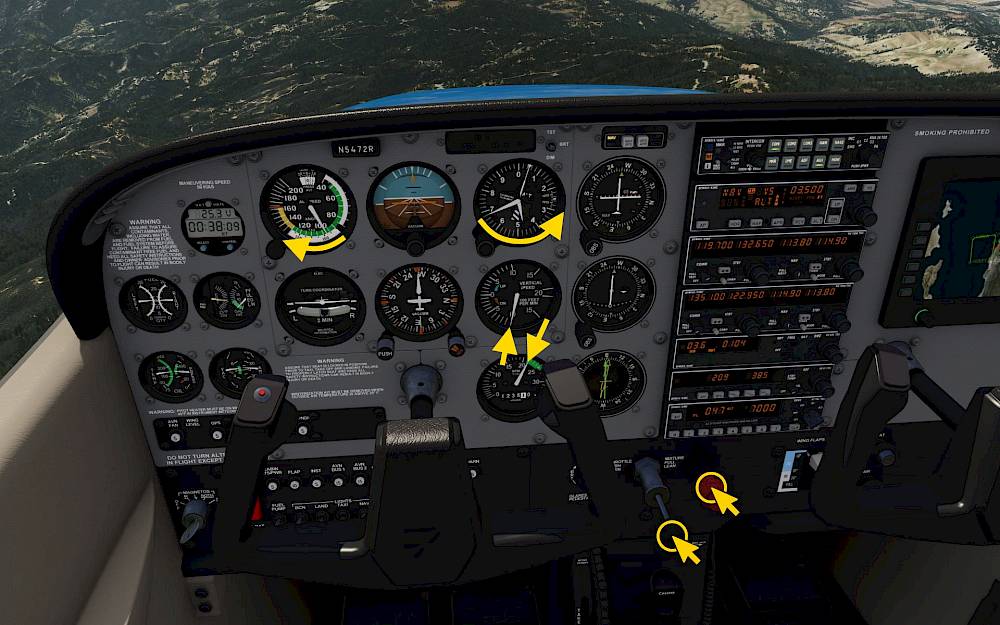
As we climb higher the air is getting thinner. But the engine is still injecting the same amount of fuel which means the ratio of fuel to air is getting too rich. During a descent we have to remember to increase the mixture again to avoid starving the engine.
Let’s adjust the mixture to get the most economical fuel burn.
The EGT won’t be as hot as the maximum EGT that can be reach which gives us a slight margin for error.
Let us demonstrate the instrument capabilities of the Aerofly FS Cessna 172 SP.
We’ll show you how to fly: From VOR to VOR, an ILS approach. But the Cessna 172 is also equipped with a DME and ADF so you can also fly VOR/DME approaches and NDB approaches
A very high frequency omni-directional range (VOR) is a radio navigation station on the ground that sends out signals in all directions at two different radio waves. Simplified drastically: One frequency is emitted constantly and the other travels around the station in circles. Measuring the time delay between the signals tells you the direction to the navigation station.
The frequencies for these VOR stations can be obtained from the navigation menu of Aerofly FS. Simply click on a station on the map and it tells you the frequency on the right.

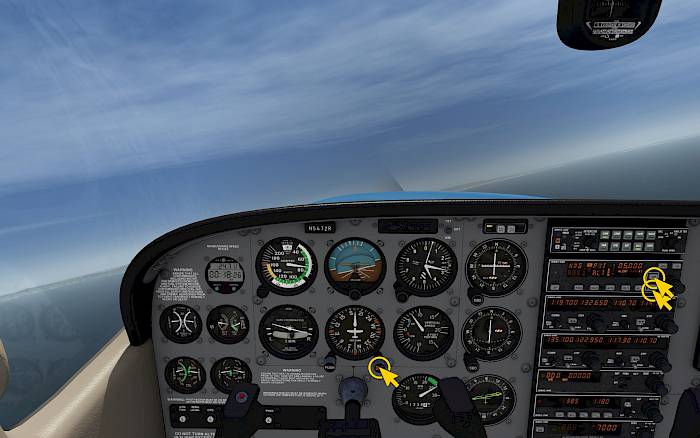
We’re starting this VOR navigation tutorial after reaching the cruise phase at 5000 feet.
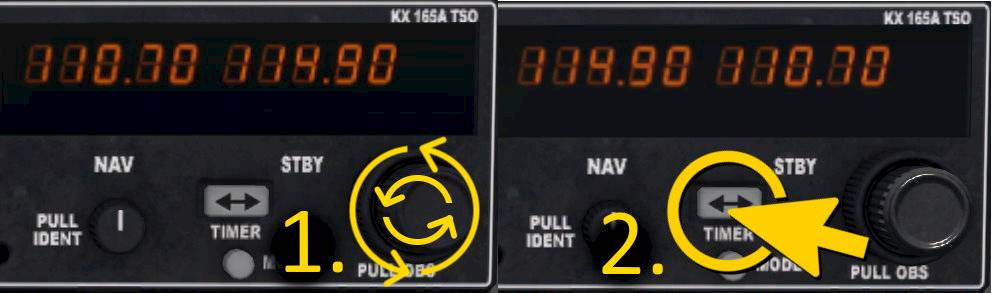
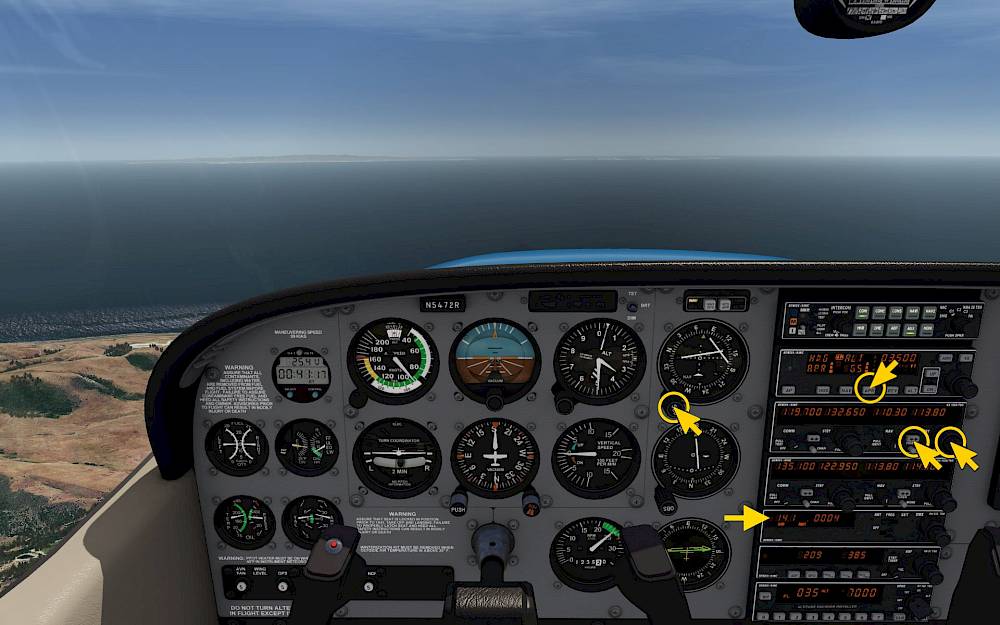
We’re going to use the San Marcus VOR north-east of Santa Barbara (KSBA) which has the identifier RZS and the frequency 114.90 MHz.
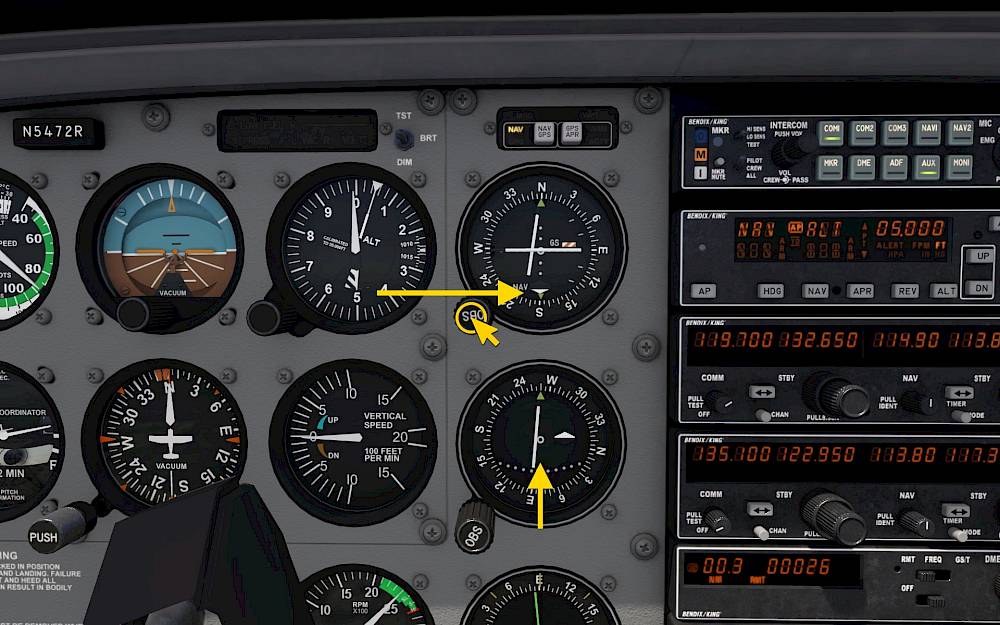
The needle on the course deviation indicator (CDI) should now show a needle deflection. The VOR does not provide a glide slope signal, so the glide slope needle is at zero and a red “GS” flag is visible as expected.
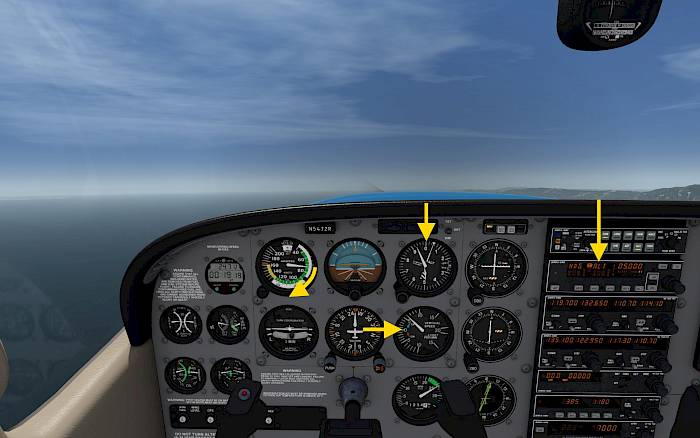
At some point the needle moves through the center, this depends on your position relative to the station. Observe the white arrow at the bottom of the instrument as well. It either shows an up arrow or a down arrow.
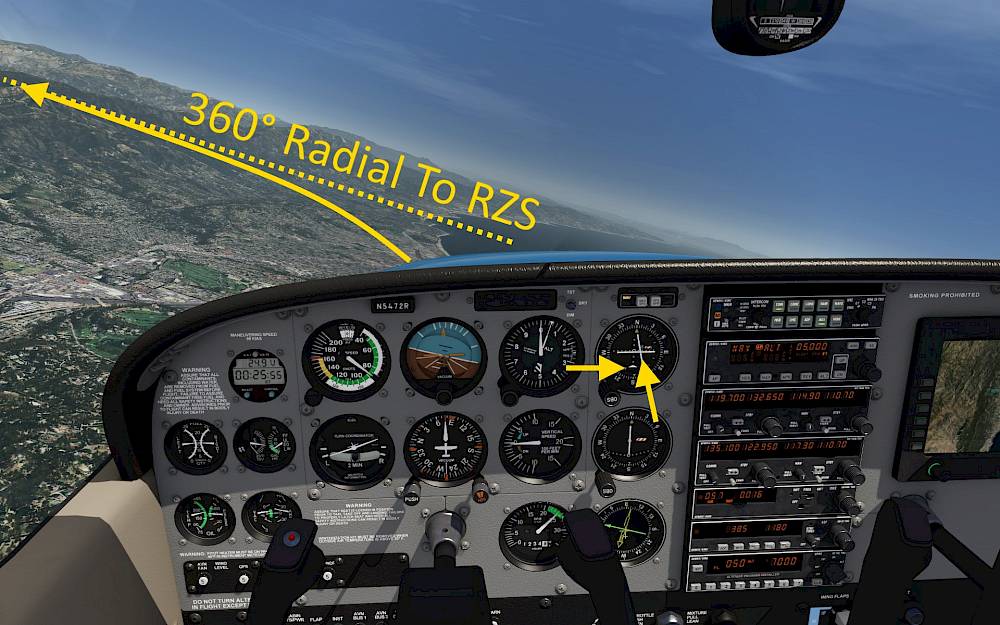
With the needle centered at zero and with the white arrow pointing up the instrument tells you which course you have to fly to get to the VOR station. Read the course on the instrument at the top marker of the compass rose.
This is a crude way to fly to a station but helps you to fly around. But we can do even better than that. If you know from which direction you want to fly to the VOR station, e.g. along a valley and not through the mountains on the side you can set the desired course on the instrument and then follow the needle signals to stay on the selected radial.
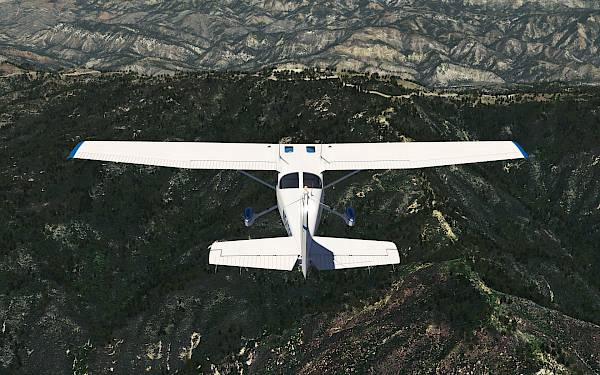
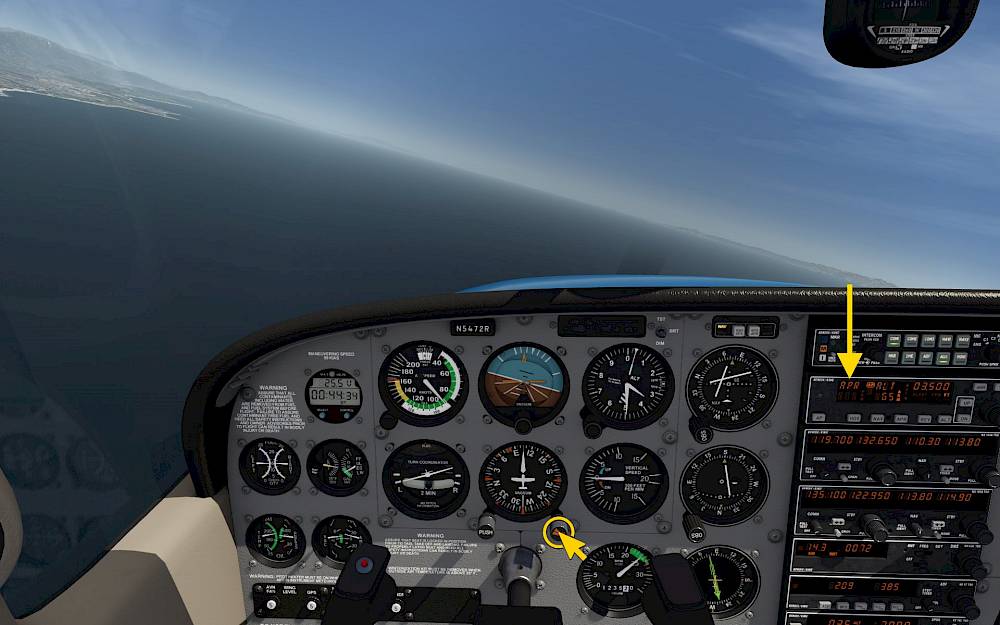
When you are above the hills you should eventually fly above the San Marcus VOR station. This hill is around 4000ft so we should pass right over it. Look for the white arrow at the bottom of the instrument. Once you fly over the station it flips from pointing up to pointing down. This indicates that you have passed the station and are now flying away from it.
The autopilot will turn the plane left to 261° and steers us back to the outbound radial of the San Marcus (RZS) VOR. This direction will bring us directly to the next VOR, the Gaviota VOR (GVO).
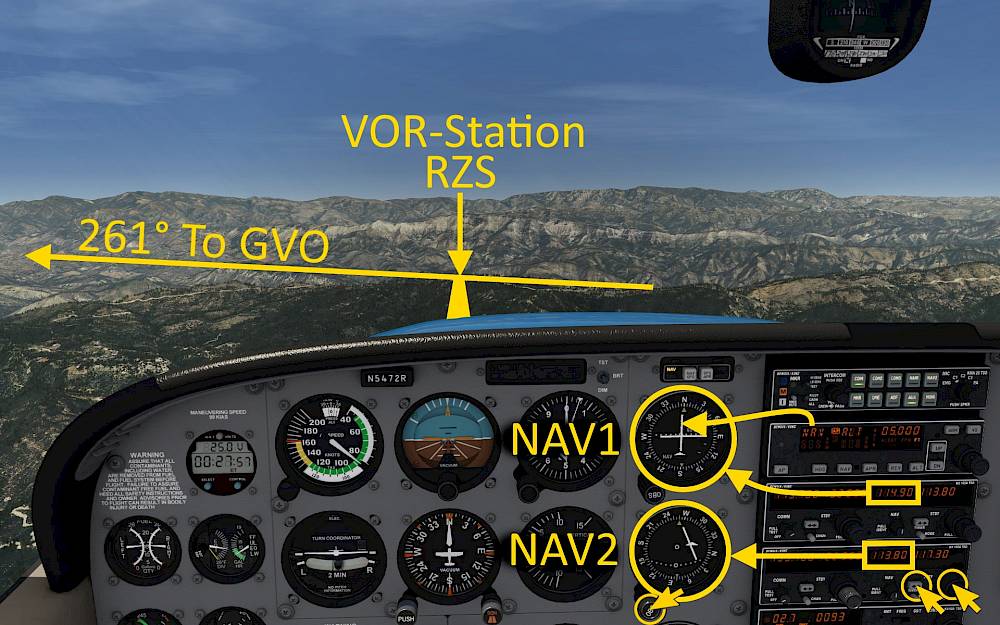
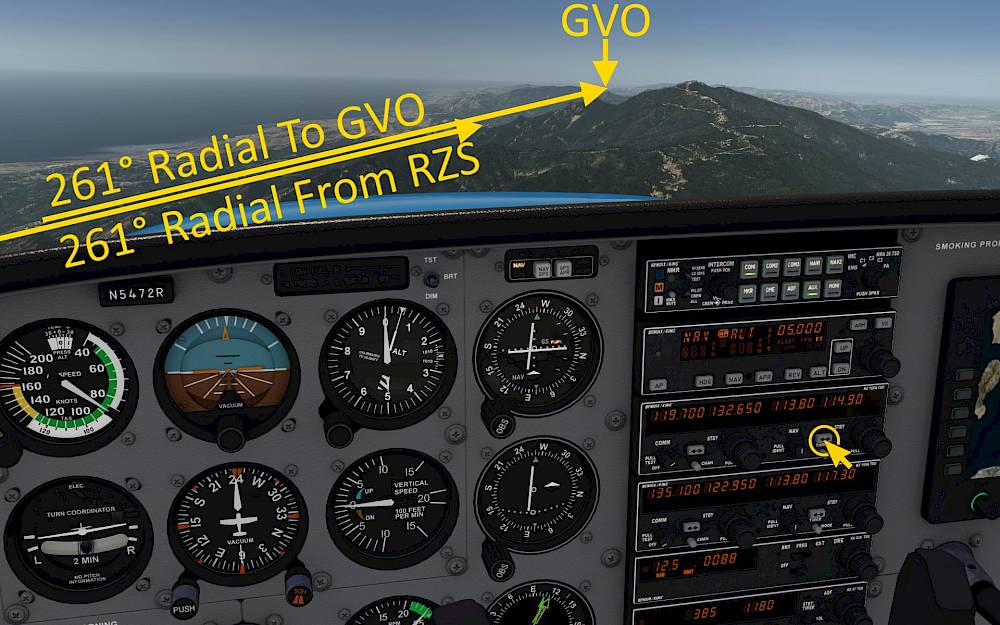
The autopilot is always following the NAV1 signals and is still flying away from

We’ll keep flying on this radial for a while. Before reaching GVO we’re starting our descent. Look at the DME display. When it’s showing about 3 NM to GVO we’ll initiate the descent.
As we descent perform the descent adjust the throttle and enrichen the mixture.
The instrument landing system (ILS) is a navigation systems that is used to fly an aircraft to the runway. The system has two antennae on the ground. One is placed at the far end of the runway and provides lateral (left/right) information. This localizer signal helps you to stay aligned on the runway centerline during the approach. The second antenna is placed next to the touch down zone and guides the aircraft vertically (up/down), typically on a final descent 3° angle. This is called the glide slope.
The selection of the ILS station is achieved by tuning the correct ILS frequency and setting the approach course. The aircraft is flown towards the signal from the runway and the pilots follow the beam down to the runway. Some aircraft like the Airbus A320 or Boeing 747 can even fly the ILS down to touchdown on autopilot. But our Cessna 172 cannot.
For this example we are going to use ILS 07 at Santa Barbara (KSBA), the frequency is 110.3 MHz and the course is 075°.
You can find these frequencies in the Aerofly FS navigation menu, when you select a runway or the approach for the runway as your destination runway.
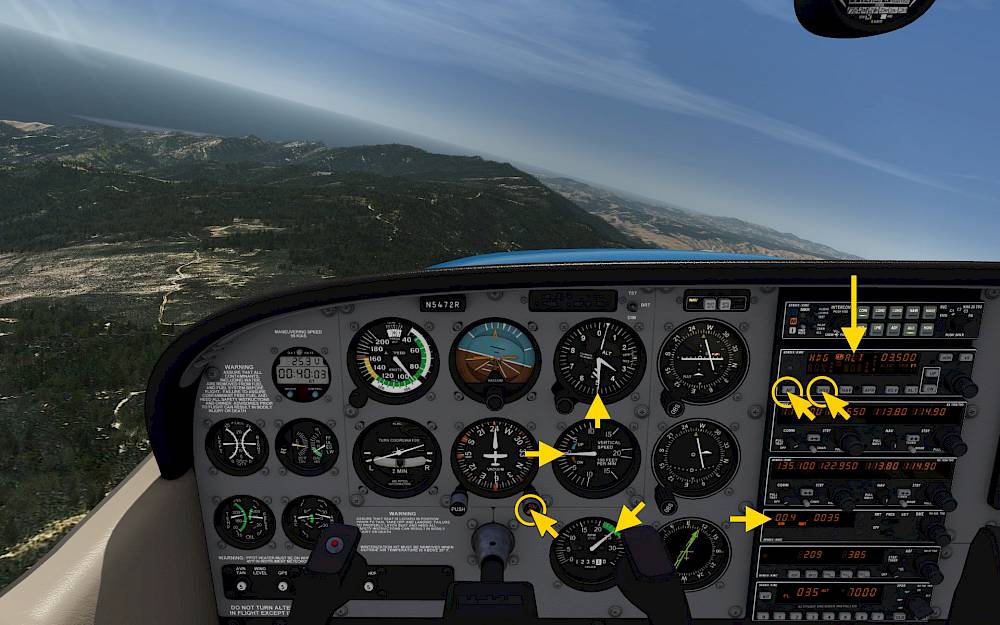
We’re now breaking off from the radial to GVO and fly an intercept heading for our base leg.
You should be above 3500ft and flying on a heading of 180° at this time.
Once the needle starts moving to the middle the autopilot starts to capture the localizer. The autopilot mode changes to APPR. The glide slope engages shortly after.
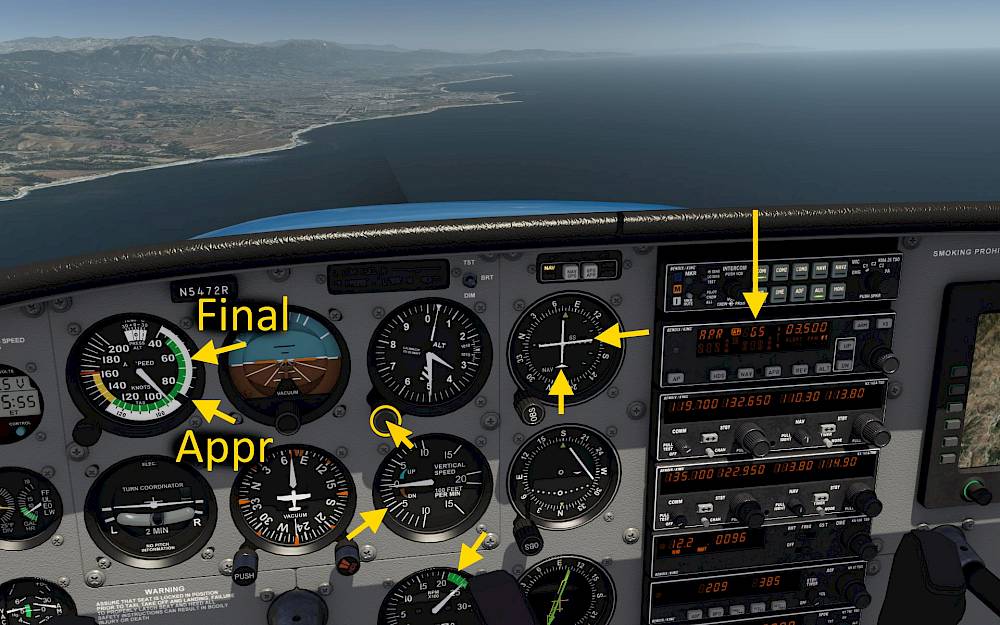
Once the glide slope captures the autopilot will nose down to stay on glide slope. We’re now fully established on the ILS and the autopilot would continue to fly and crash us right into the runway touch down zone. So we always have to perform the last bit of the landing manually in this airplane.
When you reach the coast line you can start to slow down to the final approach speed of 65 knots.
The flaps cause additional lift and drag which can throw off the autopilot a bit. Let it stabilize on the glide slope again.
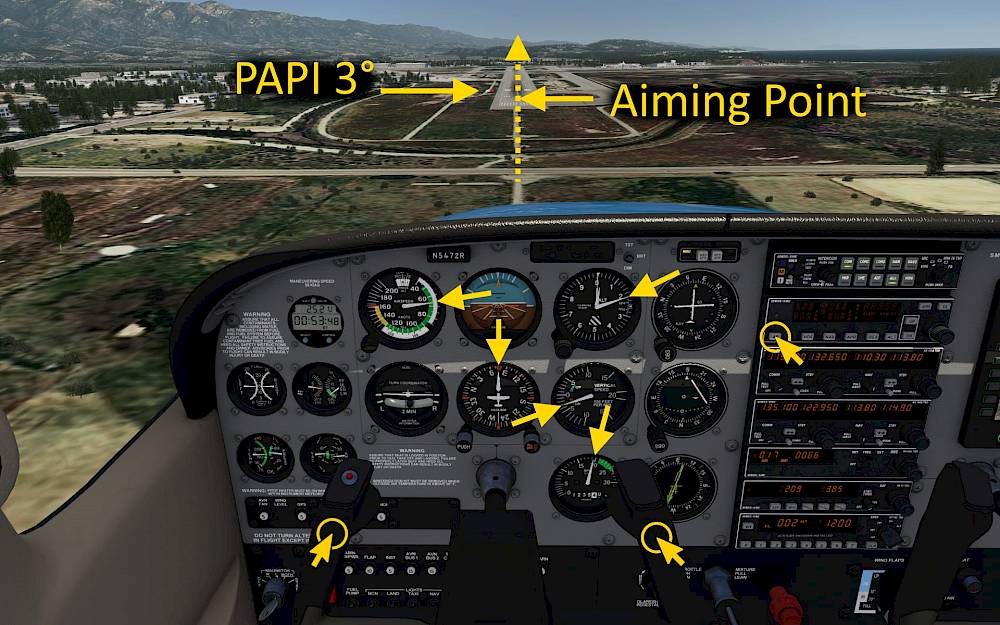
The Precision Approach Path Indicator (PAPI) will guide you vertically. When you see two red lights and two white lights you are on the correct path. When you are too low you will see more red lights than white lights. And if you are too high you can see more white lights than red lights.

At about 15 ft above the runway reduce the throttle to idle, then gently increase back pressure on the yoke to raise the nose and to arrest the descent rate. Look out and towards the end of the runway. The white runway edge lines move up due to the change in perspective.
The distance between the nose of the plane and the horizon should decrease over time. The screenshot on the right shows the exact moment of touch down, this is the attitude that you should aim for.
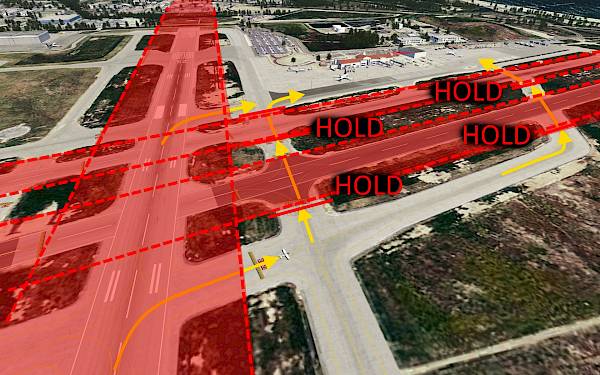
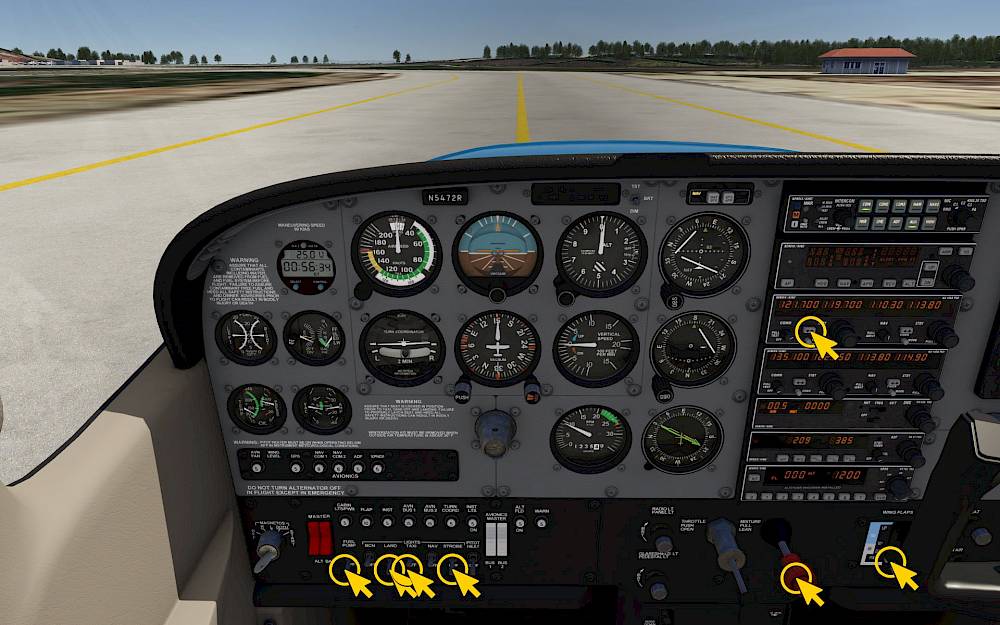
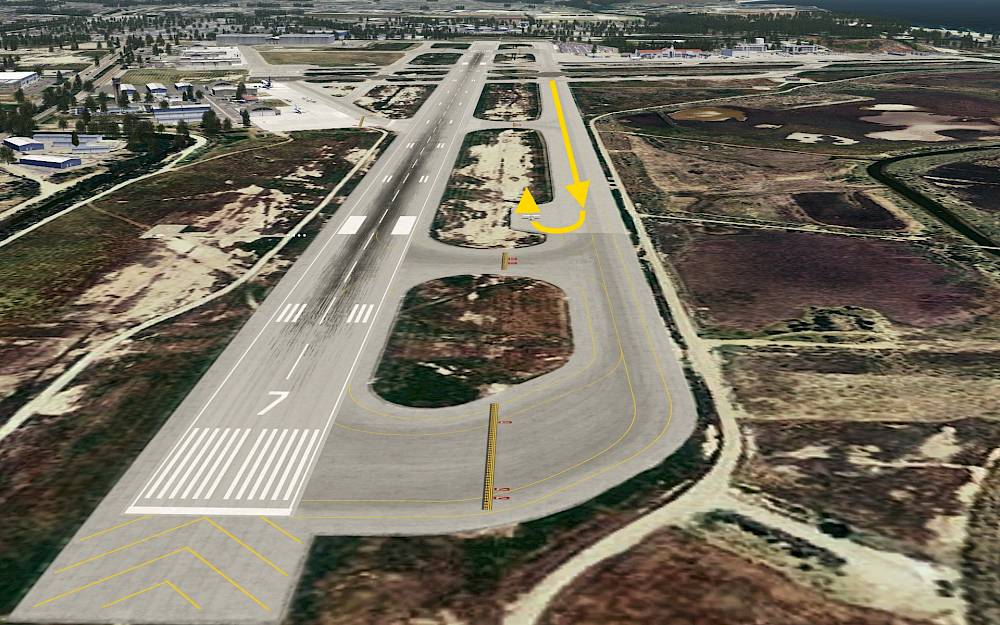
We’ve arrived at Santa Barbara. Please vacate the runway to the right at the earliest possible taxiway. Once you have taxied off the runway and you are behind the hold short lines and out of the runway area you can stop and hold the parking brake to do the after landing checklist and to look at the taxi route.
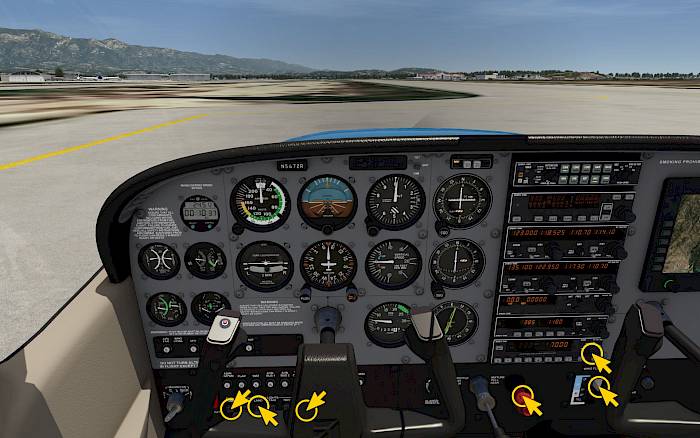
Let’s perform the after landing checks first.
You can take the same route we came from and cross the two runways at the end of the taxiway.
Make sure that before entering a runway that you hold short and look in both directions for any potential traffic about to takeoff or on final approach.
Once you have found a free parking spot


You can now open the door and leave the aircraft.
Thank you for taking the time to read this tutorial. We hope that it answered a lot of questions and that you landed safely.
Fly safe!

In this cockpit introduction tutorial we explain the instruments in the Cessna 172 and the control elements.

This tutorial explains the steps how to set up an instrument approach.
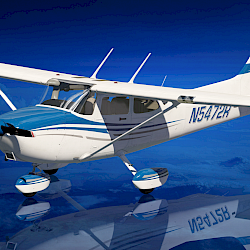
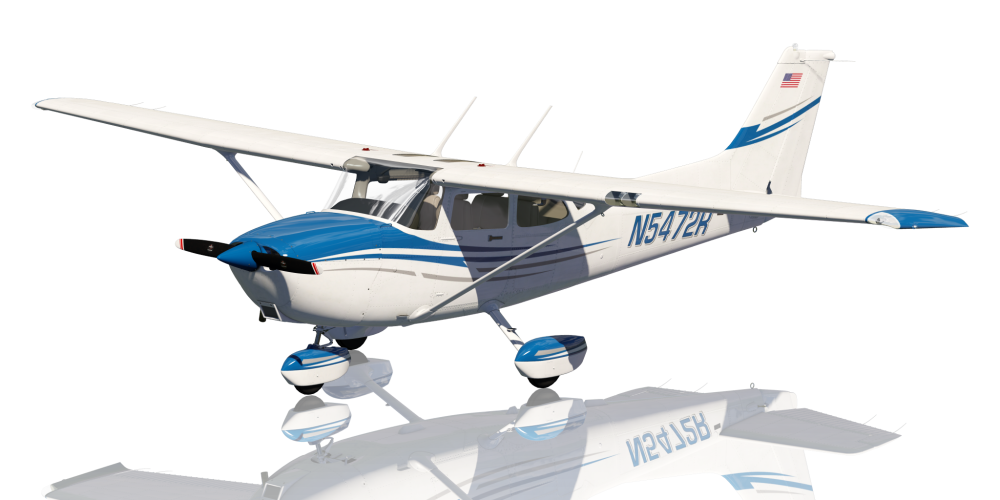
Check out the Cessna 172 page to get an overview about its features, see more screenshots and find more details about this aircraft in Aerofly FS.
Find more interesting tutorials to read on our tutorials main page.